Posts Tagged acoustical foam
Little Safari Day Care – creating peace (and quiet), one pyramid at a time.
Posted by Acoustics First in Absorption, Classrooms, Customer Feedback, Multipurpose Rooms, Product Applications, School & Educational Facilities, Teaching Rooms on August 11, 2021
Daycare facilities are inundated with music, crafts, games, learning, and noise!
With more parents returning to the office, we’ve recently received a handful of treatment requests from day-care facilities dealing with an influx of boisterous children.
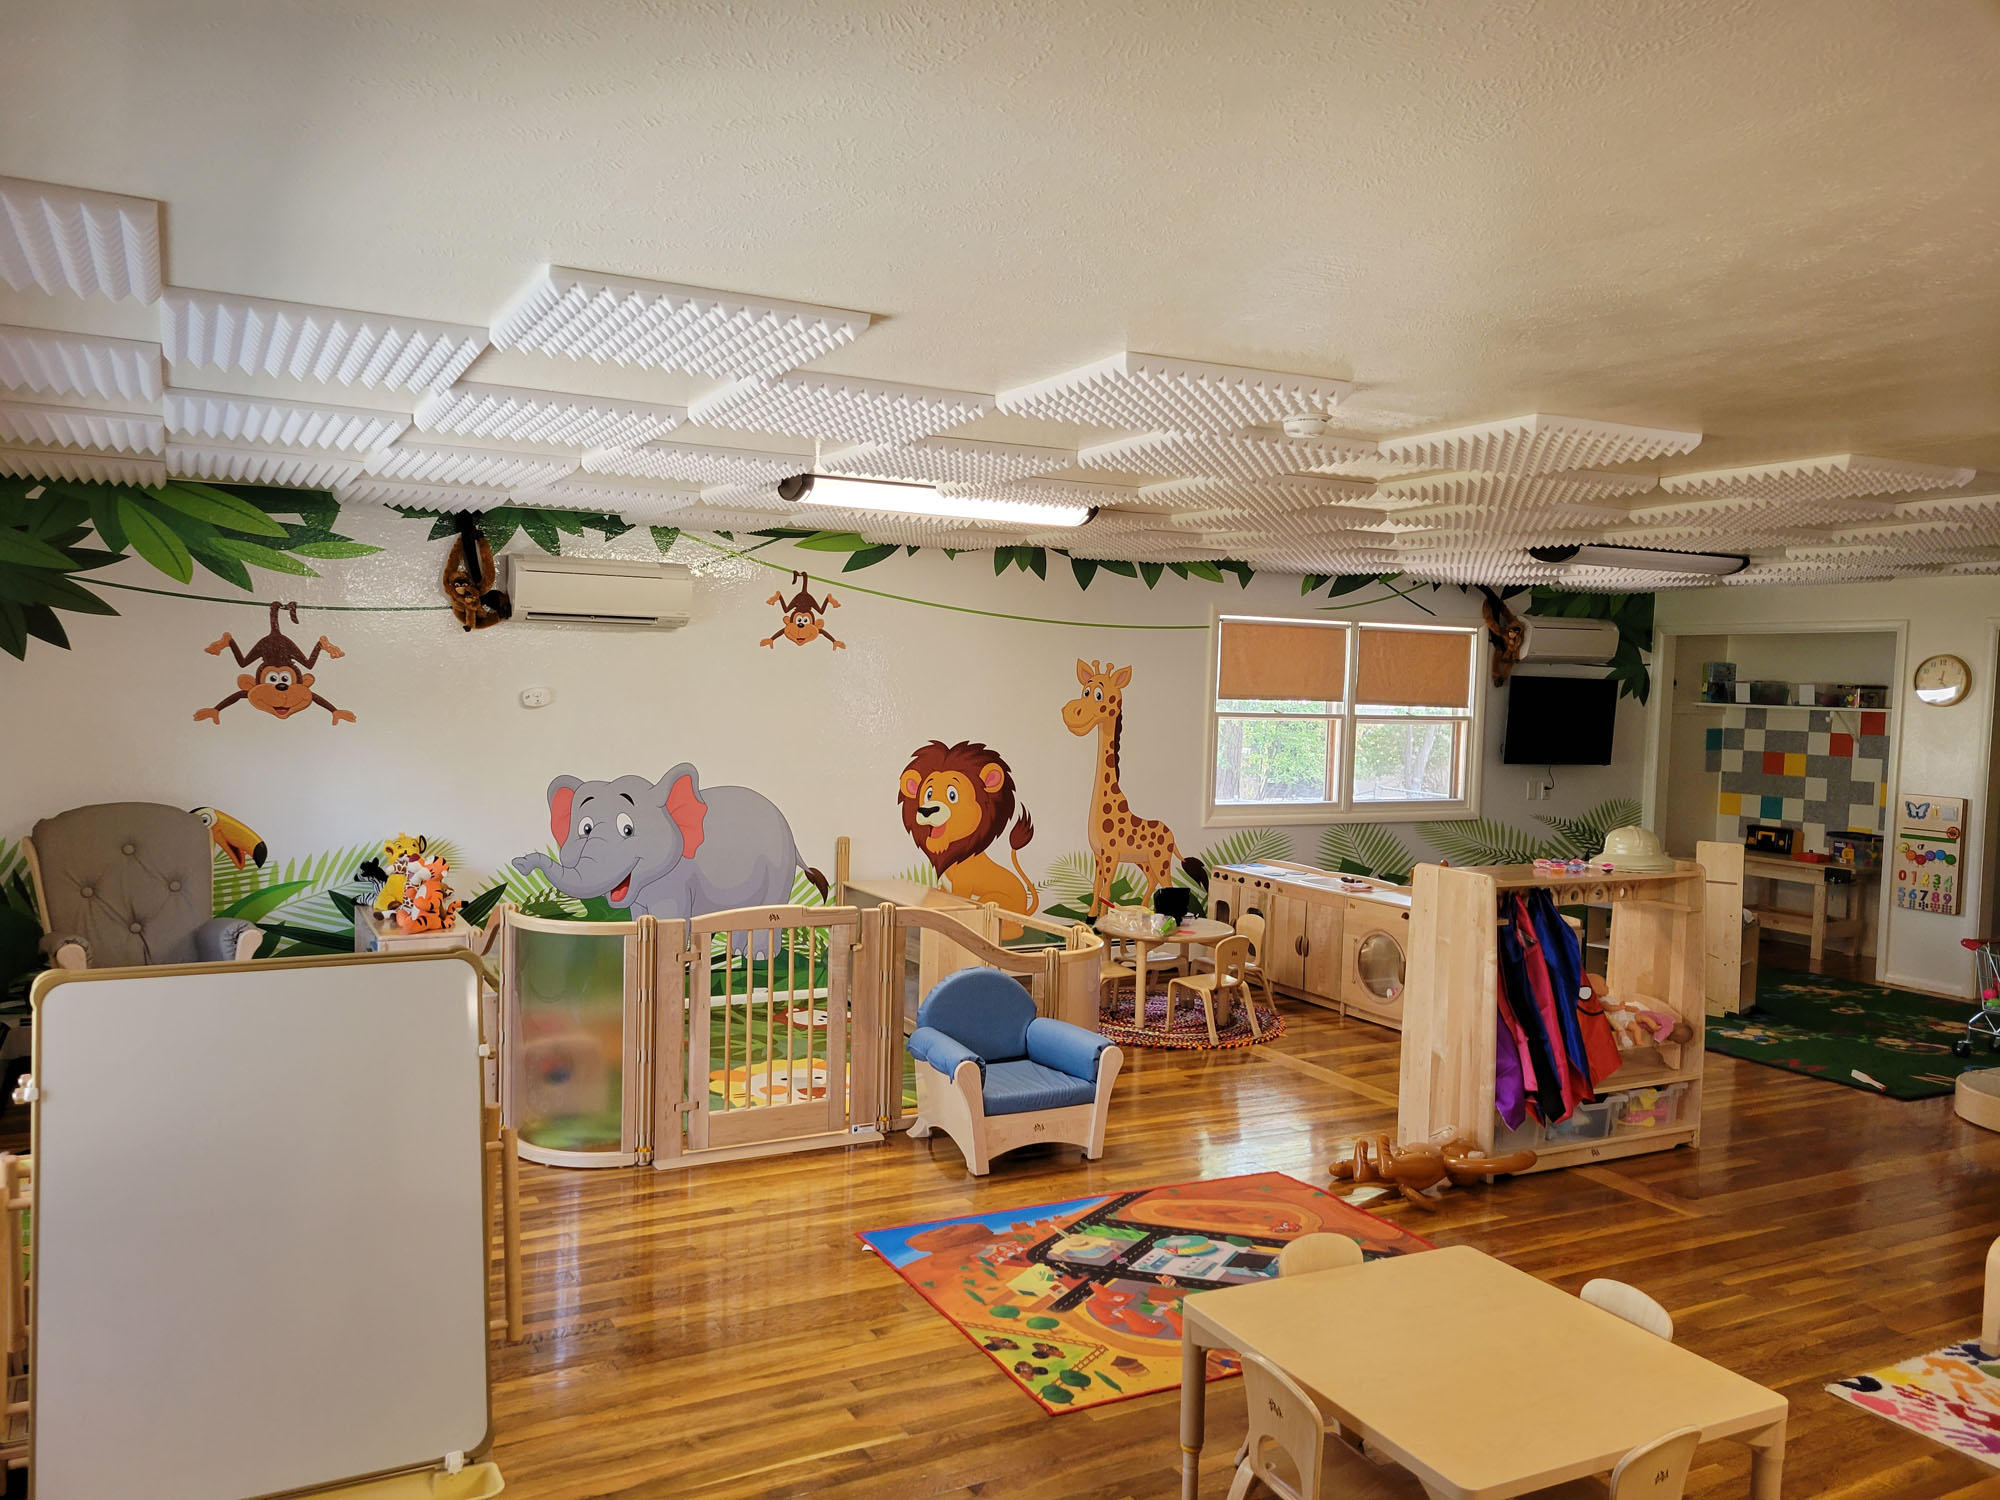
Little Safari Day care reached out to us in July 2021 for help with their space. Little Safari’s multi-purpose room is used for play, music, reading, arts/crafts, meals, games etc….. lots of moving and laughing = lots of noise! According to the owner “The noise level is deafening at times to the point you can’t hear anything, just noise”

The fanciful mural on the playroom wall looks great, but when you look closer, that glossy painted surface reflects sound like glass! Luckily, Fireflex Pyramid foam can quiet that down!
Technical consultant Cameron Girard settled on a remediation package that included FireFlex Acoustic Pyramid Foam panels distributed throughout the ceiling of the multi-purpose room. Safe to say, they were very happy with the results!!

The checkerboard install of the foam helped to distribute the absorption over the loudest areas of the room.
From the owner…..“Cameron, Thank you for all of your help and expertise in sound suppression!!! I have had people tell me upon entering the front door “wow, it’s much quieter in here” Such a noticeable difference. You may have saved my hearing and sanity!!!”
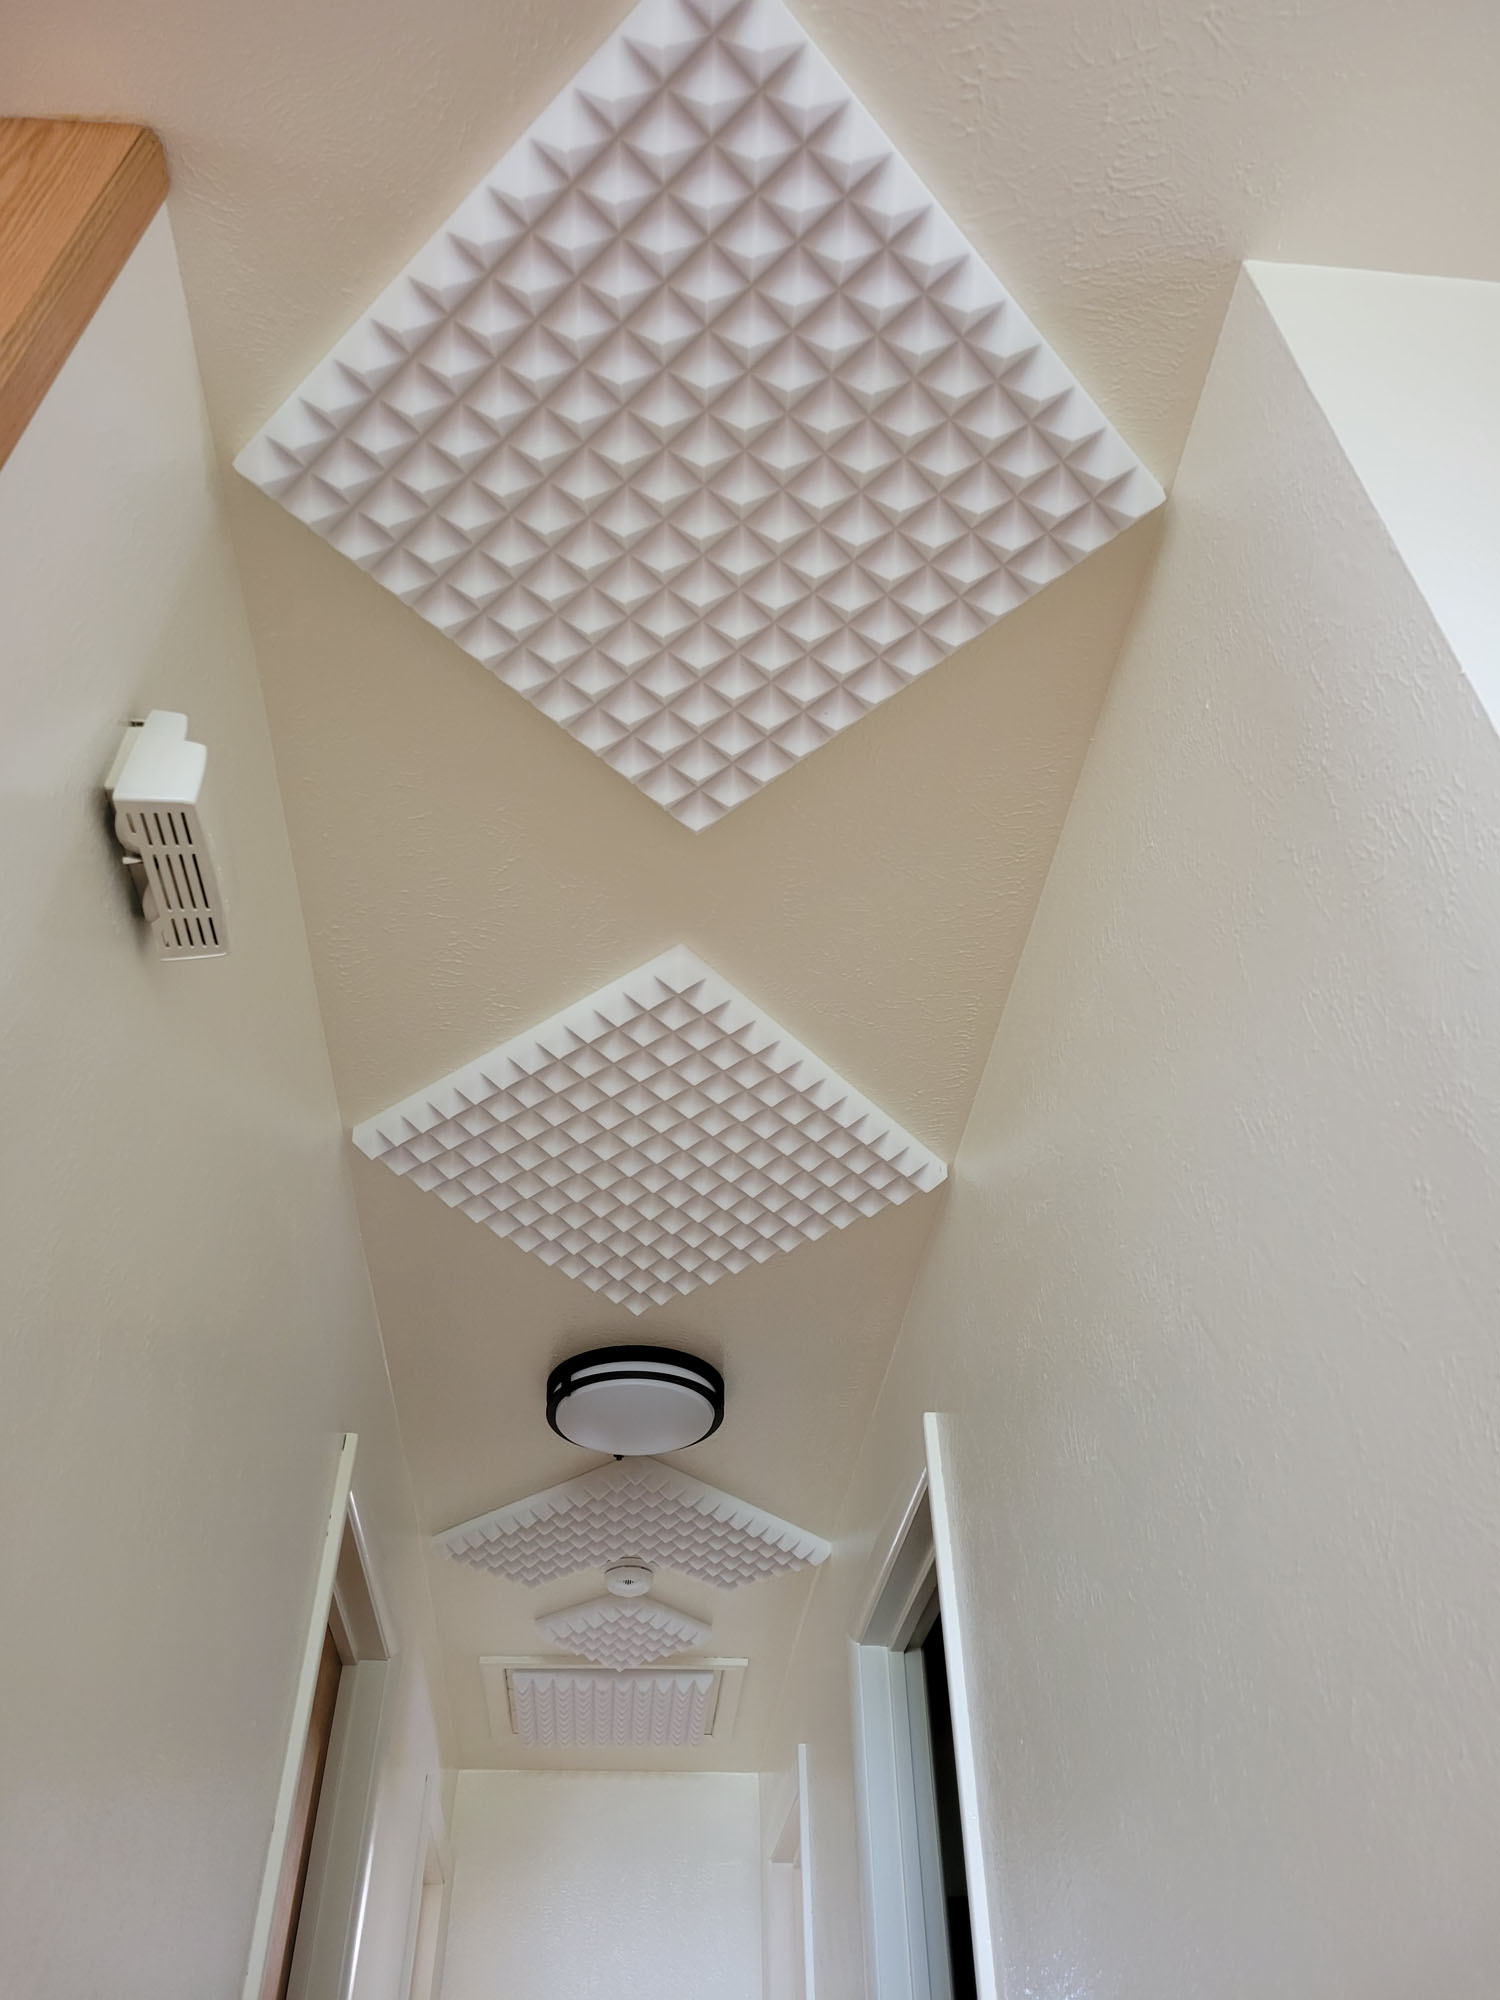
There were even a few panels left to help quiet down the hallway. Note how they oriented the panels and trimmed them to work around obstructions – nice clean install!
DIY: Back Wall Diffuser Array/Bass Trap
Posted by Acoustics First in Absorption, Auditorium, Broadcast Facilities, Diffusion, DIY, Home Entertainment, Home Theater, HOW TO, Media Room, Multipurpose Rooms, Music Rehearsal Spaces, Music Tracking Room, Product Applications, Products, Recording Facilities, Recording Studio, Restaurants, Studio Control Room, Teleconferencing, Theater, Vocal Booth, Voice Over, Worship Facilities on June 20, 2013
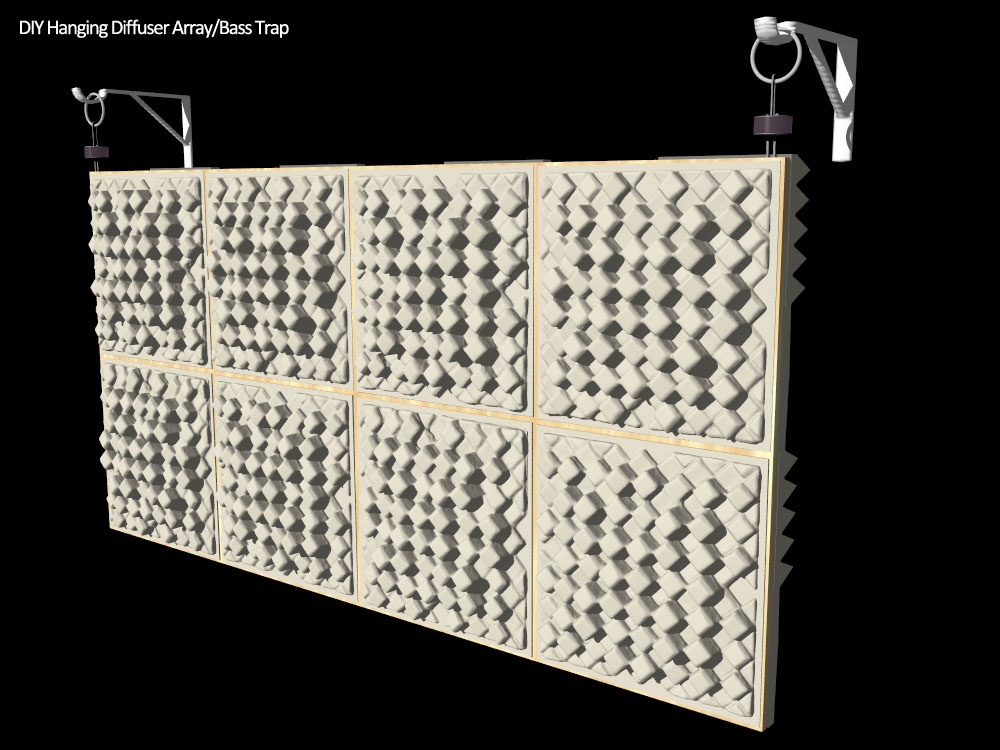
Getting more out of your back wall diffuser array with a simple hanging DIY array/bass trap.
One of the big “back wall” questions people have is “If I have a large diffuser array, how can I get the bass trapping I need?” A great answer to this question is to turn the entire array into a hanging bass absorber. If you are already planning on getting diffusion for your back wall, here is a great way to use that wall space for more than just diffusion.
Stuff you need:
- 4’x 8’ sheet of 3/4” Plywood
- 32 sq/ft of 4” Cutting Wedge® Classic Foam (Or similar absorber)
- 8 x Art Diffusers® – Model C (or Model F, Quadrapyramid™, or other comparable diffuser)
- 2 x IsoHangers
- 2 x Heavy rings (Think big Curtain Rings or Hanging Wire will also work)
- 2x Closet Rod/Shelf Brackets
- 2 x 7/8” wood screws and fender washers
- Construction Adhesive (Make sure it’s safe for Foam)

Assembly instructions
- Screw the two IsoHangers to the plywood, using a fender washer on each screw. These should be about an inch in from each end -drill small pilot holes first. (These will be used to hang the panel, this side will be designated as the back from here on out.)
- Use Construction adhesive to attach the Cutting Wedge® Foam to the back of the panel in a checkerboard pattern (each panel 90° rotated from adjacent)
- Use Construction adhesive again to attach the 8 Diffusers to the front of the Plywood (Follow the installation instructions for adhesive placement)
- Attach the Rings or Wire to the free end of the IsoHangers.
What you have created is a hanging panel that will diffuse mid-high frequencies and trap the lows. The hanging mass absorbs low frequency energy by moving slightly when pushed by the energy of the Low frequency Waves. The rear facing fiberglass also absorbs low frequencies by dampening the panel, but it also absorbs any of the waves that happen to get trapped behind the panel.

Hanging the Diffuser/Trap Assembly
- Measure and attach the Closet Brackets to the Wall – Use appropriate anchors! If you have standard or double wall construction without Resilient Channels, use the studs – The IsoHangers will keep vibrations from transmitting through the wall.
- Hang the panel on the Closet Brackets using the rings/wire with the Diffusers facing you and that’s it!
 This simple DIY project is provided as a way for our customers to learn better ways to use our products and get more value out of the products they buy. For those customers who are planning on purchasing diffusers to make an array, or maybe already have an array and are looking to try a new configuration – this project may be what you’re looking for.
A little History…
If you embark on this little construction project, you will be constructing studio elements that have remained basically unchanged since at least the early 1970’s. Hanging plywood wrapped in studio foam or fiberglass has been used “behind the curtains” of many of the top studios for effective bass control for over 40 years – just no one has ever seen it, as it has been hidden in walls; masked as a false wall of fabric stretched across wooden louvers!
————————————————————————————————————————————————————————————
Acoustics First Corporation supplies acoustical panels and soundproofing materials to control sound and eliminate noise in commercial, residential, government, and institutional applications worldwide. Products include the patented Art Diffusor®, sound absorbers, noise barriers, acoustical fabrics and accessories. Acoustics First® products are sold for O.E.M applications, direct, and through dealers. For more information on acoustical materials and their application, please visit www.AcousticsFirst.com or call Toll Free 1-888-765-2900 (US & Canada).
DIY: Super Bass Trap
Posted by Acoustics First in Absorption, Art Galleries, Articles, Classrooms, DIY, Home Entertainment, Home Theater, HOW TO, Music Tracking Room, Product Applications, Products, Recording Facilities, Recording Studio, School & Educational Facilities, Studio Control Room, Teaching Rooms, Teleconferencing, Theater, Universities, Vocal Booth, Voice Over, Worship Facilities on May 16, 2013
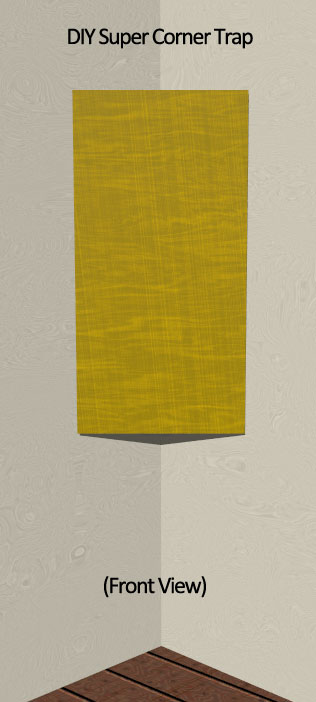
Take a couple of products and make your corner into a super trap!

One of the most pervasive problems in recording and listening environments is the problem of bass build up in the corners. If you want to get the most out of your room, try making your corner into a DIY super trap!
Stuff you’ll need:
- 2’x4’x4” (or 2”)Back-Beveled Sonora® Wall Panel (beveled on the rear to fit corners or a standard panel with angle brackets)
- 48” Bermuda Triangle Trap® or 2 PhaseFOAM™ Bass traps (or a 1’x4’x1” raw fiberglass panel hung across the corner.)
- Foam Adhesive
- Sonora® Mounting brackets
Simple installation instructions:
- Use the adhesive to attach the Foam Bass trap to the wall
- Use the brackets to attach the Sonora® Panel across the corner over the trap
Super simple. Super effective.
As simple as it seems, this method of installing these products is an ideal way to get extra trapping in your corners. This solution changes the corner density multiple times as the sound waves pass through it –as well as introduces a layer of air space. This installation method takes the strengths of the two products and has them working together to eliminate that build-up of energy in the corners – it literally sucks it up like a sponge!

This simple DIY project is provided as a way for our customers to learn better ways to use our products and get more value out of the products they buy. If you are looking for more ways to use the products you have, look to Acoustics First for Ideas. http://www.acousticsfirst.com
————————————————————————————————————————————————————————————
Acoustics First Corporation supplies acoustical panels and soundproofing materials to control sound and eliminate noise in commercial, residential, government, and institutional applications worldwide. Products include the patented Art Diffusor®, sound absorbers, noise barriers, acoustical fabrics and accessories. Acoustics First® products are sold for O.E.M applications, direct, and through dealers. For more information on acoustical materials and their application, please visit www.AcousticsFirst.com or call Toll Free 1-888-765-2900 (US & Canada).
DIY: How to quiet down that noisy equipment rack
Posted by Acoustics First in Absorption, Auditorium, Broadcast Facilities, Data Centers, DIY, Government, Home Entertainment, Home Theater, HOW TO, Media Room, Music Rehearsal Spaces, Music Tracking Room, Product Applications, Recording Facilities, Recording Studio, Sound proofing, Studio Control Room, Vocal Booth on May 2, 2013
 DIY Project – Rack issues
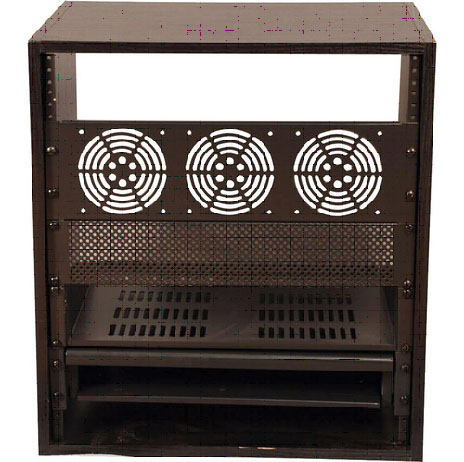
Take a few seconds and DIY fix some of the common problems with using equipment racks!
Not too many people think about their equipment racks, but many of us use them. Usually it’s something like what you see to the right – the great, sturdy, utilitarian box. Unfortunately, there are a couple inherent problems with these:
- Ringing – The metal resonates causing a ringing effect – may be masked by program material.
- Reflections – many times your rack is near sound sources causing reflections off the hard surfaces.
- Noise – Fans and other devices in the rack can make noises that are disruptive to recording.
Here are a few DIY fixes for these common problems.
- Composite foam with adhesive backing is perfect for stopping the ringing of filler panels.
- FireFlex™ acoustical foam the inside of your rack to keep the noise down.


- Use some Composite Foam to line your trays, drawers and shelves to keep items from rattling around inside the case.
- Cover your rack in Sound Channels® fabric to keep the case from causing harsh reflections.
- Make a temporary cover for the front and back with BlockAid® sound barrier with minimal ventilation cut-outs to use during takes if rack-borne noise is problematic.
This simple DIY project is provided as a way for our customers to learn better ways to use our products and get more value out of the products they buy. If you are looking for more ways to use the products you have, look to Acoustics First for Ideas. http://www.acousticsfirst.com
————————————————————————————————————————————————————————————
Acoustics First Corporation supplies acoustical panels and soundproofing materials to control sound and eliminate noise in commercial, residential, government, and institutional applications worldwide. Products include the patented Art Diffusor®, sound absorbers, noise barriers, acoustical fabrics and accessories. Acoustics First® products are sold for O.E.M applications, direct, and through dealers. For more information on acoustical materials and their application, please visit www.AcousticsFirst.com or call Toll Free 1-888-765-2900 (US & Canada).
Setting the Stage for Acoustics First
Posted by Acoustics First in Articles, Home Entertainment, Home Theater, Product Applications, Studio Control Room on February 28, 2013

Setting the Stage for Acoustics First
by Nick Colleran
Originally Published in Productions Magazine Sept/Oct 2012 issue.
Early acoustical theaters were just that – acoustic. The good news and the bad news are usually the same news when a venue sounds incredibly good at the start. An auditorium that projects natural sound well is most often over-powered and overloaded by modern musical performances and the line array sound systems that reinforce them. That’s the bad news in the good news. This type of good room will need to be modified to handle high-powered sound from modern music performances while keeping its sound-enhancing properties. All efforts can be directed into the “how” of doing the job when everyone has heard the “why” it needs to be done.
Re-engineering reinforcement – Modifications for “loud”
The hard back wall of the stage is a significant source for monitor splash-back into the performers’ microphones, reducing gain-before-feedback and enhancing opportunities for system squeals. This is in addition to promoting timing confusion due to slap-back that is usually out of sync with the music. This disturbance and annoyance can be overcome by using materials from the province of industrial noise control. A factory finish, that is a finish for the factory, is also both “roadie-proof” and “on-the-road” compatible. Yes, you can take it with you. This allows one set of materials to follow the performances from one venue to the next.
Curtain call – Reflecting on the stage
The industrial curtains called QFM for Quilted Fiberglass Materials accomplish multiple functions:
Bass control from an internal limp mass, Absorption from quilted fiberglass, and Resistance to abuse from a tough vinyl cover.
The covering is thin enough to avoid reduced effectiveness at all but the highest frequencies and strong enough to withstand stage and road wear. Hanging mass (at one time plywood) with an absorptive cover is a long-standing studio technique to control low frequencies. The newer, non-rigid barriers allow a curtain configuration that is invisible to the audience, while providing a clean sound source for the both the performers and the listeners.
Overhead, not overheard – Many are baffled
Above the stage, there is almost always a large cavity designed for lights and to accommodate rigging. This space can act as an unintended echo chamber. Being out of harms way, the area allows for a lighter and less costly sound treatment with acoustical baffles. Besides the obvious requirement that they work acoustically, they need only to be invisible (usually black) and pass the proper fire code. Acoustically, they have about twice the exposed sound absorbing surface as a wall-mounted panel, by hanging in free space. It’s more surface, less reverberation, out-of-sight and within budget. They are light enough and small enough to travel well if strung in a way that allows easy removal for relocation, such as threaded onto aircraft cable and hung in a line from side-to-side. Adding a fabric finish to the baffles, produces a more decorative product, suitable to the audience side of the auditorium when a more permanent ceiling solution is required.
Stage One – Separating Sound
Stage one of acoustical control often is the stage. Both on-stage and in-studio sound isolation usually begin with structure borne sound traveling through the floor. It is always wise to implement isolation between instruments from the beginning, where it is a “cheap” fix rather a costly solution. This can be accomplished by floating the stage surface, and doing it in several separate sections. As noted previously with the hanging back of stage curtains, mass matters. Mass can come from many different materials whose properties are heavy and dense. They can be common materials such as gypsum or sand as well as more acoustically specific items like sheet lead or mass loaded vinyl barrier. (BlockAid® is a readily available example.) Added mass damps the damage of vibration and reduces ringing resonance.
Once the stage goes “thud” when hit due to its added mass rather than a cartoonish “boing”, it is time to handle the hollow space beneath the stage and fill it with fluffy stuff. This can be whatever attic insulation that is on sale at the local home improvement store. It need only trap the air to prevent its becoming a big bass drum when stomped upon.
Way back in the days of Disco (or Disco daze), complications arose in the studio from the required “lead-foot” kick drum getting into the acoustical piano by traveling through the studio floor as vibration and transmitted up the piano legs. Although studio floors are usually isolated from other rooms, they can still connect within a room. This problem was solved by floating the drum booth independent of the common recording studio floor. At that time this author’s studio went so far as to construct a sand-filled floor set on nine truck tires. The sand provided mass and inertia while the tires created de-coupling from the common structure. Today it is accomplished with high mass materials and off-the-shelf vibration pads, at about the same cost. Independent and transportable compact structures can be created for the individual instruments and be moved with very little heavy lifting.
After stage resonance is reduced by adding a layer of mass loaded vinyl to its surface and the cavity below is stuffed with fiberglass to prevent its ringing or singing along with the music, a second stage may be layered on top of the original and floated on ribbed neoprene pads every 12 inches along standard, 16” on-center bracing. This keeps the guitar amp’s sound out of the vocal microphone stand, bass drum out of the piano legs, and so on, to create increased clarity and improved separation in the live performance.
Islands in the stage will stop transmission transit and are relatively cheap to build into the plan. Separate sections for drums, piano, singer, bassist and guitar amplifier can be buffered with half-inch strips of flexible resilient neoprene without being seen. Much like vocals can be modulated when source through the same speaker as the bass, surfing the bass wave in the stage floor can also add an undesirable tremolo (or vibrato) effect to voice or other wind instrument. (This effect can be demonstrated by auditioning a vocal through the bass player’s amplifier while playing.)
Dome details – Round and around
One technique used in early acoustical performance theaters was the overhead dome. This feature captured wasted sound energy and focused it back to the audience to reinforce sonic energy in areas where it had diminished with distance from the source. With new systems the level is electronically reinforced, not needing further enhancement, which confuses rather than clarifies. In addition, the dome creates a sonic racetrack where the sound moves around the edge in a swirling motion. Anyone who has been in a domed facility during a thunderstorm has heard how sound travels around the perimeter. The RCA dome in Indianapolis provided a good example to CEDIA attendees a few years ago . This phenomenon of raceway runaway can be abated with acoustical “speed bumps” of Melamine foam which easily bends to conform to curves*, keeping the look while truncating the travel of the fast moving sound waves. In this case being unfocused is a desirable trait.
To reduce sound getting into the dome from the line arrays and the like, hanging baffles can be placed around the front half of the perimeter of the ellipse. These may be fabric covered to blend with the décor of the audience area and made from two-inch, seven pound per cubic foot density acoustical fiberglass to extend its absorption range. Being hanging baffles they do not permanently change the original architecture, where that is a concern.
(Don’t Look) Behind the curtain – Unseen, Unheard
When acoustical treatments must be essentially permanent, high efficiency at low cost can be achieved with utility finishes that can be field-cut to fit spaces in cavities behind auditorium side curtains. Factory fit panels require precise measurements to install within curves. Field cutting skips this step as it is, by definition being, done in real time to as-built measurements rather than made to out-of-date plans. Savings derived from the unseen, utilitarian treatments can be applied to upscale finishes for panels in plain sight.
Balcony bounce-back
Another common problem for an older theater in the modern world is sound returning from the balcony face. These are usually concave surfaces that not only send sound back but focus it for feedback as well. Convex curves such as polycylindrical “barrel shapes or semi-reflective half-round, hollow traps can control concave characteristics when interspersed with thicker, flat acoustical wall panels to achieve a combined “Flat” curve.
Definition by Diffusion
Sound intensity can be reduced by the decision to destroy or diffuse. Absorption is the destructive choice, eliminating the problem by eliminating the sound. Care needs to be taken to use only what is necessary and no more.
The other alternative is to spread the sound over a larger area to reduce intensity. This can be likened to spreading peanut butter on bread – it becomes easier to swallow although it is the same quantity as the original lump from the jar. With diffusion, a little goes long way. A single barrel shaped diffuser can clear up the cacophony of a board room without the deadness of absorption required for the same amount sound clarification.
Check back After Launch
With venue retrofits, some tweaks can be made after opening. Covering all walls before there is an evaluation with performers and audience, is not always a good idea. While it may be theoretically possible to model and predict acoustical performance, it can be more economical and efficient to get the room in a reasonable range and polish to the real world result. An informed conclusion, upon hearing the room in use, can produce an optimum result.
*Contrary to popular belief, acoustical foam can be painted to match décor without affecting its performance. (The author has a copy of the independent lab report comparing painted to unpainted natural. Painted measured better, but not significantly.)
The Author
Nick Colleran is past-president of SPARS (Society of Professional Audio Recording Services), past president of the VPSA (Virginia Productions Services Association), a former recording artist and audio engineer.
Starting in 1978, his company began supplying unique acoustical materials. Nick now leads a “quiet life” as a principal of Acoustics First Corporation. The company holds patents for several innovative acoustical products.
Acoustics First designs, manufactures and distributes products to control sound and eliminate noise for commercial, residential and industrial uses.
Materials Mentioned:
Vib-X™ vibration pads | BlockAid® mass loaded vinyl noise barrier | Stratiquilt™ quilted industrial blankets | Cloudscape® Baffles hanging acoustical baffles | Sonora® acoustical wall and ceiling panels | Select Sound™ black fiberglass board | Geometrix™ half-round broadband absorbers
Download of article available here: http://acousticsfirst.com/article-setting-the-stage-for-acoustics-first-productions-mag.htm
—————————————————————————————————————————-
Acoustics First Corporation supplies acoustical panels and soundproofing materials to control sound and eliminate noise in commercial, residential, government, and institutional applications worldwide. Products include the patented Art Diffusor®, sound absorbers, noise barriers, acoustical fabrics and accessories. Acoustics First® products are sold for O.E.M applications, direct, and through dealers. For more information on acoustical materials and their application, please visit www.AcousticsFirst.com or call Toll Free 1-888-765-2900 (US & Canada).
Originally published by Home Toys.

You must be logged in to post a comment.