Archive for August, 2020
ArtDiffusor® Model C and Model F – Similar, yet different.
Posted by Acoustics First in Diffusion, Media Room, Music Tracking Room, Product Applications, Recording Facilities, Recording Studio, Studio Control Room, Theater, Uncategorized, Vocal Booth, Voice Over on August 20, 2020

We often get asked about the functionality of the different diffusers, and one of the frequently asked questions is about the differences between the ArtDiffusor® Model C and ArtDiffusor® Model F. We will cover some of similarities and differences in the design, functionality and use of these two devices.
Design.
The Model C and Model F use identical math to come up with their basic structure, they even have angled faces – the main difference between the two is that the Model F elements are ½ of the Model C’s height, length and width – and then it is duplicated 4 times in the same footprint… The Model C is nominally 2’ x 2’ x 4” deep. The Model F is four quadrants that are nominally 1’ x 1’ x 2” deep – like little scaled down Model C’s… This makes them visually similar and aesthetically compatible. This low profile design makes the Model F more desirable for ceiling installs in spaces with very limited headroom – like basement studios that have low ceilings.
Performance
Due to the different size of the elements on the two devices, they have very different frequencies at which they are most effective. The Model C is a mid-frequency diffuser by design… having larger elements and deeper wells than the Model F. The Model F is primarily a high-frequency diffuser, due to the small elements and lower profile. Both diffusers are tuned to different frequencies as their “primary range,” and while they do affect lower and higher frequencies than they are designed for – it is to a lesser degree, or the product of absorption.
What does this mean?
The Model C has a primary design range of 1KHz to 4KHz. This is where it is primarily designed to work. It can and does diffuse below 1KHz and over 4KHz – just to a lesser degree than its primary design range.
The Model F has a primary design range of 2KHz to 8KHz, and again, it does diffuse outside of that range, but to a lesser degree.
The angled caps of both the Model C and Model F help to extend their high frequency range by reflecting sound in different directions at higher frequencies – causing the sound to scatter spatially. The different heights of the elements cause sound reflections to be offset “temporally,” or in time. The sound that hits the higher elements is reflected sooner than the sound that hits the lower elements – travelling further before it is reflected. This time offset, changes the “Phase Coherency” of the reflection; the larger the difference in the heights, the greater the offset in time.
The size of the elements matters as well. The shorter wavelengths of high frequencies can diffract and scatter off of the smaller elements of the Model F more readily than low frequencies, which see the Model F as a slightly angled & mostly flat surface. However, the lower frequencies are more affected by the larger and deeper elements of the Model C.
How do these differences help define their use?
The Model C is a great all around diffuser – it covers a wide range of frequencies, throws a very predictable 2D diffusion pattern, and it is tuned to a very musical range.
The Model F is a great high-frequency diffuser. It targets a few very specific, yet important issues. High frequencies are responsible for some nasty problems in rooms. Flutter echoes, ringing, comb filtering, and other artifacts are particularly noticeable in higher frequencies. If your room is otherwise performing well acoustically, the Model F can help tackle that last hurdle to make a good room into a great room.
Many critical listening environments use both the Model C and Model F to tune the diffusion in their space.

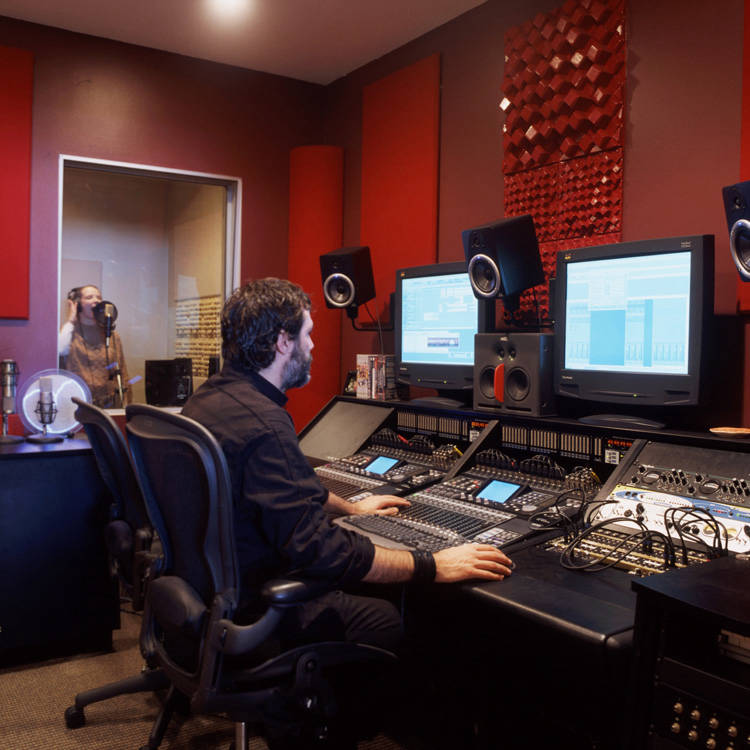
While the white Aeolians® on the back wall are the visual focal-point on in Big3 Studio A, look closely at the ceiling and you will notice a large array of black Model C’s and Model F’s. These help to intermix the diffusion of different frequencies in the large control room.
Due to their aesthetic and functional compatibility, many rooms benefit from using both. Model C’s addressing the bulk of the Mid-range diffusion, and the Model F smoothing out the top end.
I hope that this highlights the unique properties of both the ArtDiffusor® Model C & ArtDiffusor® Model F – and helps to demystify their function and use in your space.
DIY – Nouveau™ Home Theater Back Wall
Posted by Acoustics First in Diffusion, DIY, Home Theater, Products, Studio Control Room, Uncategorized on August 7, 2020

It wasn’t a difficult install, but these Nouveaus made this space sing.
Adding Nouveau™ wood diffusers to a home theater is not as daunting a task as it may seem, and can be done with a little planning and a few tools. This install used an ingenious mounting method to ease the final install. Instead of mounting the z-track to the wall directly, it was mounted to sheets of plywood which were hung with Gorilla/Hercules hooks.
The first task was to pick a stain. You can use the back of a plank to get an idea of how the poplar will respond to the different options. Poplar has a very interesting and varied structure that will take stain differently than some other woods. Darker stains may be more consistent, but don’t reveal the character and variation in the wood. This install chose a Smoke Gray which grayed out soft areas and browned the harder heart wood. A semi-gloss clear coat was used to finish.
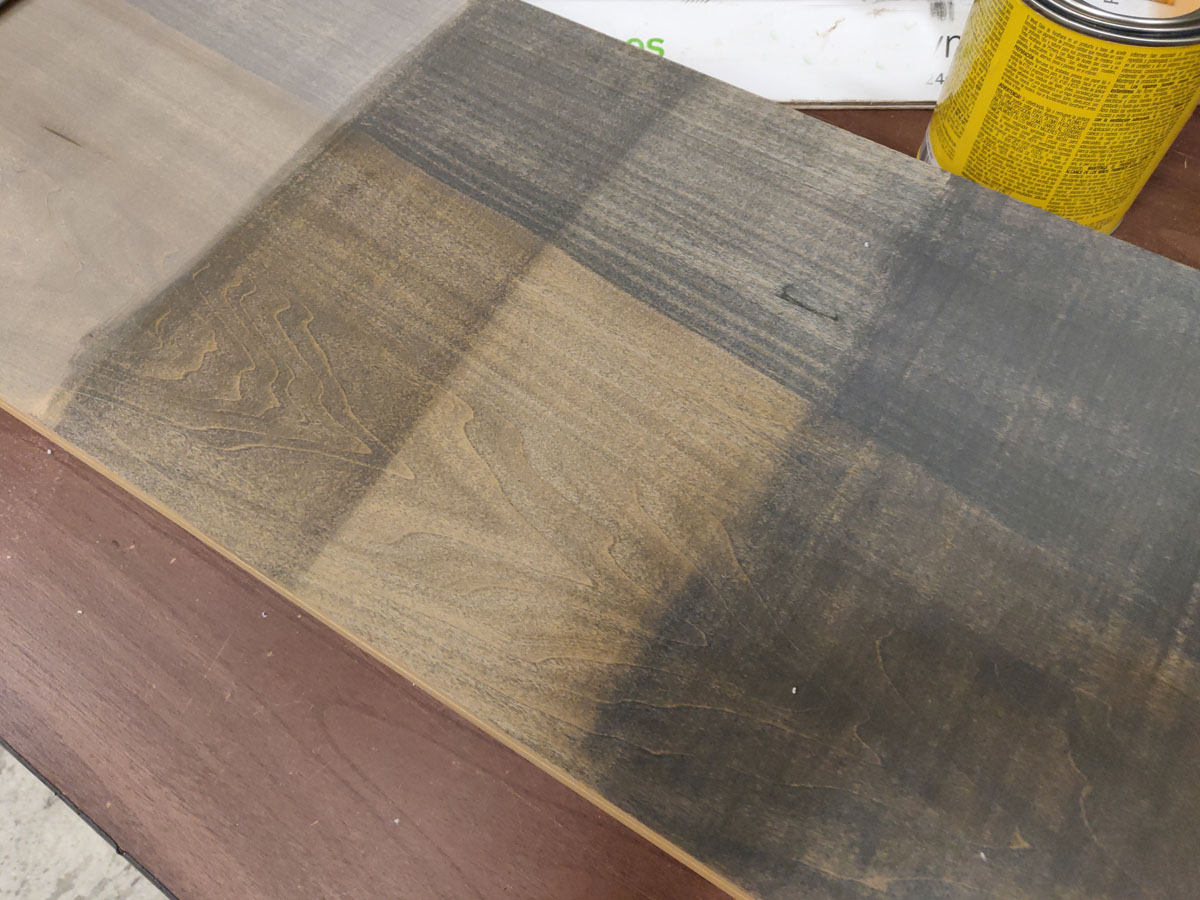
Using the back of the Nouveau™, you can see how the stains will “take.”
While the stain dried, the mounting plywood was cut down to hide behind the planks. Four hanging straps with eye-loops were then added to the top edge of each of the plywood sections, and spaced to avoid studs.
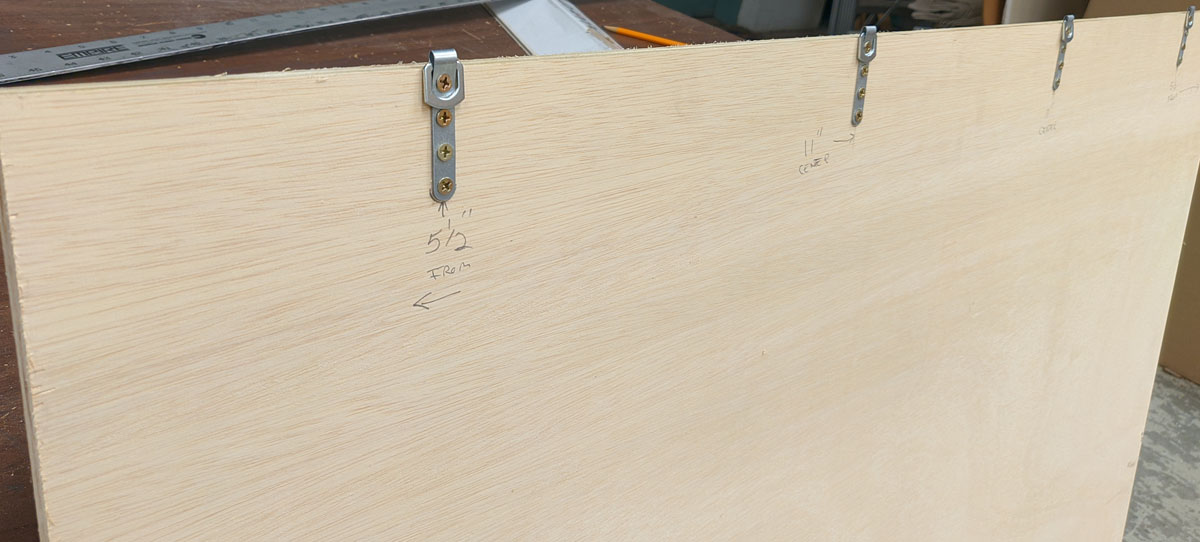
Industrial hanging eyelets were added to the top edge of the sheets to make them easy to level and hang with the Gorilla Hooks.
The Z-track that would normally be installed on the wall was installed on the opposite side of the plywood. This will make it easy to hang the Nouveaus onto the sheet after it’s on the wall.

Z-Bar track was added to the top and bottom of the plywood sheet to accept the z-bars that are going on the back of the finished Nouveau™ planks.
After the Nouveau™ planks are finished with the staining, and left to cure for a few days, they are ready to have the mating Z-bars attached to the back. They are installed with the same spacing as the Z-tracks on the plywood sheets. This will make it easy to align them after the plywood is hung on the wall.

The z-bars are measured, marked, and installed at the same spacing as the z-tracks on the plywood.
The Gorilla/Hercules Anchor hooks are rated to around 50-60 lbs each. The Nouveau™ planks are roughly 25lbs each (at 48 inches) and each section has 4 hooks supporting 4 planks plus the weight of the 3/8″ plywood. The hooks are installed so that the plywood will hang level – with the weight distributed evenly across all four hooks.

When installed properly and leveled, each of these hooks will hold up to about 50-60lbs each. In this configuration, they should only need to support about half that.
Finally, the Nouveau™ planks are installed into the Z-Tracks on the plywood, and moved into position. Because the z-bars were installed square and level, there is no shifting, and they hang true. The undersized plywood sections disappear behind the planks leaving the impression that the planks are floating slightly off the wall.

The install doesn’t look much different from a direct mount z-track installation, with a small gap against the wall.
While this mounting method may not be ideal for every scenario, this was an effective way to install 8 Nouveau™ planks with only 8 small hook holes in the wall. These can now be installed in apartments or temporary environments with minimal damage to the existing walls – and once you are done, they’re easy to take down and reinstall somewhere else. You just need a level!

You must be logged in to post a comment.