Archive for category Home Theater
Similar, Yet Different: Model C vs. Model D!
Posted by Acoustics First in Diffusion, Home Entertainment, Home Theater, Media Room, Multipurpose Rooms, Music Rehearsal Spaces, Music Tracking Room, Product Applications, Products, Recording Facilities, Recording Studio, Studio Control Room, Theater on January 5, 2024
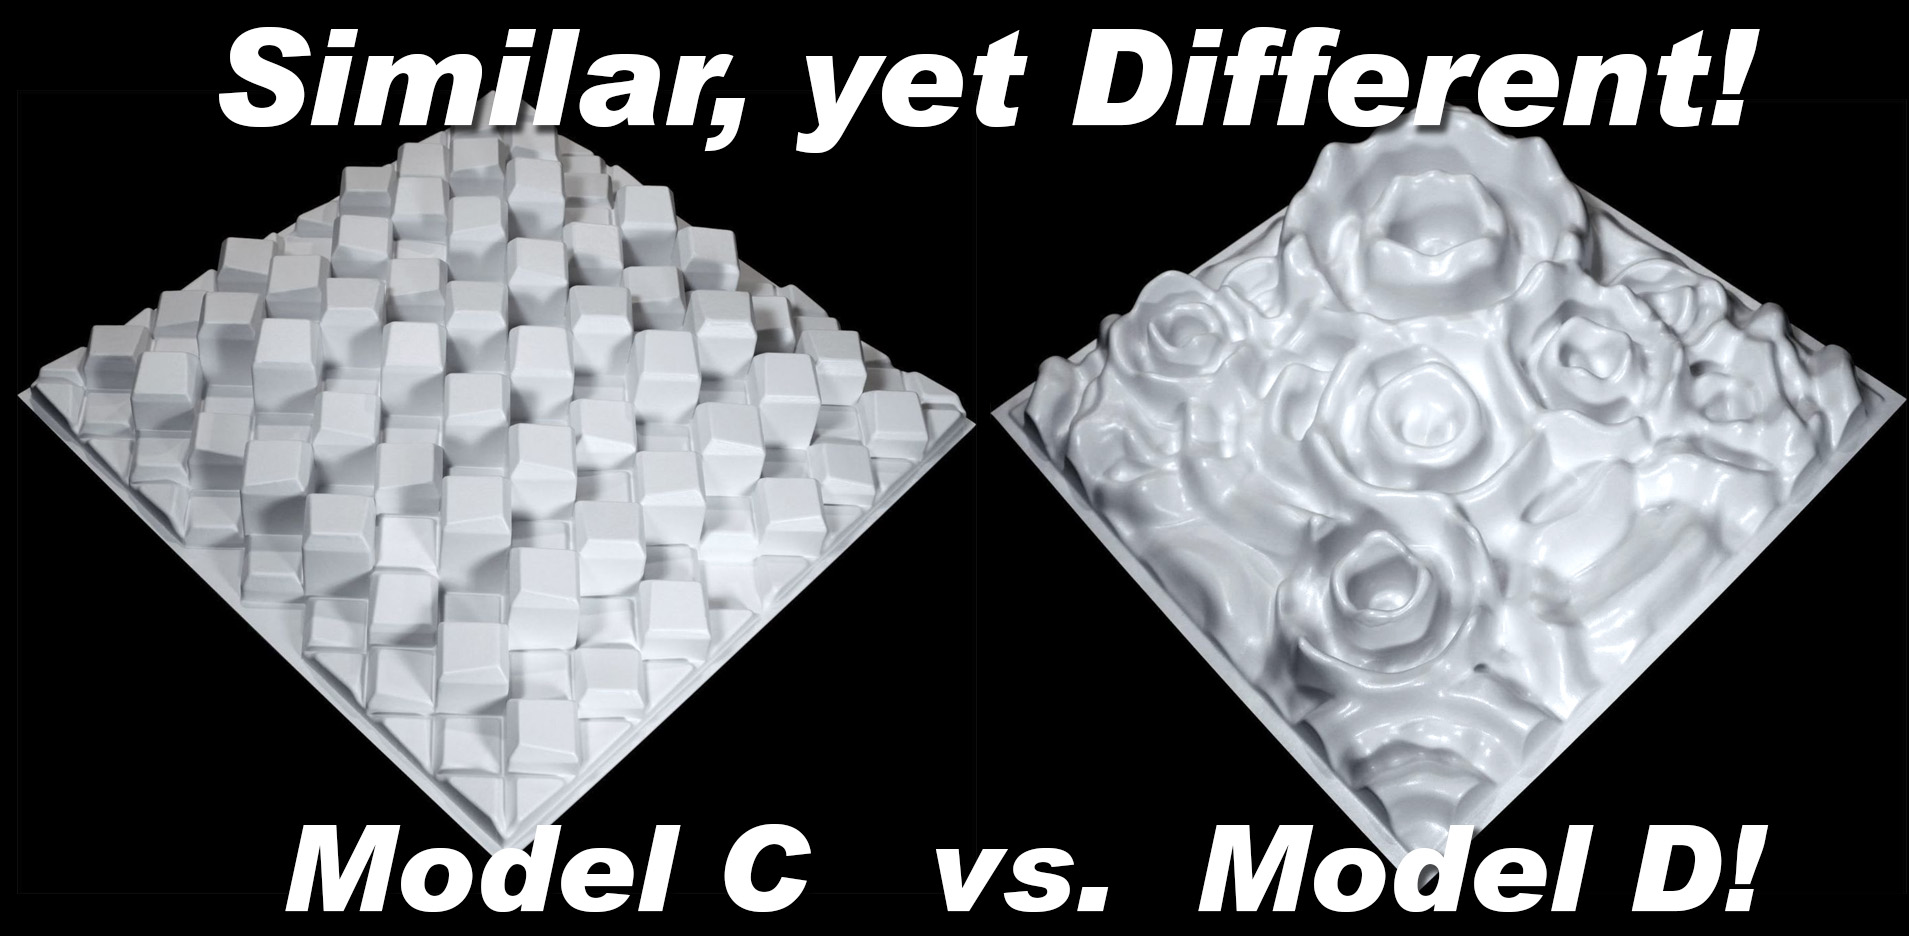
In this installment of “Similar, Yet Different,” we take a good look at two very different looking diffusers in the 2’x2′ size… the classic ArtDiffusor® Model C and the organic, rippled ArtDiffusor® Model D – while there are some similarities, there are some key differences in how they look (obviously) and how they perform.
Quick Similarities.
The ArtDiffusor® Model C and Model D are both 2’x2′ diffusers which are made to be either wall mounted or installed in a standard drop-tile ceiling grid. They are both formed from a Class A fire-rated polymer in a single piece. Both are mathematical diffusers, which create their different physical features in a “form follows function” methodology. They also cover roughly the same frequency bands, with some minor variation in how they execute their control.
Difference in Math
The Model C is an interesting configuration. Often you will see quadratic residue diffusers with flat blocks or wells in a relatively standard quadratic cell formula configuration. The Model C runs in a much different alternating binary configuration. The basic idea is that cells are placed in a 45° array with each cell adjacency calculated as an alternating array of higher and lower cells starting in the middle and working in a pattern of alternating low/high cell clusters decreasing toward the edges of the diffuser. These diffusers also do not have flat tops on the blocks – they are angled at 10°. The orientation is then rotated in 90° steps in a pattern that maximizes the spatial redistribution of reflected sound. This was a vast design departure over the original quadratic design, and created a diffusion profile that was distinctly different.

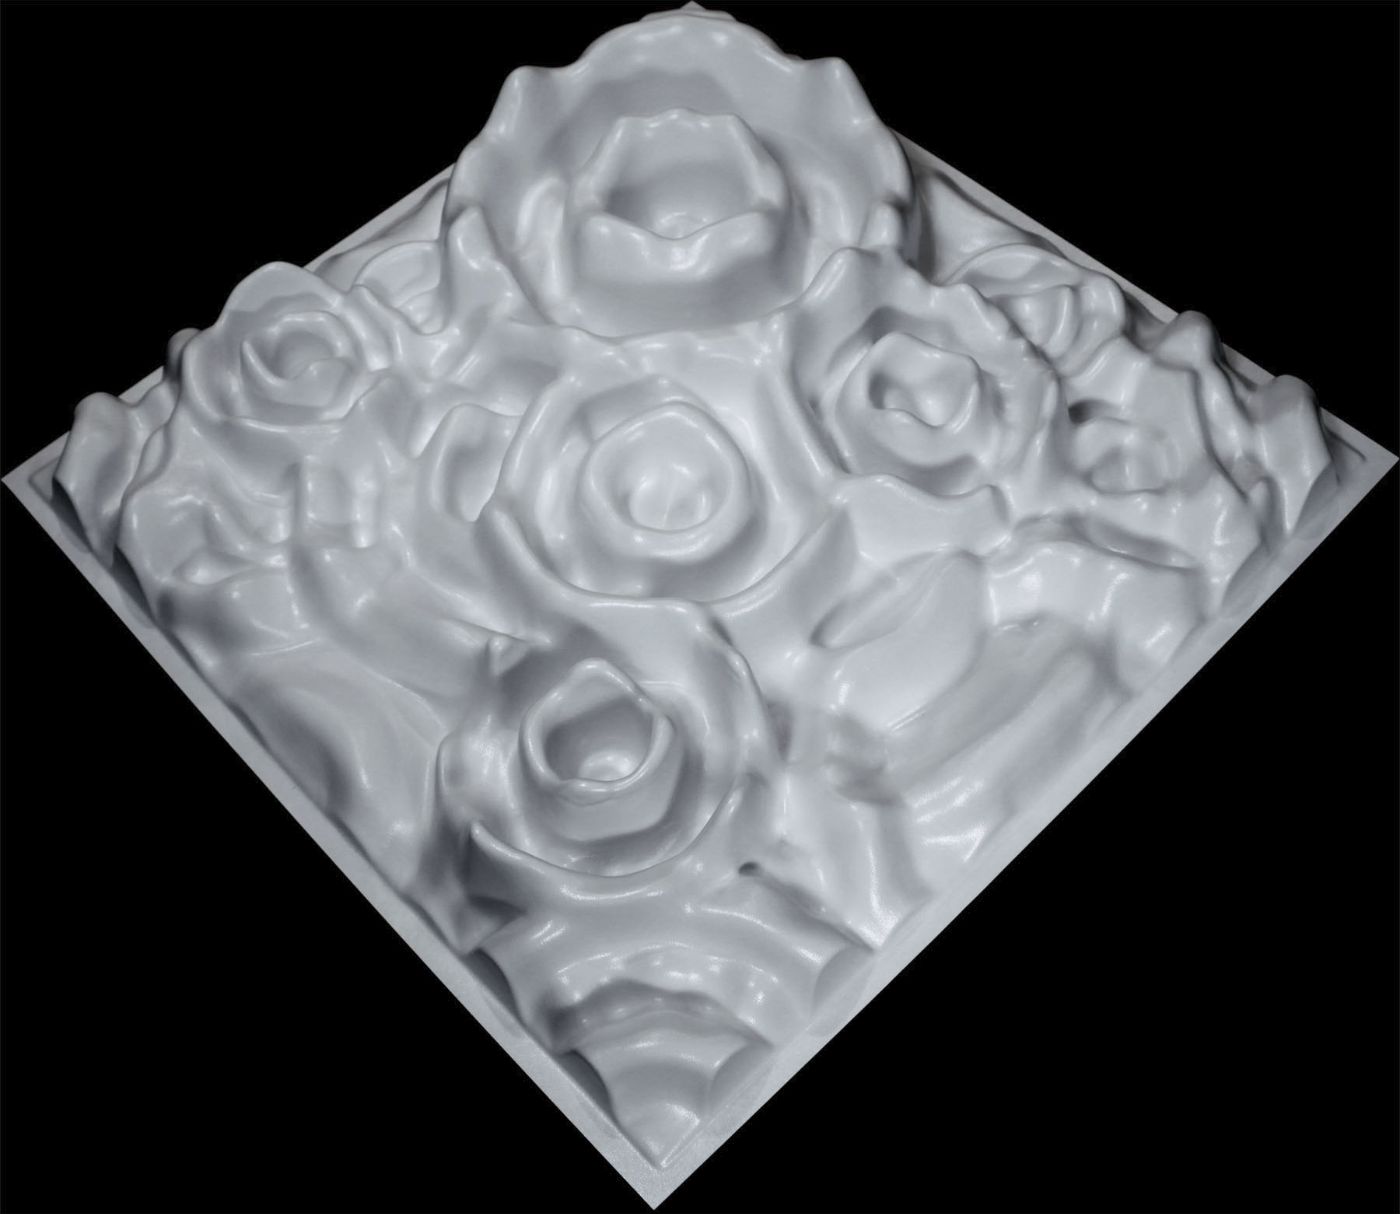
The Model D was an even greater departure. It began with a Maximum Length Sequence (MLS) concept that first changed the varied straight channels into rings of different dimensions. These rings then broke from the MLS mold by getting varied height profiles based on the QRD sequence. As if having different size rings at different heights wasn’t enough… the randomness was further perpetuated through a Boolean process of assigning certain rings a random property that would either add or subtract height from any other ring that they crossed. Finally, the entire surface geometry was smoothed using a bicubic interpolation, creating the organic undulating surface which gracefully spans the entire profile.
What this difference in math does to the acoustic performance.
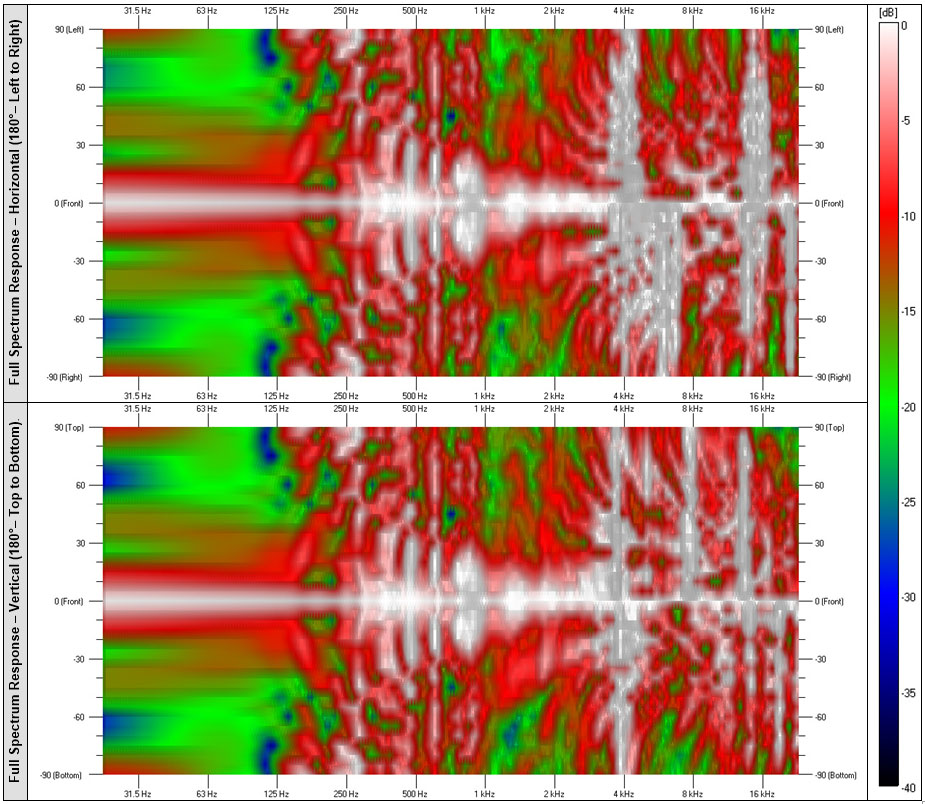
The Model C has a nice even diffusion profile through it’s primary working range. This is a product of the QRD design and binary distribution. The set size for the blocks guarantees a solid primary frequency range from about 1KHz to over 4Khz. This tunes the Model C squarely in the most sensitive bands of the human hearing range. Below this range the device becomes a bit of an absorber. Above this range and the performance becomes more effective at intervals, which can be seen in the areas of wide diffusion at 6KHz – 18 KHz. These repeating zones are common in “stepped” quadratic designs. Due to the heights of the well being at specific intervals, the intervals repeat at octaves of their effective bands.

The Model D doesn’t have the same stepping. The spline interpolation and the random Boolean shifts smooth the transition from one quadratic height to the next, and the MLS sequence causes a bit of a high-pass filter pushing the start of the primary range to around 2KHz – which is a little higher than the Model C. The main difference is that once the Model D starts it’s range it diffuses everything up to and over 20KHz without the banding that can happen in other quadratic designs.
Another difference in symmetry.
The ArtDiffusor® Model C is a fairly symmetric design, but it’s 45° angle pushes that symmetry along the diagonal (corner to corner) across the unit. The asymmetry is subtle but allows for enough variation to account for any “lobing” issues that can occur in more simple geometric devices The 10° block faces being at varied orientations is key to increasing the spatial directivity over the older “flat-faced” Quadratics. This was a very novel design when it was first introduced, and those benefits are crucial to the longevity of the Model C’s reign – It just works. It’s predictable and musical… and that’s why it’s here to stay!
The ArtDiffusor® Model D is a completely different animal from the Model C when it comes to symmetry… as a matter of fact… there isn’t really much on it that is symmetric! The Model D was designed as a departure from symmetry. Focusing on the mid to high frequencies, which are very specular, the organic geometry creates an asymmetric reflection pattern. This pattern can be used to steer the sound into a wider field.. and that profile changes with the wavelength of the sound that hits it. This steering ability and the wide frequency range has made the Model D a favorite in mixing and mastering environments, where they can get smooth performance through the entire frequency spectrum.
How these differences benefit everyone.
We have stated before that there isn’t really a one-size-fits-all solution in acoustics. Many environments will use various treatments to achieve their desired goals. You will often have different devices to address different problems, in different frequencies, in different locations, in the same space. Bass traps for controlling the lows. Absorption to reduce gross energy across the board. Large geometric surfaces to break up parallel reflections and steer the projection of sources. Mid range diffusers to create clarity to the sources and reduce artifacts. High frequency diffusers to reduce flutter and add a feeling of envelopment and airiness in the space. These devices all have their place – from the smaller listening rooms, to critical listening environments, and large multifunction spaces and venues.
It is also worth noting that these two devices have a very different aesthetic visually. The classic blocks of the Model C have become a signature look for quality sound environments, and people recognize them as they would classic geometric pyramids and barrels. The Model D aesthetic provides a visual accent that people take advantage of to set their space apart from others. The undulating, asymmetric pattern changes drastically when you rotate the individual units in the array. This allows for not only varied acoustic performance, but also a unique visual possibilities – with numerous variations.

The ArtDiffusor® Model C and Model D are two tools that are used to craft ideal listening environments around the world… and in those roles they are indeed Similar, Yet Different.
Similar, Yet Different: Aeolian® vs. MiniAeolian™
Posted by Acoustics First in Broadcast Facilities, Home Entertainment, Home Theater, Media Room, Multipurpose Rooms, Music Rehearsal Spaces, Music Tracking Room, Product Applications, Products, Recording Facilities, Recording Studio, Studio Control Room, Uncategorized, Vocal Booth, Worship Facilities on September 28, 2023

In this installment of “Similar, Yet Different”, we are going to compare the two current variations of the popular Aeolian® Diffuser – the original 2’x2′ Aeolian and the 1’x1′ MiniAeolian™!
Design
This comparison has some similarities to the very first “Similar, Yet Different” post we made comparing the ArtDiffusor® Model C to the ArtDiffusor® Model F. We are looking at a diffuser that uses identical mathematic functions to create the shape… both the Aeolian® and the MiniAeolian™ are an “Organic Quadratic” constructed from a Bicubic Interpolation of a Quadratic Residue Function. They are both truncated so that they are completely asymmetric, even to the edge. The MiniAeolian™ IS an Aeolian®, only it is scaled differently.
You may recall that the Model F was constructed of 4 scaled down Model C diffusers in a monolithic 2’x2′ tile – This is not the case with the MiniAeolian™. The Original Aeolian® Diffuser is a 2’x2′ footprint that is 5″ tall, and will fit in a standard 2’x2′ ceiling grid. The MiniAeolian™ is a single scaled down unit, and it is a little different – The 1’x1′ footprint stands alone as a single unit, but it is only scaled down in height to 4″.
In this case, form follows function. The MiniAeolian™ was built to fill a specific function as a smaller wall-mount unit, or a direct-mount ceiling unit for smaller spaces. Part of this wall-mount function was to have a version of the Aeolian® that would fit in tight areas or in spaces that didn’t have enough clearance for the 5″ standard Aeolian® (or would require modification to those areas (or diffusers) to allow this extra height). Some people implement configurations that have tighter footprint requirements, and the 1’x1′ footprint of the Mini allow it to be used in these types of layouts.
Performance
So how does this change affect the performance of the unit? Surprisingly, they are quite similar. The Organic curved design, with only a 20% reduction in height, shows only minor differences in performance of their overall frequencies ranges – with both primary ranges starting at about 1500Hz-1600Hz with and average between 150° and 170° of horizontal and vertical dispersion up to between 5Khz and 7Khz. While the primary range is a good indicator, when we look at the actual polar response, we can get a better picture of their full range performance.

A quick glance shows two very similar performing diffusers, except for the low-frequency performance. The larger elements and deeper formfactor of the original Aeolian® are more effective at the 1000Hz range, where the MiniAeolian™ appears to be mostly specular. There are some surprises however. It appears that at the 2000Hz range leans slightly in the favor of using 4 MiniAeolians™ in an array verses the single Aeolian®. There is more surface variation over the same footprint (2’x2′ in the array of 4), and the size of the Mini’s features are a bit more optimal for diffusing the 2Khz wavelength. This swings back slightly into the favor of the single Aeolian® at 4Khz, where the larger elements have a wider throw, and the elements of the Mini have steeper wells. At 8Khz, it tips back to the Mini, and then at 16Khz, they are both neck-and-neck.
The amazing similarity is that the variations are quite subtle through their entire effective ranges, and even quite a bit above those ranges. While there are slight differences in the performance of the diffusers when we compare the directly, these are really very minimal except for the low-frequency edge in performance of the larger original Aeolian®.
Closing
With the similarity of performance in the two diffusers, they can almost be used interchangeably – or even used together in the same environment to implement an aesthetic vision or add more randomness/variety to the diffusion in the space.
There are several occasions where you may require one over the other.
- If you need more 1Khz diffusion, you should add some 2’x2′ Aeolians® – as they perform better in that range.
- If you need to install diffusers that fit in a ceiling grid… you will also want to use the original.
- If you want the Aeolian® but need diffusers that will fit in a space that is less than 2’x2’x5″, you may want to go with the MiniAeolian™.
Currently the MiniAeolian™ is a custom order item only, and is subject to minimum order quantities.
Contact Acoustics First® for more information and pricing.
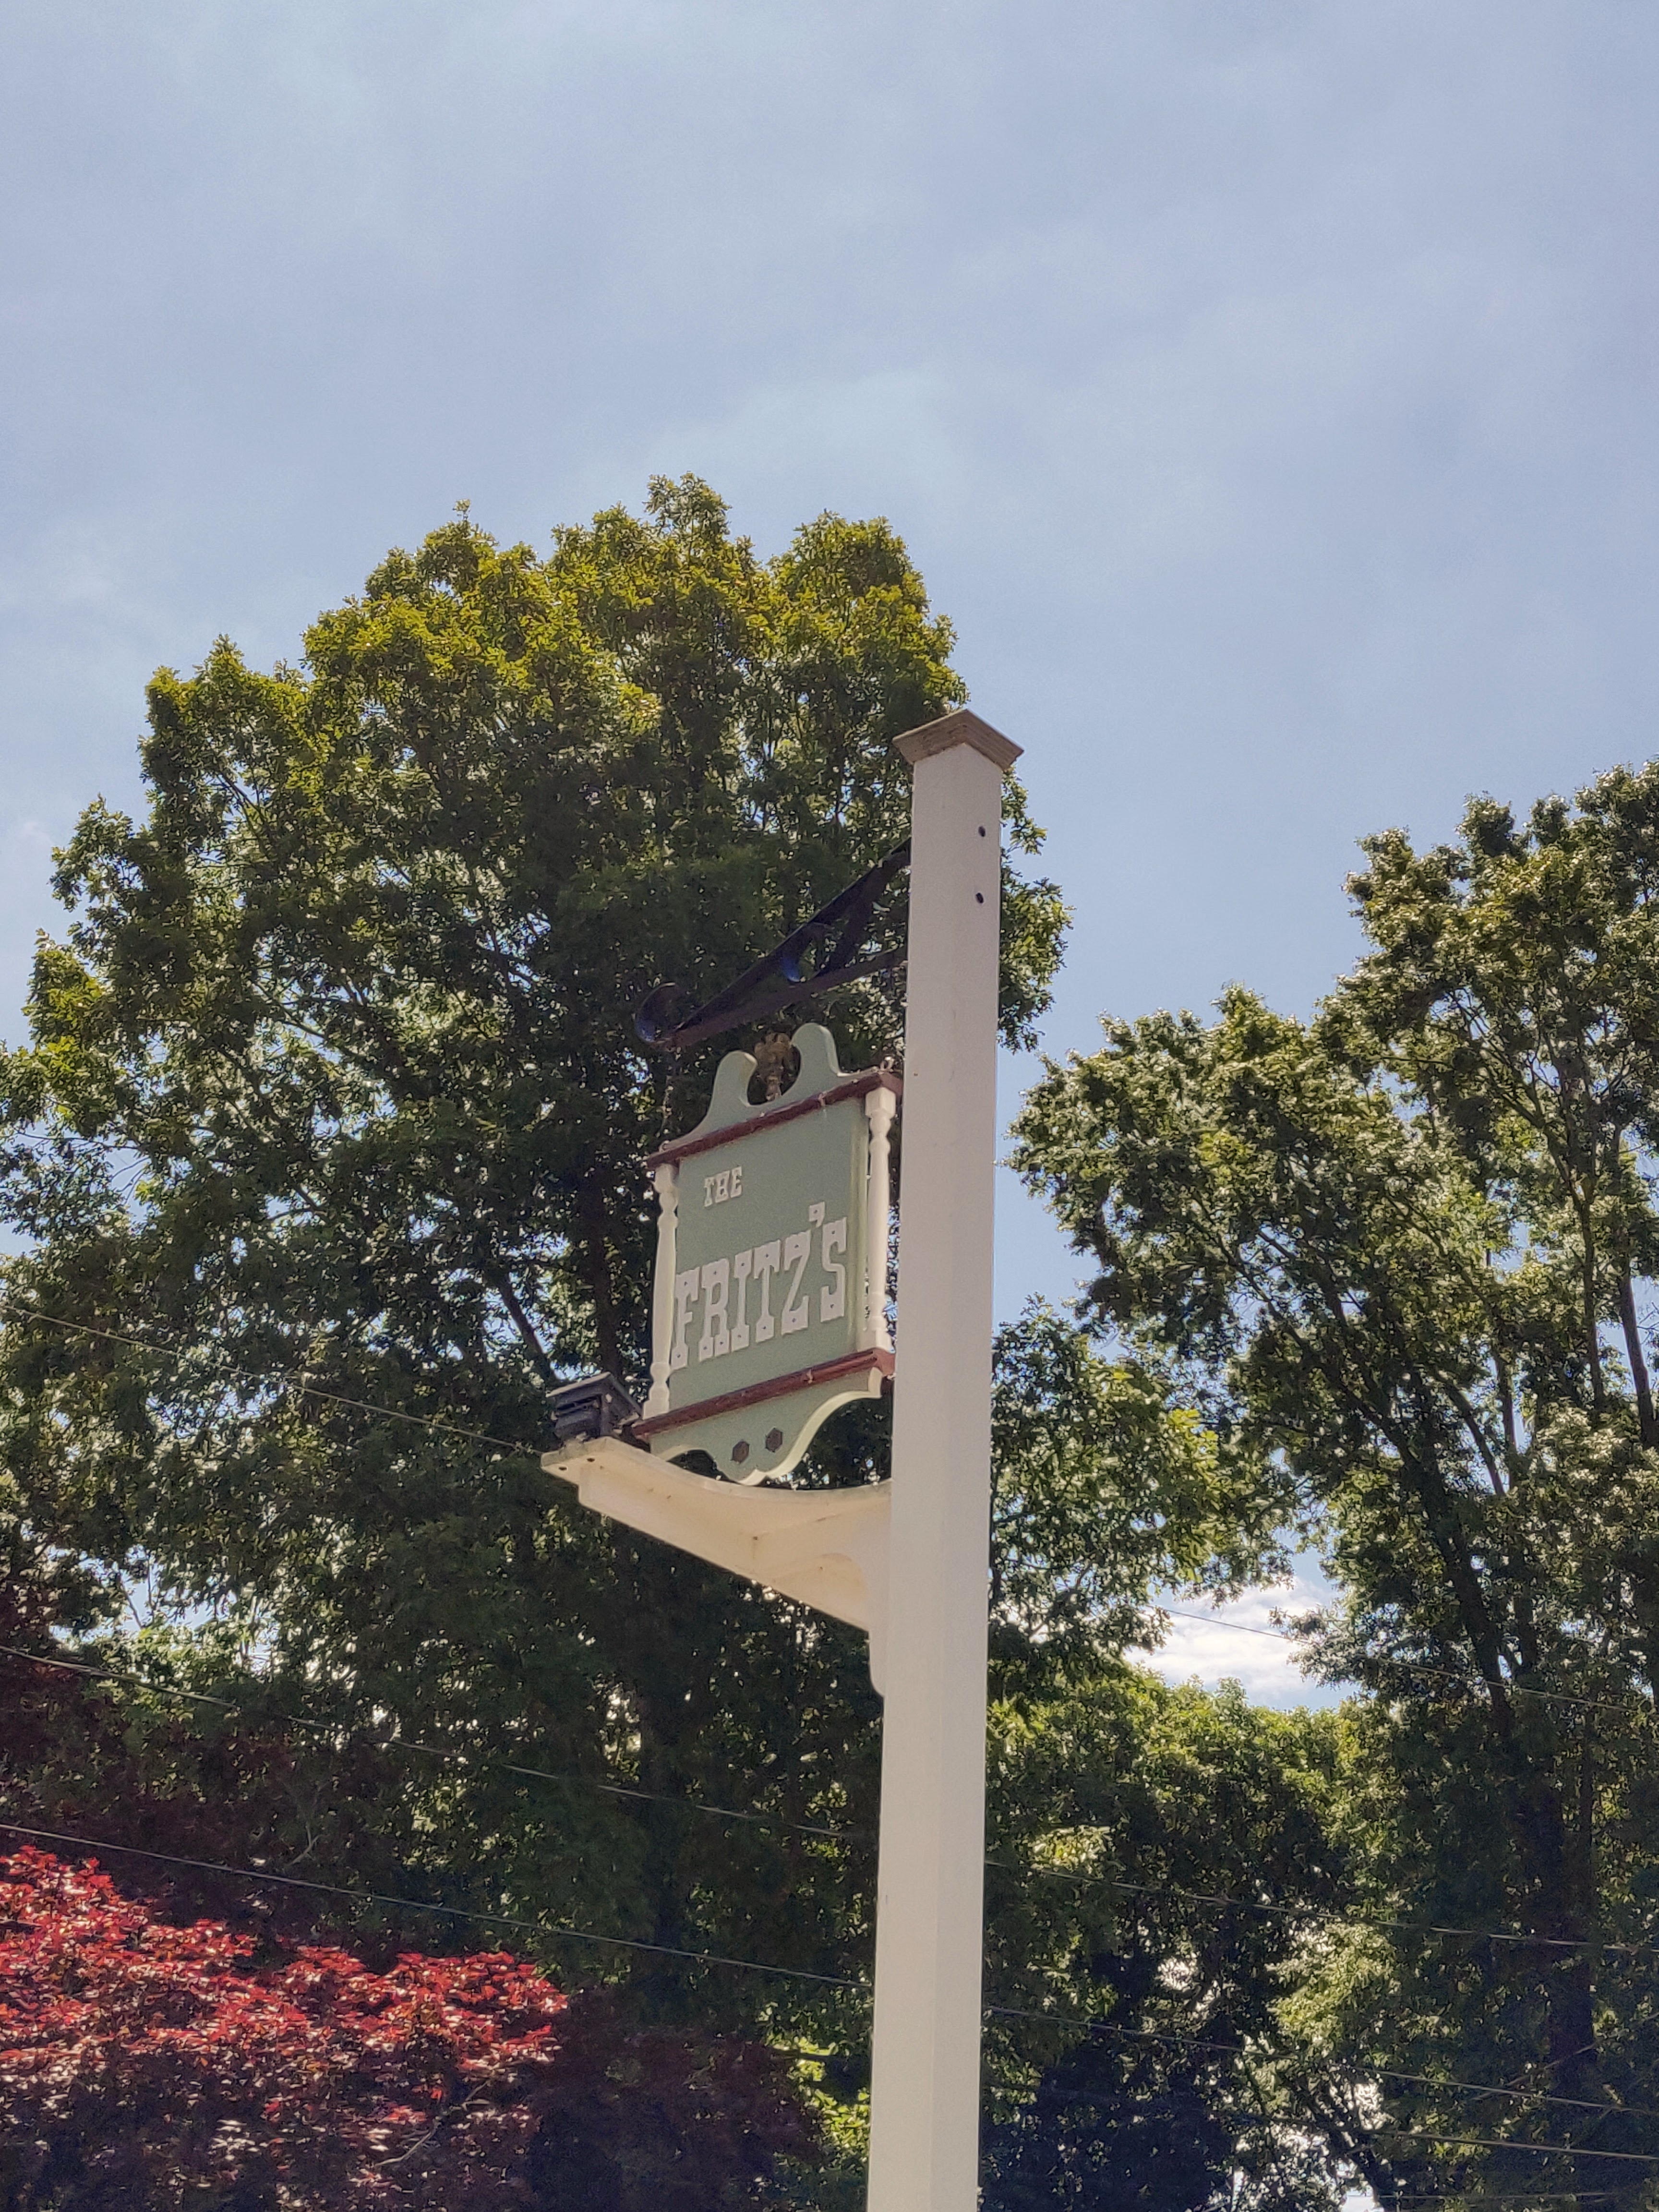
Ken Fritz – 1942-2022
Posted by Acoustics First in DIY, Home Entertainment, Home Theater, HOW TO, Media Room, Mentions, Uncategorized on August 18, 2022

Back in April 2021, Acoustics First® Posted a blog about a listening room designed and built by Ken Fritz. This is an overly-simplified statement, as he not only designed and built the structure, but also the massive speakers, the high-tech turntable, and many of the other components. The next month, John Gardner, Nick Colleran, and Jim DeGrandis were invited to witness Ken’s masterpiece of a room in person – and now, a year later, Ken is no longer with us.

Let’s back up a little bit. The history of this room goes back decades, and there is a common history between this room and the Acoustics First® HiPer Panel®. While Ken was finishing the structure back in the early 2000’s, he was focused on building a room that would help his speakers reach their ultimate potential. He had researched the geometry of the finest halls and theaters and their construction, but he was looking to take it one step further. When he was shopping for acoustic treatments for the space, he came across Acoustics First® – which was near his home. At the time, Nick Colleran and John Gardner were working on ideas for a new type of multi-layer, perforated composite, which would eventually become the HiPer Panel®. After the product completed development, and its patent was still pending, Ken’s room became the first installation of the new product.

Ken consulted with Nick and John multiple times during the long construction process, his uncompromising attitude toward his space was always looking for the “best way, no matter what it took.” His bass traps were styled after professional mastering facilities, where the entire corner was recessed and filled with low-frequency absorption. His ceiling was modeled to direct the reflections toward the upper rear of the room, above the balcony. The speakers were hand built, as was his turntable – all of which were marvels of engineering and detail.

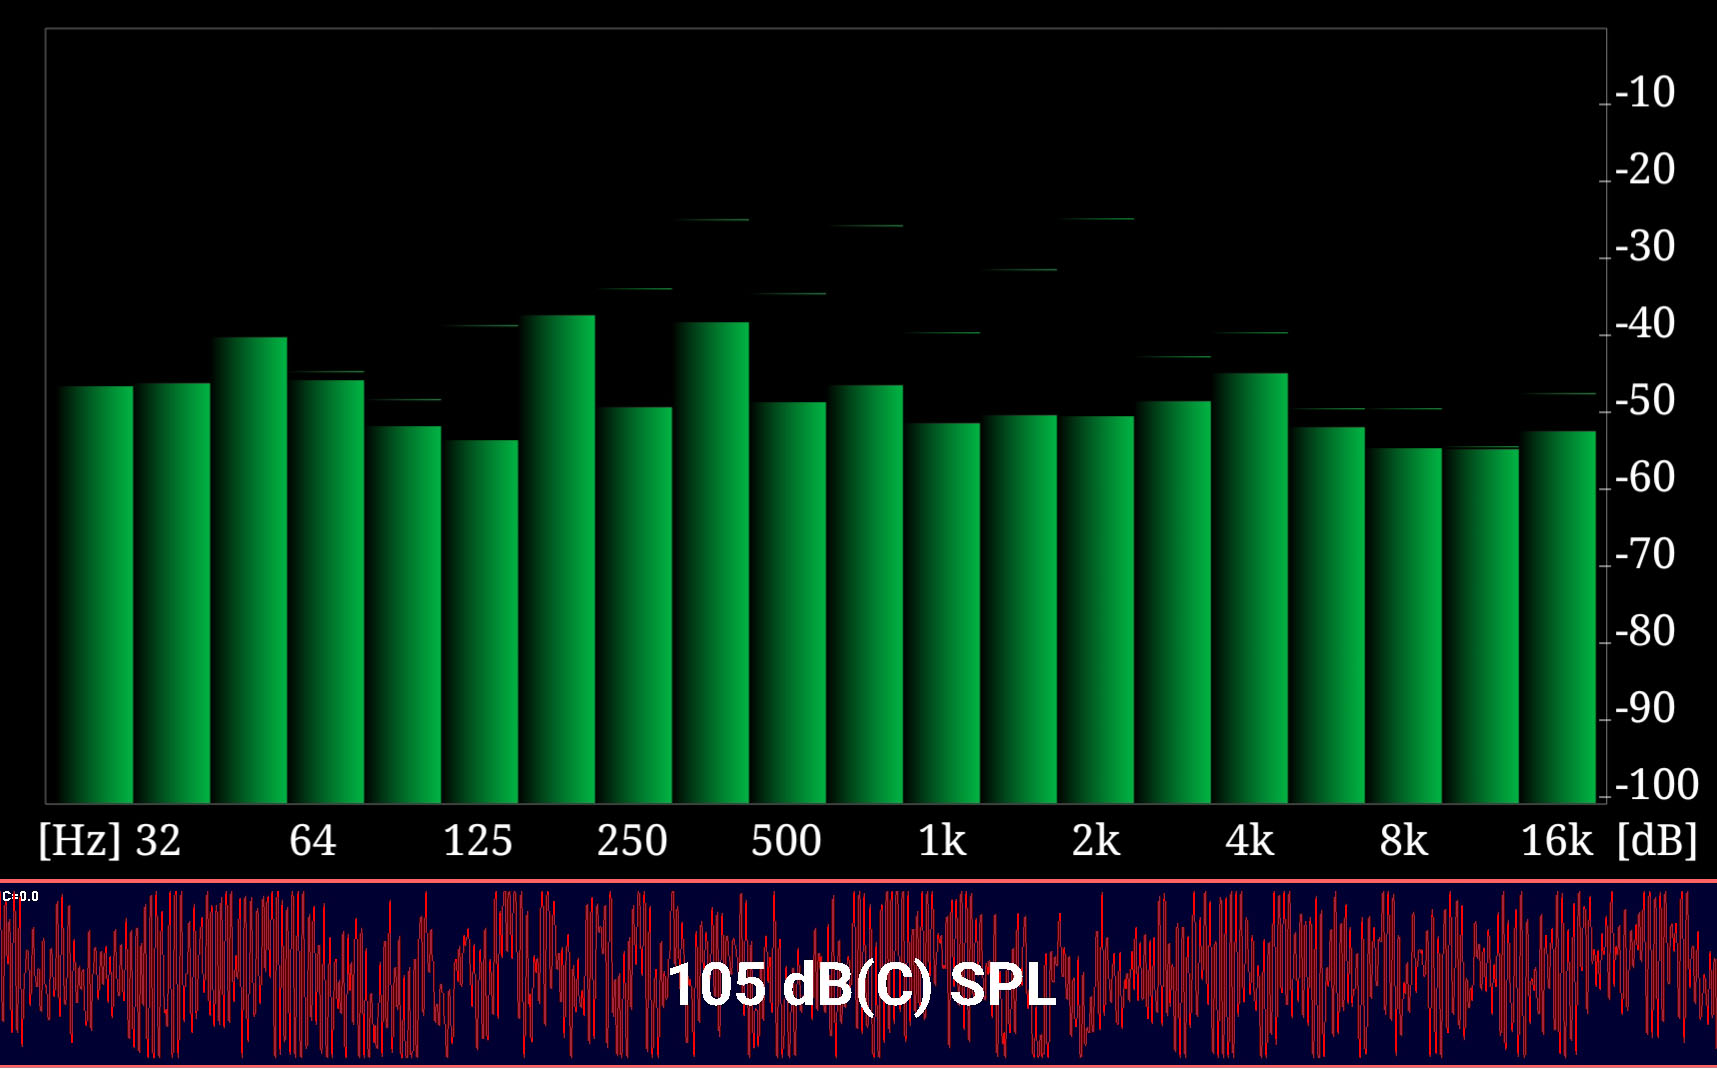
I will never forget Ken’s enthusiasm when he indulged in listening to his favorite recording of the “1812 Overture”, complete with Howitzer cannons. The magnitude of the sound would have shaken everything in the room, had Ken not meticulously isolated and anchored everything. The sound was pure and clean, even at 105dB (standing at the rear of the room – and balanced perfectly.)
But Ken wasn’t just about the music or the gear, he also liked to educate and learn. After listening to the recording, he went on to discuss how they had recorded the cannon shots, and even had an audio sample of the different “takes” done during the setup. This was Ken… he wasn’t just interested in how it sounded, but the process of how they got there.
We hope that Ken’s enthusiasm continues to inspire those who have an uncompromising love of music and sound, and that he will be remembered as one of the most fervent proponents of “following your dream.”
Thanks, Ken.
Absorption & Diffusion – The Construction Specifier
Posted by Acoustics First in Absorption, Art Galleries, Articles, Auditorium, Broadcast Facilities, Diffusion, Home Entertainment, Home Theater, HOW TO, Industrial Facilities, Media Room, Multipurpose Rooms, Music Rehearsal Spaces, Offices, Product Applications, Recording Facilities, Studio Control Room, Teleconferencing, Theater on April 29, 2022
For the May 2022 edition of “The Construction Specifier,” Acoustics First was asked to illustrate the use of absorption and diffusion in creating optimal acoustic spaces. The article is a great reference for understanding the types of acoustic absorbers and diffusers, as well as some use scenarios like offices, critical listening spaces, and larger communal spaces.
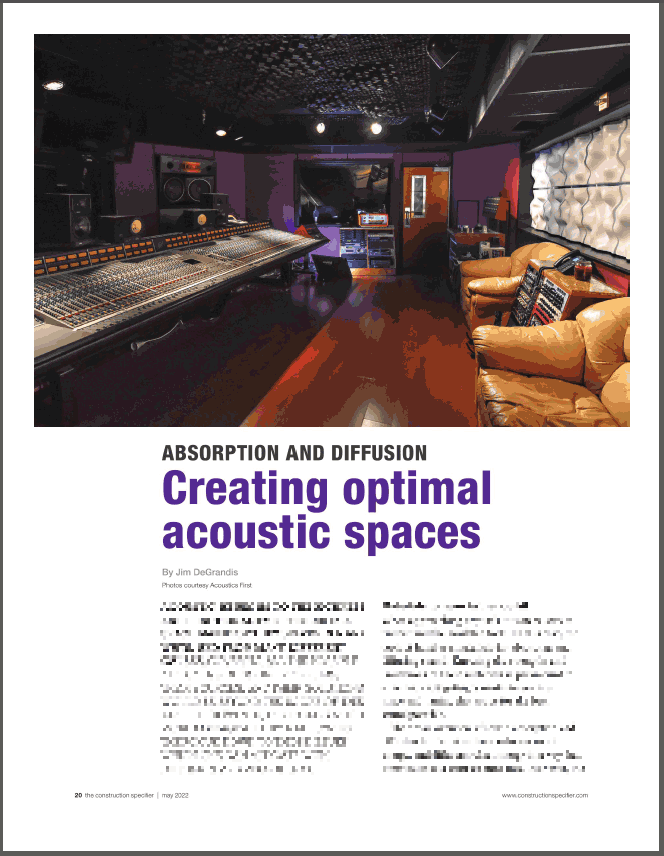
Note: This version has been edited and the advertisements are removed. The full published version of the May 2022 digital edition can be found on The Construction Specifier’s website here.
Sonora® LFC – Low-Frequency Control Panel
Posted by Acoustics First in Absorption, Auditorium, Home Entertainment, Home Theater, Multipurpose Rooms, Music Rehearsal Spaces, Music Tracking Room, Press Release, Product Applications, Products, Recording Facilities, Recording Studio, Studio Control Room, Theater, Uncategorized, Vocal Booth, Voice Over, Worship Facilities on May 24, 2021
Bass frequencies are difficult to control… and there is sometimes a tendency to overuse standard, broadband panels to try to absorb everything in order to get rid of that bass. However, this method is unbalanced and has the side-effect of leaving a room sounding muffled and boomy.
Why?
Physics! High frequencies are easier to absorb than low frequencies. So, when you ONLY use broadband absorbers, they easily remove the high frequencies and leave more of the lows. Overusing broadband absorption in a large performance space can be a disaster – leaving an environment lacking energy and feel – many describe this condition as a room sounding “dead.” (Not good!)
So how can you treat the boomy bass without killing your rooms with too much broadband absorption? Can you just take out the bass? Unfortunately, it is impossible to ONLY absorb the bass, but we can LIMIT the amount of high frequency energy that we absorb to balance out the response.
Acoustics First® presents… the Sonora® LFC – Low-Frequency control panel.
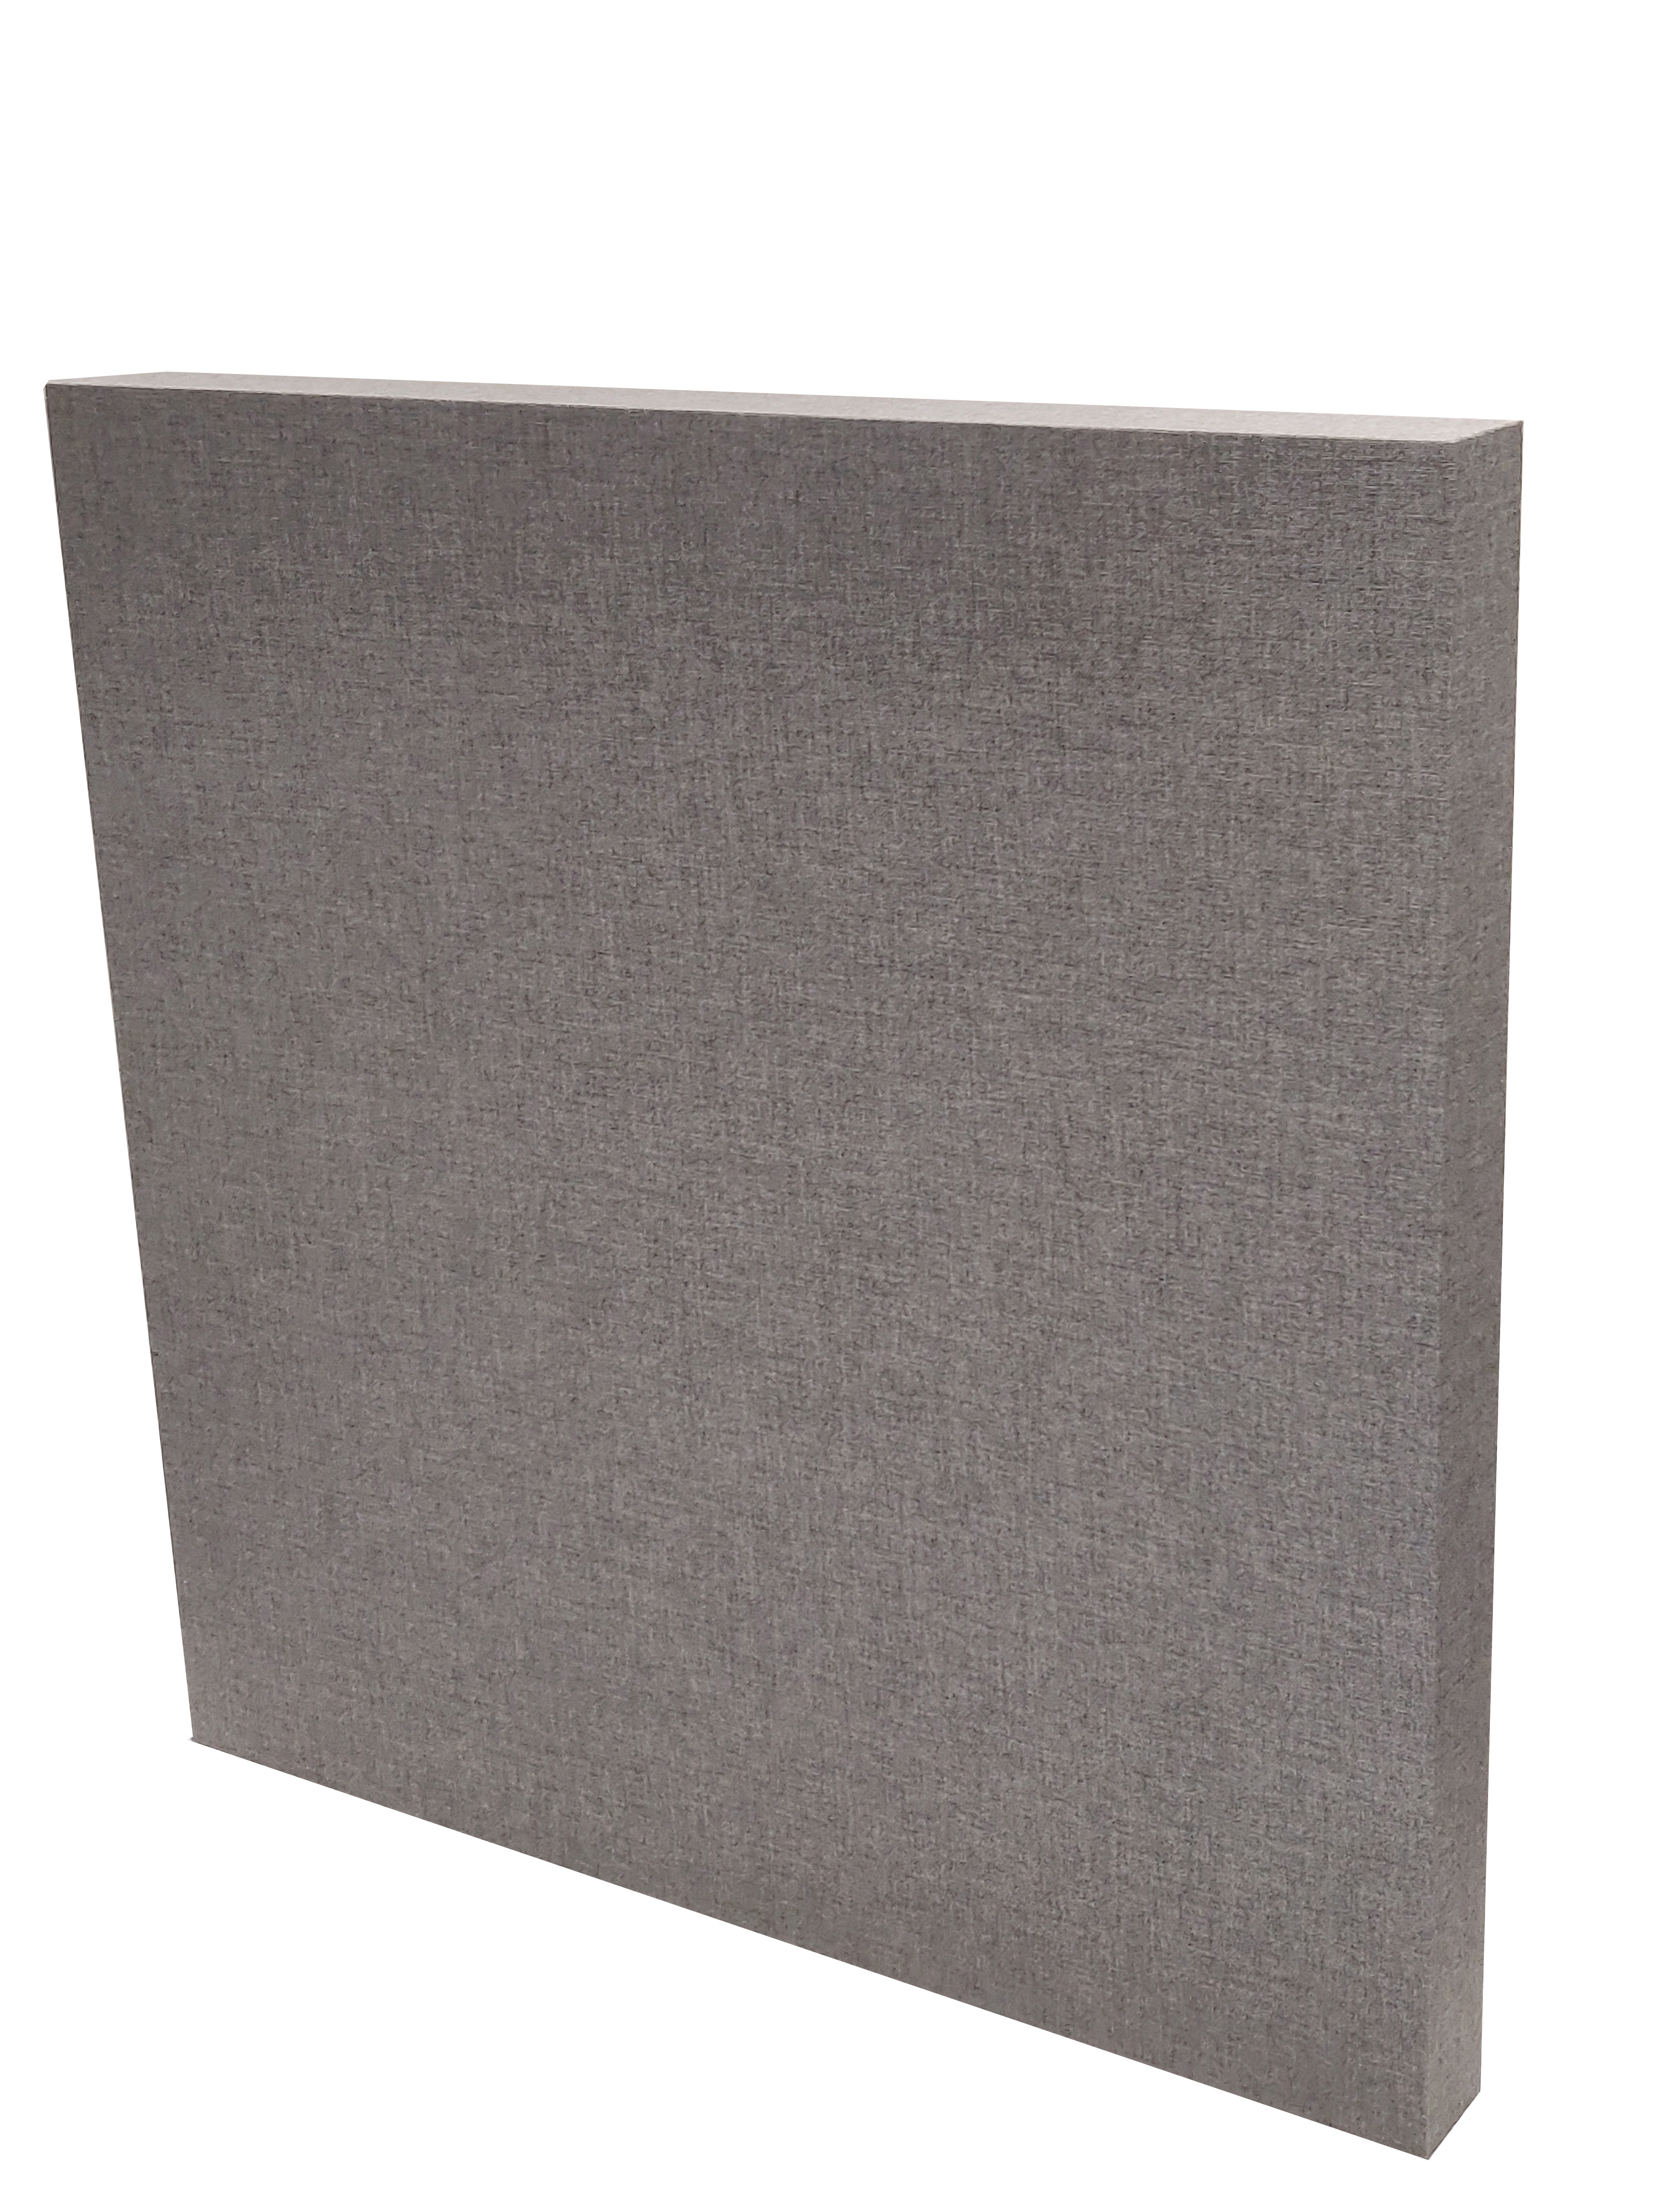
The Sonora® LFC looks like a standard Sonora® Wall panel, but looks can be deceiving! At 4-1/8″ thick, it is virtually indistinguishable from a High-Impact Sonora® panel – however the interior structure of the LFC is optimized to attack the bass frequencies and smoothly roll off the high frequencies. Let’s take a closer look at the performance difference between the Sonora® LFC and the standard Sonora® panel.

When you look at the performance charts, you will notice that the standard 4″ Sonora® panel starts to “roll-off” in the lower frequencies below 125 Hz – it still absorbs them, just to a lesser degree. We designed the Sonora® LFC panel to focus on those frequencies below 125 Hz – while allowing the other treatments to handle the rest! This allows you to use fewer broadband panels, and still have some high-frequency energy for diffusers to spread around – thus creating a more balanced acoustic environment.
The Sonora® LFC is an engineered solution using the same high-performance materials as our other products, but combining them in a way that optimizes them for Low-Frequency Control – hence Sonora® LFC! The magic is in the way those materials are used.
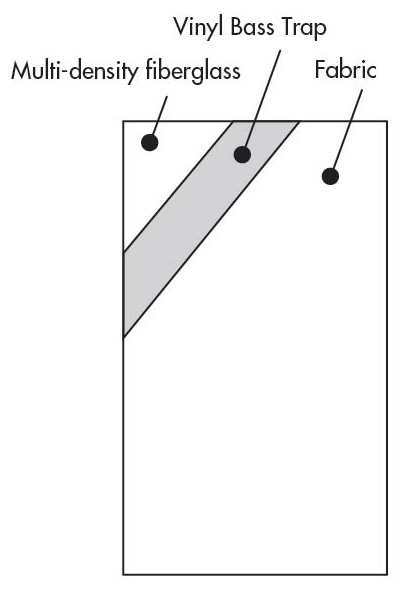
All of the materials used in an acoustic environment have a function – “Diffusers,” “Absorbers,” and “Bass Traps” are all general descriptors of product functions. Some diffusers are also Bass Traps. Some bass traps are also broadband absorbers. Some diffusers use absorption for amplitude grating. By combining a dampened, resonant trap with multi-density fiberglass, the Sonora® LFC focuses on making acoustic spaces more balanced. For controlling the bass without sucking the life out of a room, the LFC Panel is an outstanding tool for refined Low-Frequency Control!

You must be logged in to post a comment.