Archive for category DIY
Ken Fritz – 1942-2022
Posted by Acoustics First in DIY, Home Entertainment, Home Theater, HOW TO, Media Room, Mentions, Uncategorized on August 18, 2022

Back in April 2021, Acoustics First® Posted a blog about a listening room designed and built by Ken Fritz. This is an overly-simplified statement, as he not only designed and built the structure, but also the massive speakers, the high-tech turntable, and many of the other components. The next month, John Gardner, Nick Colleran, and Jim DeGrandis were invited to witness Ken’s masterpiece of a room in person – and now, a year later, Ken is no longer with us.

Let’s back up a little bit. The history of this room goes back decades, and there is a common history between this room and the Acoustics First® HiPer Panel®. While Ken was finishing the structure back in the early 2000’s, he was focused on building a room that would help his speakers reach their ultimate potential. He had researched the geometry of the finest halls and theaters and their construction, but he was looking to take it one step further. When he was shopping for acoustic treatments for the space, he came across Acoustics First® – which was near his home. At the time, Nick Colleran and John Gardner were working on ideas for a new type of multi-layer, perforated composite, which would eventually become the HiPer Panel®. After the product completed development, and its patent was still pending, Ken’s room became the first installation of the new product.

Ken consulted with Nick and John multiple times during the long construction process, his uncompromising attitude toward his space was always looking for the “best way, no matter what it took.” His bass traps were styled after professional mastering facilities, where the entire corner was recessed and filled with low-frequency absorption. His ceiling was modeled to direct the reflections toward the upper rear of the room, above the balcony. The speakers were hand built, as was his turntable – all of which were marvels of engineering and detail.

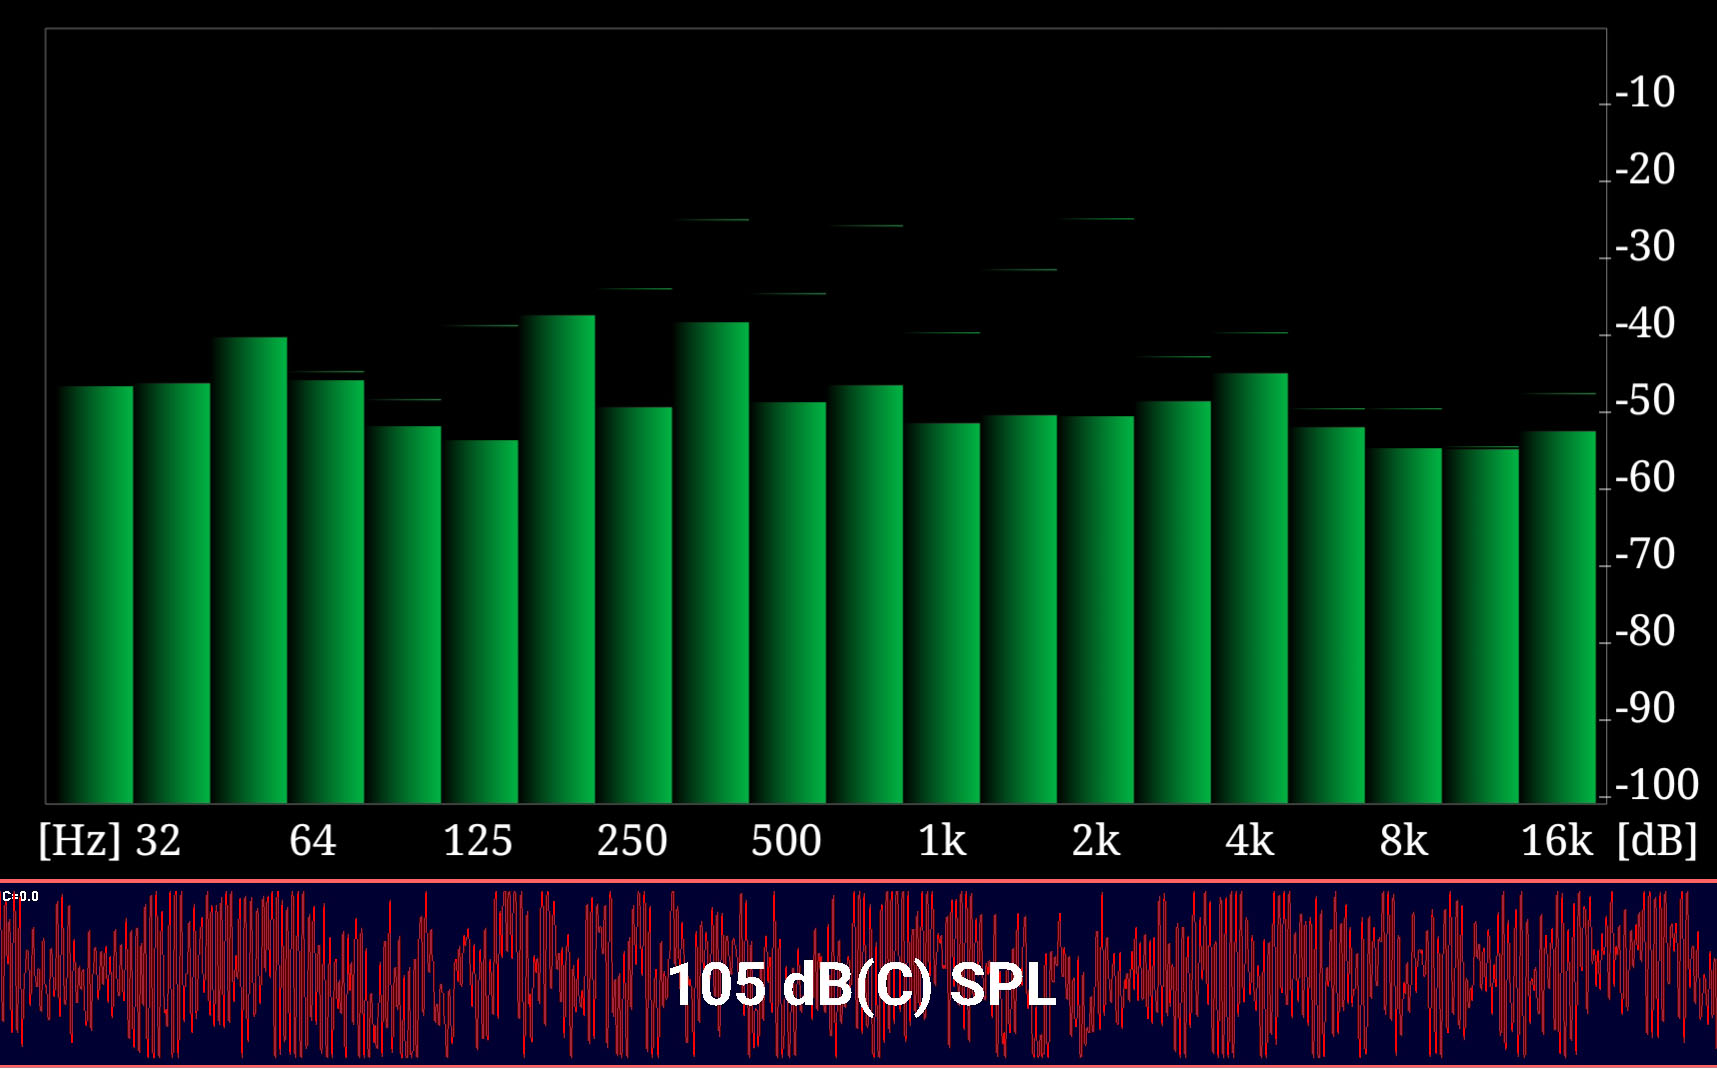
I will never forget Ken’s enthusiasm when he indulged in listening to his favorite recording of the “1812 Overture”, complete with Howitzer cannons. The magnitude of the sound would have shaken everything in the room, had Ken not meticulously isolated and anchored everything. The sound was pure and clean, even at 105dB (standing at the rear of the room – and balanced perfectly.)
But Ken wasn’t just about the music or the gear, he also liked to educate and learn. After listening to the recording, he went on to discuss how they had recorded the cannon shots, and even had an audio sample of the different “takes” done during the setup. This was Ken… he wasn’t just interested in how it sounded, but the process of how they got there.
We hope that Ken’s enthusiasm continues to inspire those who have an uncompromising love of music and sound, and that he will be remembered as one of the most fervent proponents of “following your dream.”
Thanks, Ken.
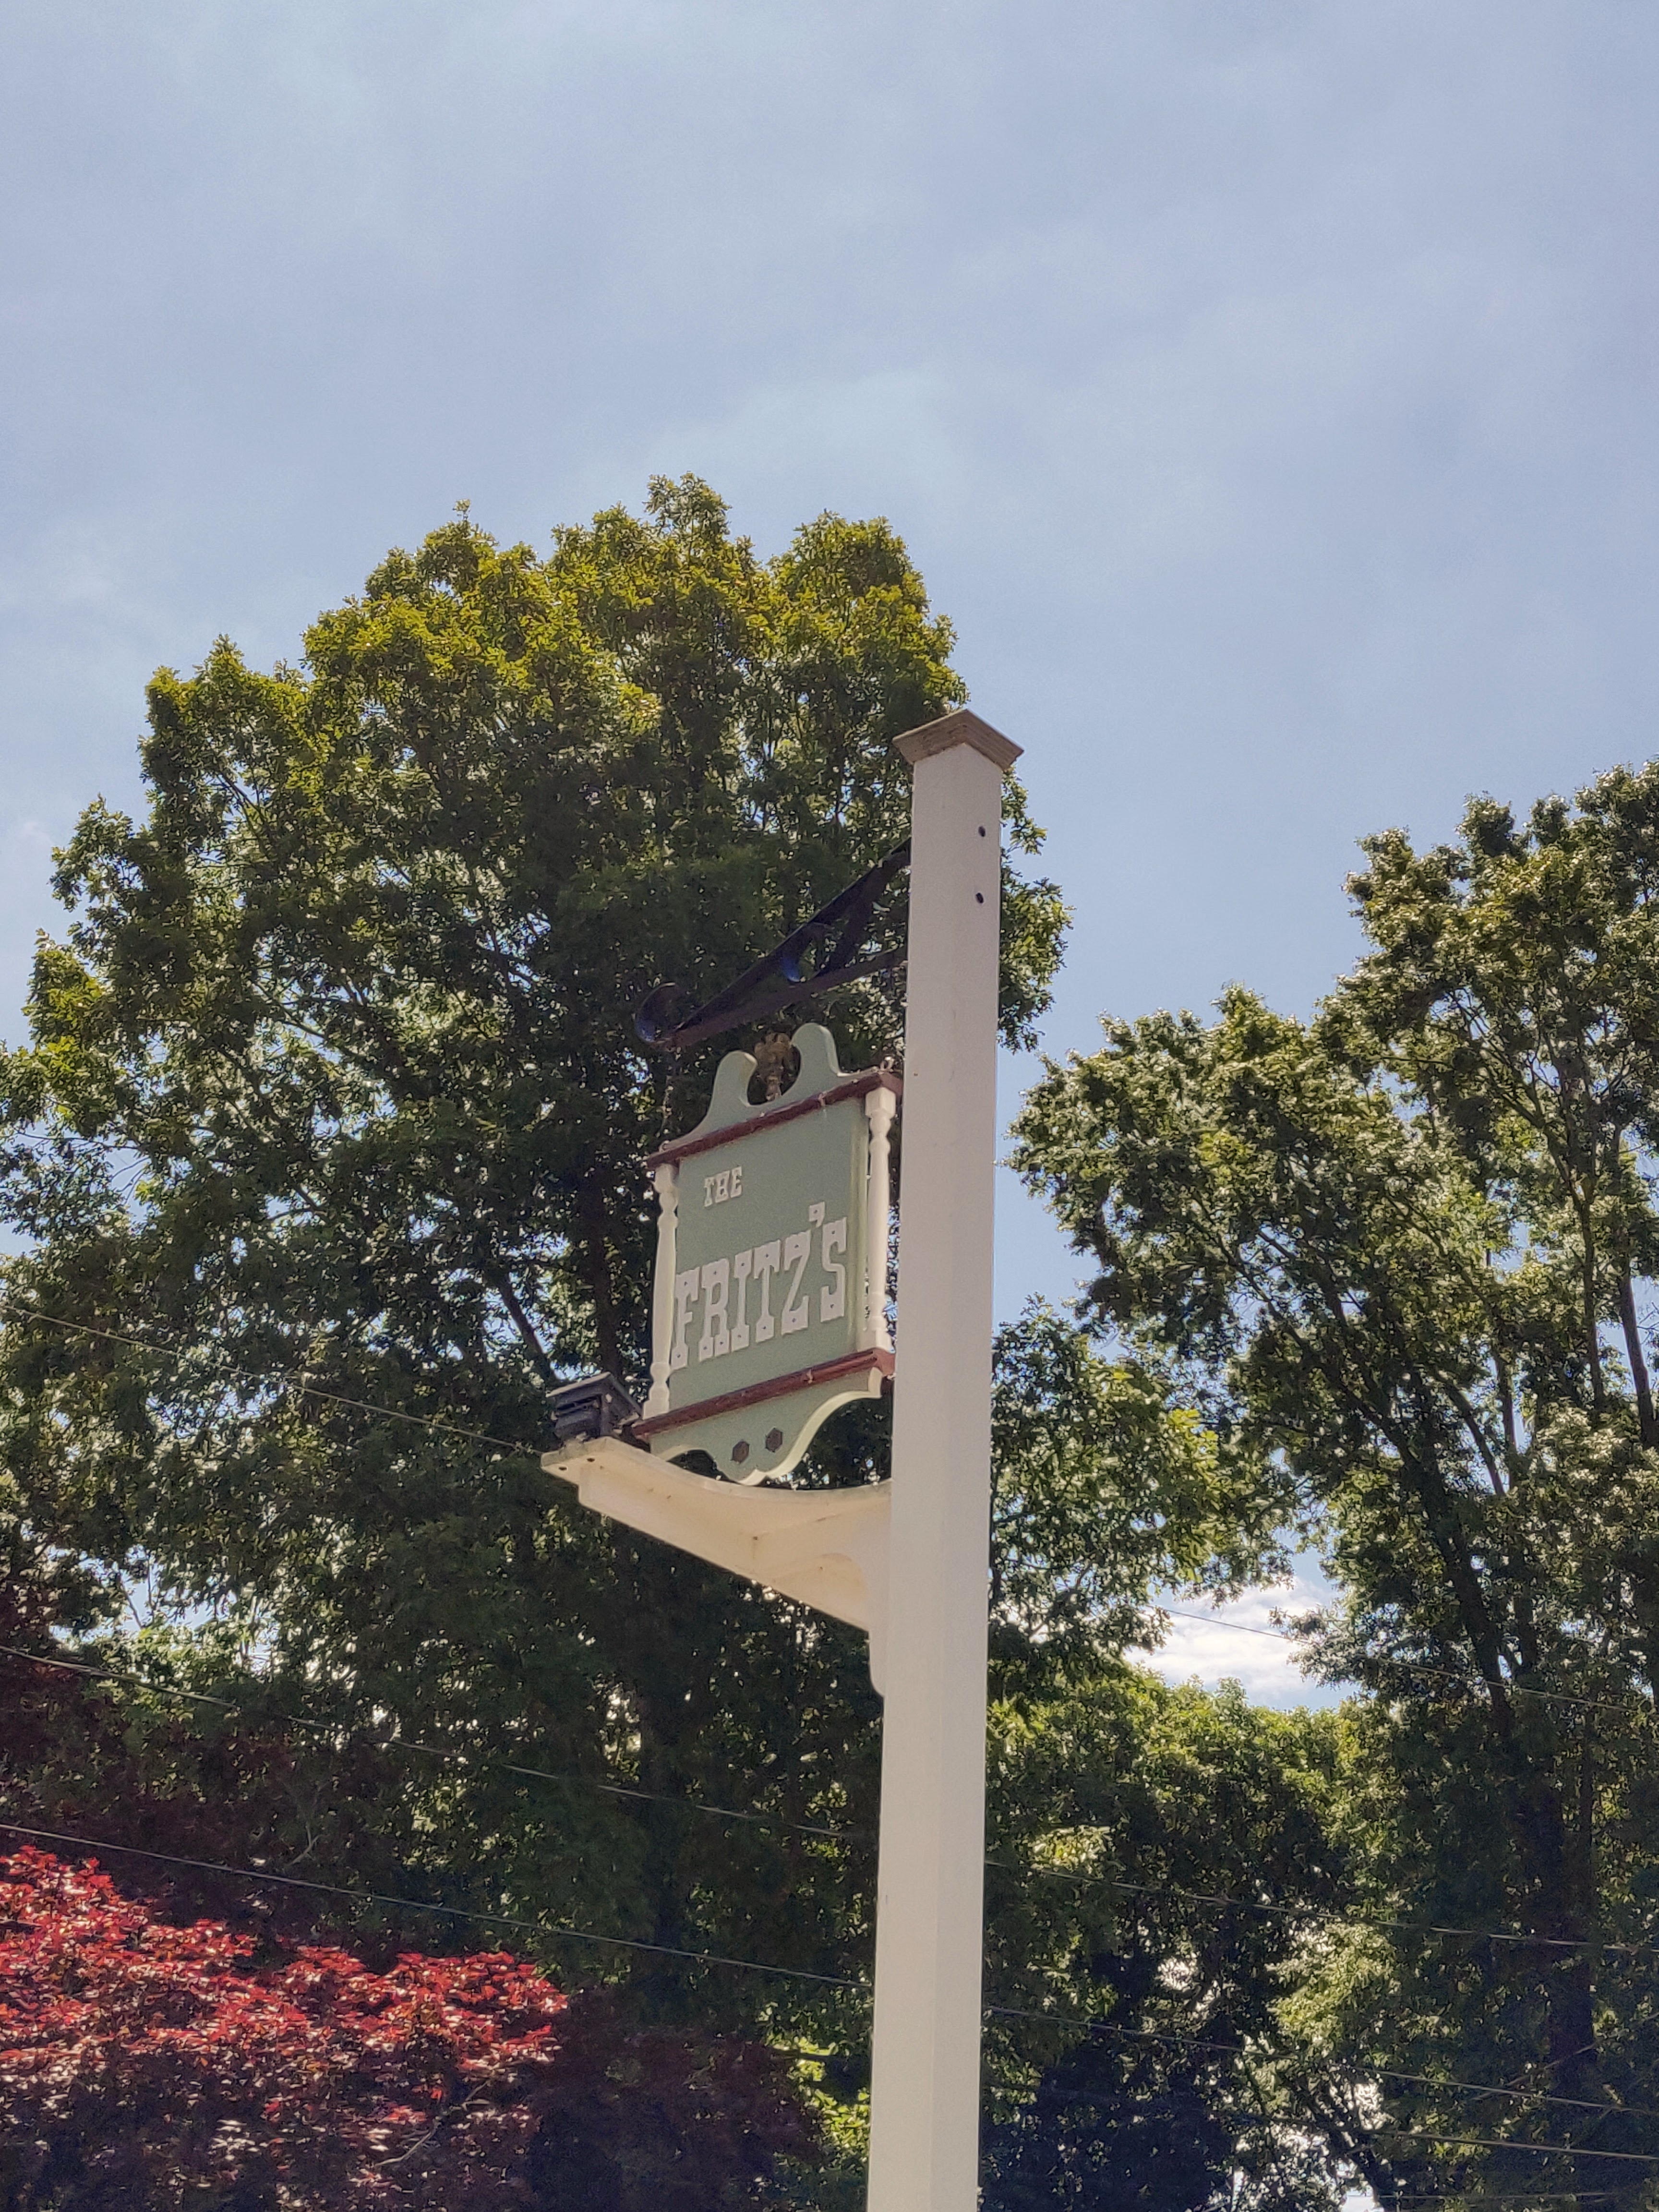
Sonora® Panels @ Vine and Branches
Posted by Acoustics First in Absorption, Customer Feedback, DIY, Multipurpose Rooms, Product Applications, Worship Facilities on June 18, 2021
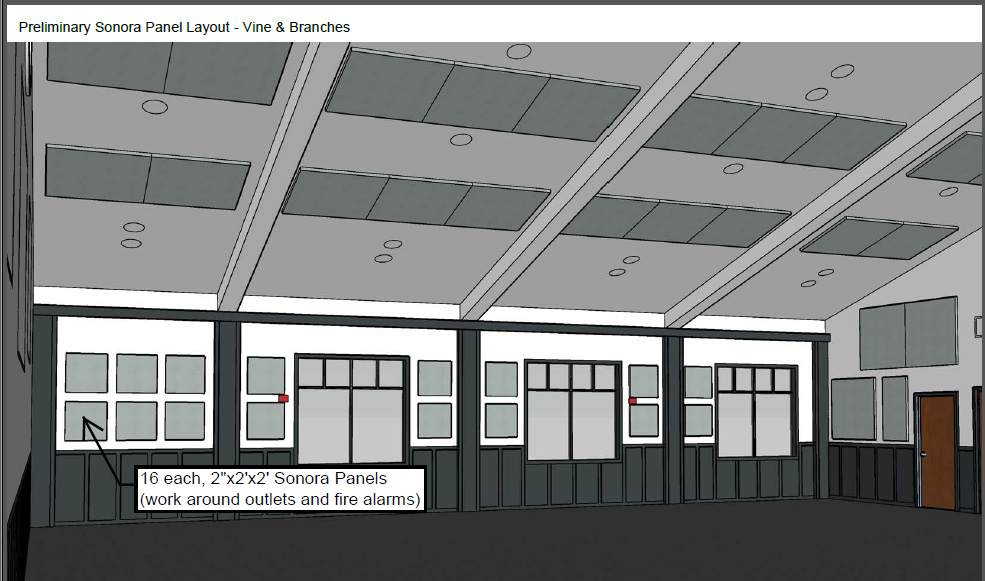
Sometimes you don’t have a large budget for an installation crew, but are in desperate need of acoustic treatment. Also, in complex spaces it helps to have a guide. So, when Acoustics First® was contacted to design a layout for Vine & Branches, our team gave them some extra help.

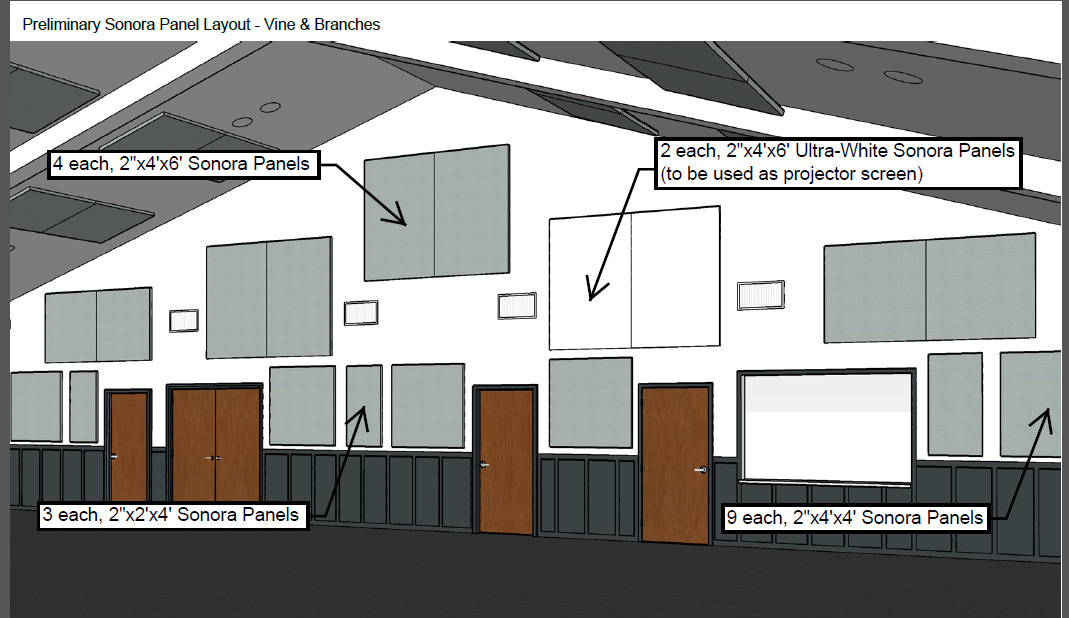
Having a projector area was also required, and there was concern about having a large section of wall that was untreated. The solution was in install two Ultra-White Sonora® panels at the projection location, and use the panels themselves as a screen – a method that has been used in many environments in the past.

Note: These installers were not professionals, and most of the installation was done by one person – who commented…
Looks pretty much like the CAD drawing you guys did for us. I did 90% of the installation by myself… So, if any of your customers ask about installation, it *can* be done by an untrained person.
With some sound advice and a good guide, any environment can benefit from some acoustic treatment.
The HiPer® Panel and Ken Fritz’s Dream
Posted by Acoustics First in Absorption, Diffusion, DIY, Home Entertainment, Home Theater, Media Room, Mentions, Press Release, Products on April 13, 2021

There are many home theaters of note, but rarely is one created (at this scale) by the singular dream and dedication of one man. Ken Fritz involved Acoustics First® early in the project to perform acoustic measurements of the space, and his theater became the first large-scale installation of our newly developed HiPer® Panel. From beginning to end, Ken says that he spent more than 25 years on the realization of his dream – and others have taken notice.

There have been numerous write-ups of Ken’s theater, which was constructed (from the ground up) specifically for this purpose. The walls are hurricane grade block construction, the roof-line is constructed to improve the acoustics, the walls are clad in HiPer® Panels, the bass emanates effortlessly from in-wall enclosures – and just look at those custom built arrays that Ken designed and constructed by hand! This project is more than just a labor of love, it is an obsession with excellence.

This obsession covers every aspect of the room and the system, with everything being either built by hand, customized to his specifications, or simply the best you can get! If there is a “home theater mountain,” Ken built a skyscraper at the summit – but don’t take our word for it…
You can watch the one-hour documentary telling the story behind the dream – in Ken’s own words.
S.A.M.M.™ – Smart Sound Management
Posted by Acoustics First in Absorption, DIY, Mentions, Products, Uncategorized on April 1, 2021

S.A.M.M.™
Sound Attenuation Matrix Management
by Acoustics First®
20 Years ago, John W. Gardner developed the ASP™ Panel Technology to maintain optimal acoustic performance of our acoustic absorber product lines – like the Sonora® Wall Panels. Recent developments have been made to augment this earlier technology, and our Research & Development team has evolved this technology into the “information age.”

Meet S.A.M.M.™, the smart way to manage your panel maintenance tasks.
S.A.M.M.™ Panels analyze the acoustic environment and use this information to track their exposure to sound pressure levels. This can be monitored real-time, either directly through the energy efficient OLED screen, or using any device with a web browser.
This technology allows more than just monitoring the acoustic environment. The S.A.M.M.™ Enabled panels have a HAL BIOS which runs a webserver daemon that gives you full-control of your panels and the acoustic environment…

… but this isn’t only for S.A.M.M.™ Enabled Panels!
After a simple firmware upgrade to your ASP™ panels, you will have full control over your entire acoustic environment – from anywhere in the world.
I am flattered that you have taken the time to reevaluate one of my lifetime projects. I owe all of my minimal knowledge… to my first professor… I LIRPA.
Dr. John Wesley Gardner
Watch the following video to see the history of the ASP™ panels developed by the irreverent, John W. Gardner, and their evolution into the Sound Attenuation Matrix Management Technology known as… S.A.M.M.™
S.A.M.M.™ is Open Source
Acoustics First® values innovation, and we can all stand on the shoulders of giants. Customers can build their own implementations and create the ideal solution for their environment. While you can use whichever hardware that you have access to, here is the hardware our research team used to develop our in house integration.
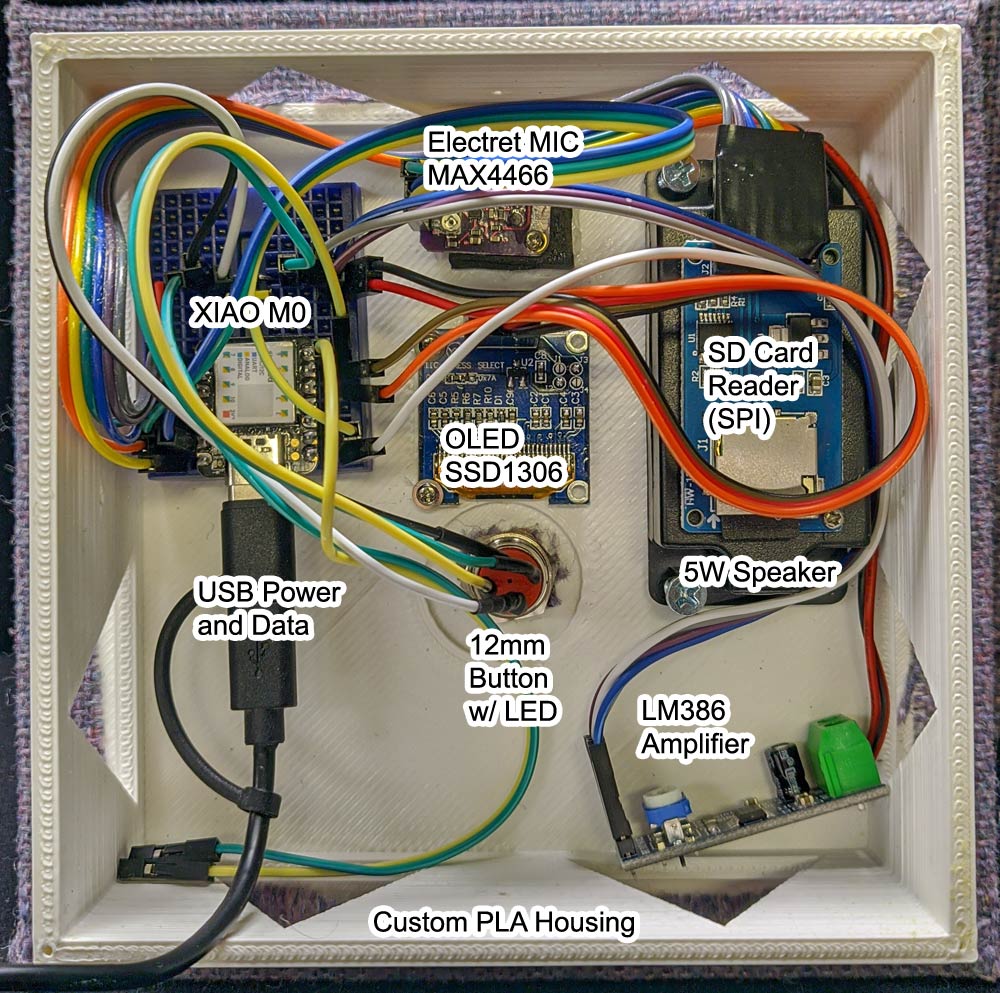
Components:
Custom 3D Printed Housing (PLA)
SEEEDuino XIAO M0+ (MCU)
128×64 OLED (SSD1306)
SD Card Reader (SPI)
Electret MIC w/Adj. Gain (MAX4466)
LM386 Amplifier
5 Watt/8 Ohm Speaker
12mm Momentary Switch (Red LED)
Optional – 10000mah USB Battery
(Click the image to enlarge)

Source Code:
The S.A.M.M.™ Source code was written in PlatformIO to be compatible with the Arduino Platform. The MCU is the SEEEDuino XIAO M0+ with the ARM Cortex M0 processor.
The libraries used in this project may need to be changed based on your hardware selections.

S.A.M.M.™ Web Console
Experience the S.A.M.M.™ Web Console interface. View the real-time output of the first S.A.M.M.™ unit, installed in the Acoustics First® R&D LAB. You can view the current capacity of the panel, as well as the average sound intensity – and as a bonus – we allow users to PURGE the panel remotely!
Stay up-to-date with cutting edge advances in acoustics with Acoustics First®.
DIY – Nouveau™ Home Theater Back Wall
Posted by Acoustics First in Diffusion, DIY, Home Theater, Products, Studio Control Room, Uncategorized on August 7, 2020

It wasn’t a difficult install, but these Nouveaus made this space sing.
Adding Nouveau™ wood diffusers to a home theater is not as daunting a task as it may seem, and can be done with a little planning and a few tools. This install used an ingenious mounting method to ease the final install. Instead of mounting the z-track to the wall directly, it was mounted to sheets of plywood which were hung with Gorilla/Hercules hooks.
The first task was to pick a stain. You can use the back of a plank to get an idea of how the poplar will respond to the different options. Poplar has a very interesting and varied structure that will take stain differently than some other woods. Darker stains may be more consistent, but don’t reveal the character and variation in the wood. This install chose a Smoke Gray which grayed out soft areas and browned the harder heart wood. A semi-gloss clear coat was used to finish.
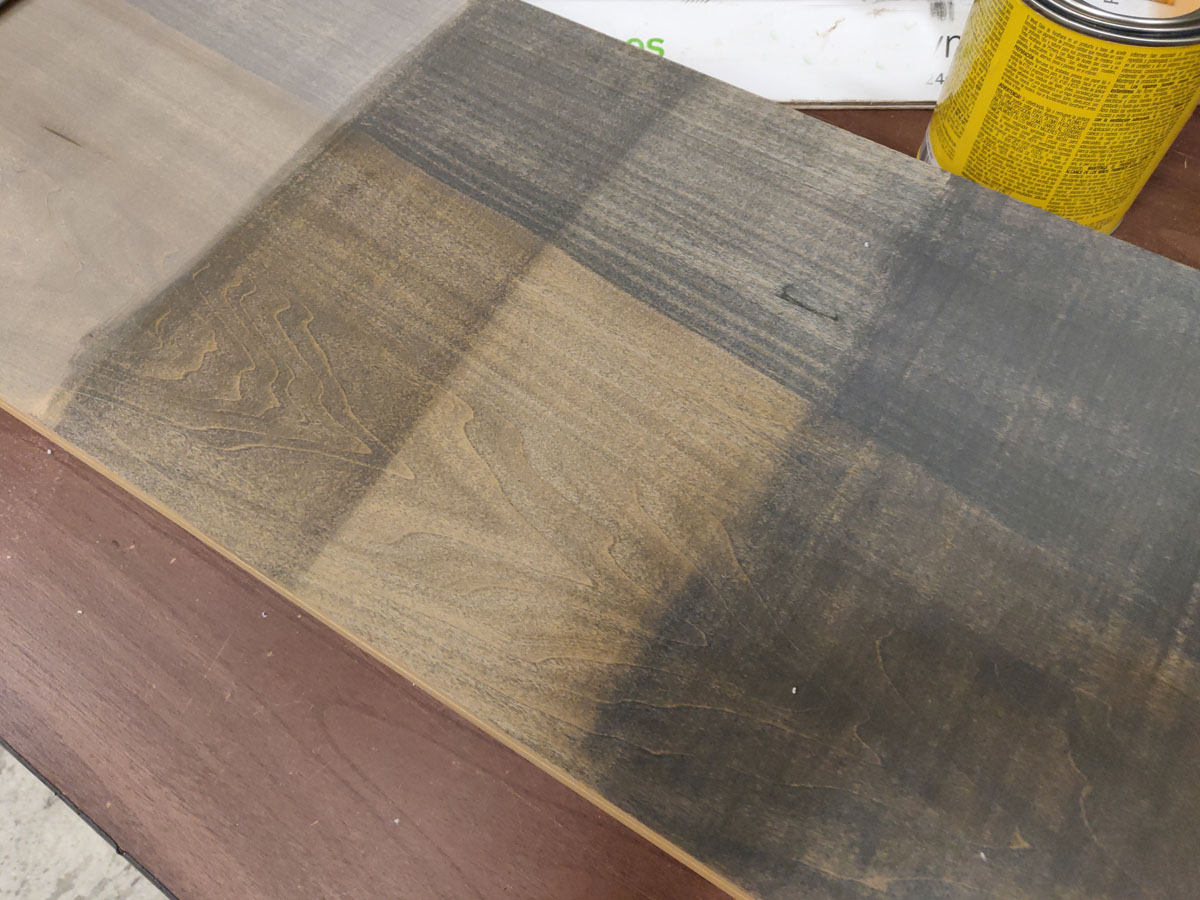
Using the back of the Nouveau™, you can see how the stains will “take.”
While the stain dried, the mounting plywood was cut down to hide behind the planks. Four hanging straps with eye-loops were then added to the top edge of each of the plywood sections, and spaced to avoid studs.
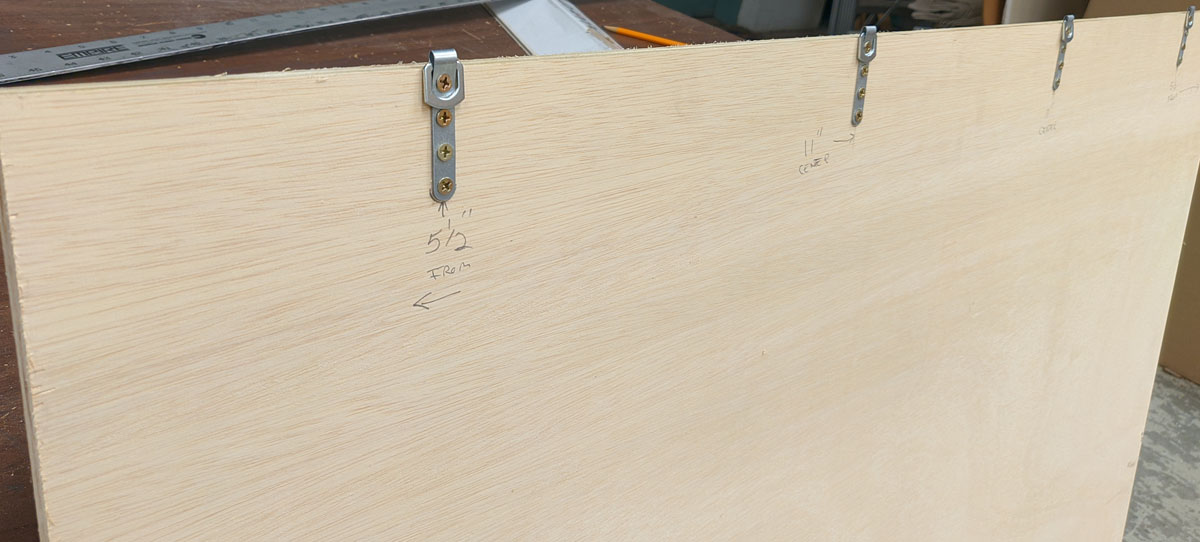
Industrial hanging eyelets were added to the top edge of the sheets to make them easy to level and hang with the Gorilla Hooks.
The Z-track that would normally be installed on the wall was installed on the opposite side of the plywood. This will make it easy to hang the Nouveaus onto the sheet after it’s on the wall.

Z-Bar track was added to the top and bottom of the plywood sheet to accept the z-bars that are going on the back of the finished Nouveau™ planks.
After the Nouveau™ planks are finished with the staining, and left to cure for a few days, they are ready to have the mating Z-bars attached to the back. They are installed with the same spacing as the Z-tracks on the plywood sheets. This will make it easy to align them after the plywood is hung on the wall.

The z-bars are measured, marked, and installed at the same spacing as the z-tracks on the plywood.
The Gorilla/Hercules Anchor hooks are rated to around 50-60 lbs each. The Nouveau™ planks are roughly 25lbs each (at 48 inches) and each section has 4 hooks supporting 4 planks plus the weight of the 3/8″ plywood. The hooks are installed so that the plywood will hang level – with the weight distributed evenly across all four hooks.

When installed properly and leveled, each of these hooks will hold up to about 50-60lbs each. In this configuration, they should only need to support about half that.
Finally, the Nouveau™ planks are installed into the Z-Tracks on the plywood, and moved into position. Because the z-bars were installed square and level, there is no shifting, and they hang true. The undersized plywood sections disappear behind the planks leaving the impression that the planks are floating slightly off the wall.

The install doesn’t look much different from a direct mount z-track installation, with a small gap against the wall.
While this mounting method may not be ideal for every scenario, this was an effective way to install 8 Nouveau™ planks with only 8 small hook holes in the wall. These can now be installed in apartments or temporary environments with minimal damage to the existing walls – and once you are done, they’re easy to take down and reinstall somewhere else. You just need a level!

You must be logged in to post a comment.