Archive for category DIY
DIY – Custom Absorber using Sonora® Black Tiles
Posted by Acoustics First in Absorption, DIY, Home Entertainment, HOW TO, Product Applications, Products, Recording Facilities on July 8, 2020
Let’s say you need some Sonora® Black scrim ceiling tiles for a home theater project, and you order a few extra – “just in case.” Now that the install is done (and you have a few left) you can do something with them… like making a cool absorber panel with lights!

With some DIY knowledge, you can make an absorber masterpiece!
Everyone will have a different vision, but the basic supplies are…
- Acoustic Absorber Material (ex. Sonora® Black Scrim Ceiling Tiles)
- Wood for frame
- Acoustically transparent material/fabric (This one uses a polyester fabric map)
- Material to enclose the back (fabric scrim)
- Wood to mount lighting (This is a 1″x 4″ with espresso stain)
- Lights (here are custom, black-pipe light fixtures, but use other lights if desired)
- Wiring (Wirenuts, electrical tape, lamp cord, etc.)
- Assorted screws, staples, hanging hardware, PPE and tools.
Note: This is not a detailed DIY, as everyone will have a different set of materials and project goals, but these will show the basic steps to create a panel like the one above…. Here we go!
Cut the wood and make a frame that will hold the acoustic material, and the fabric to enclose it. Make the frame big enough to hold the material, and still be covered by the fabric. Make the frame as rigid as possible. Predrill your holes and make it square. Make it tight enough to hold the acoustic material with friction, but without crushing it.
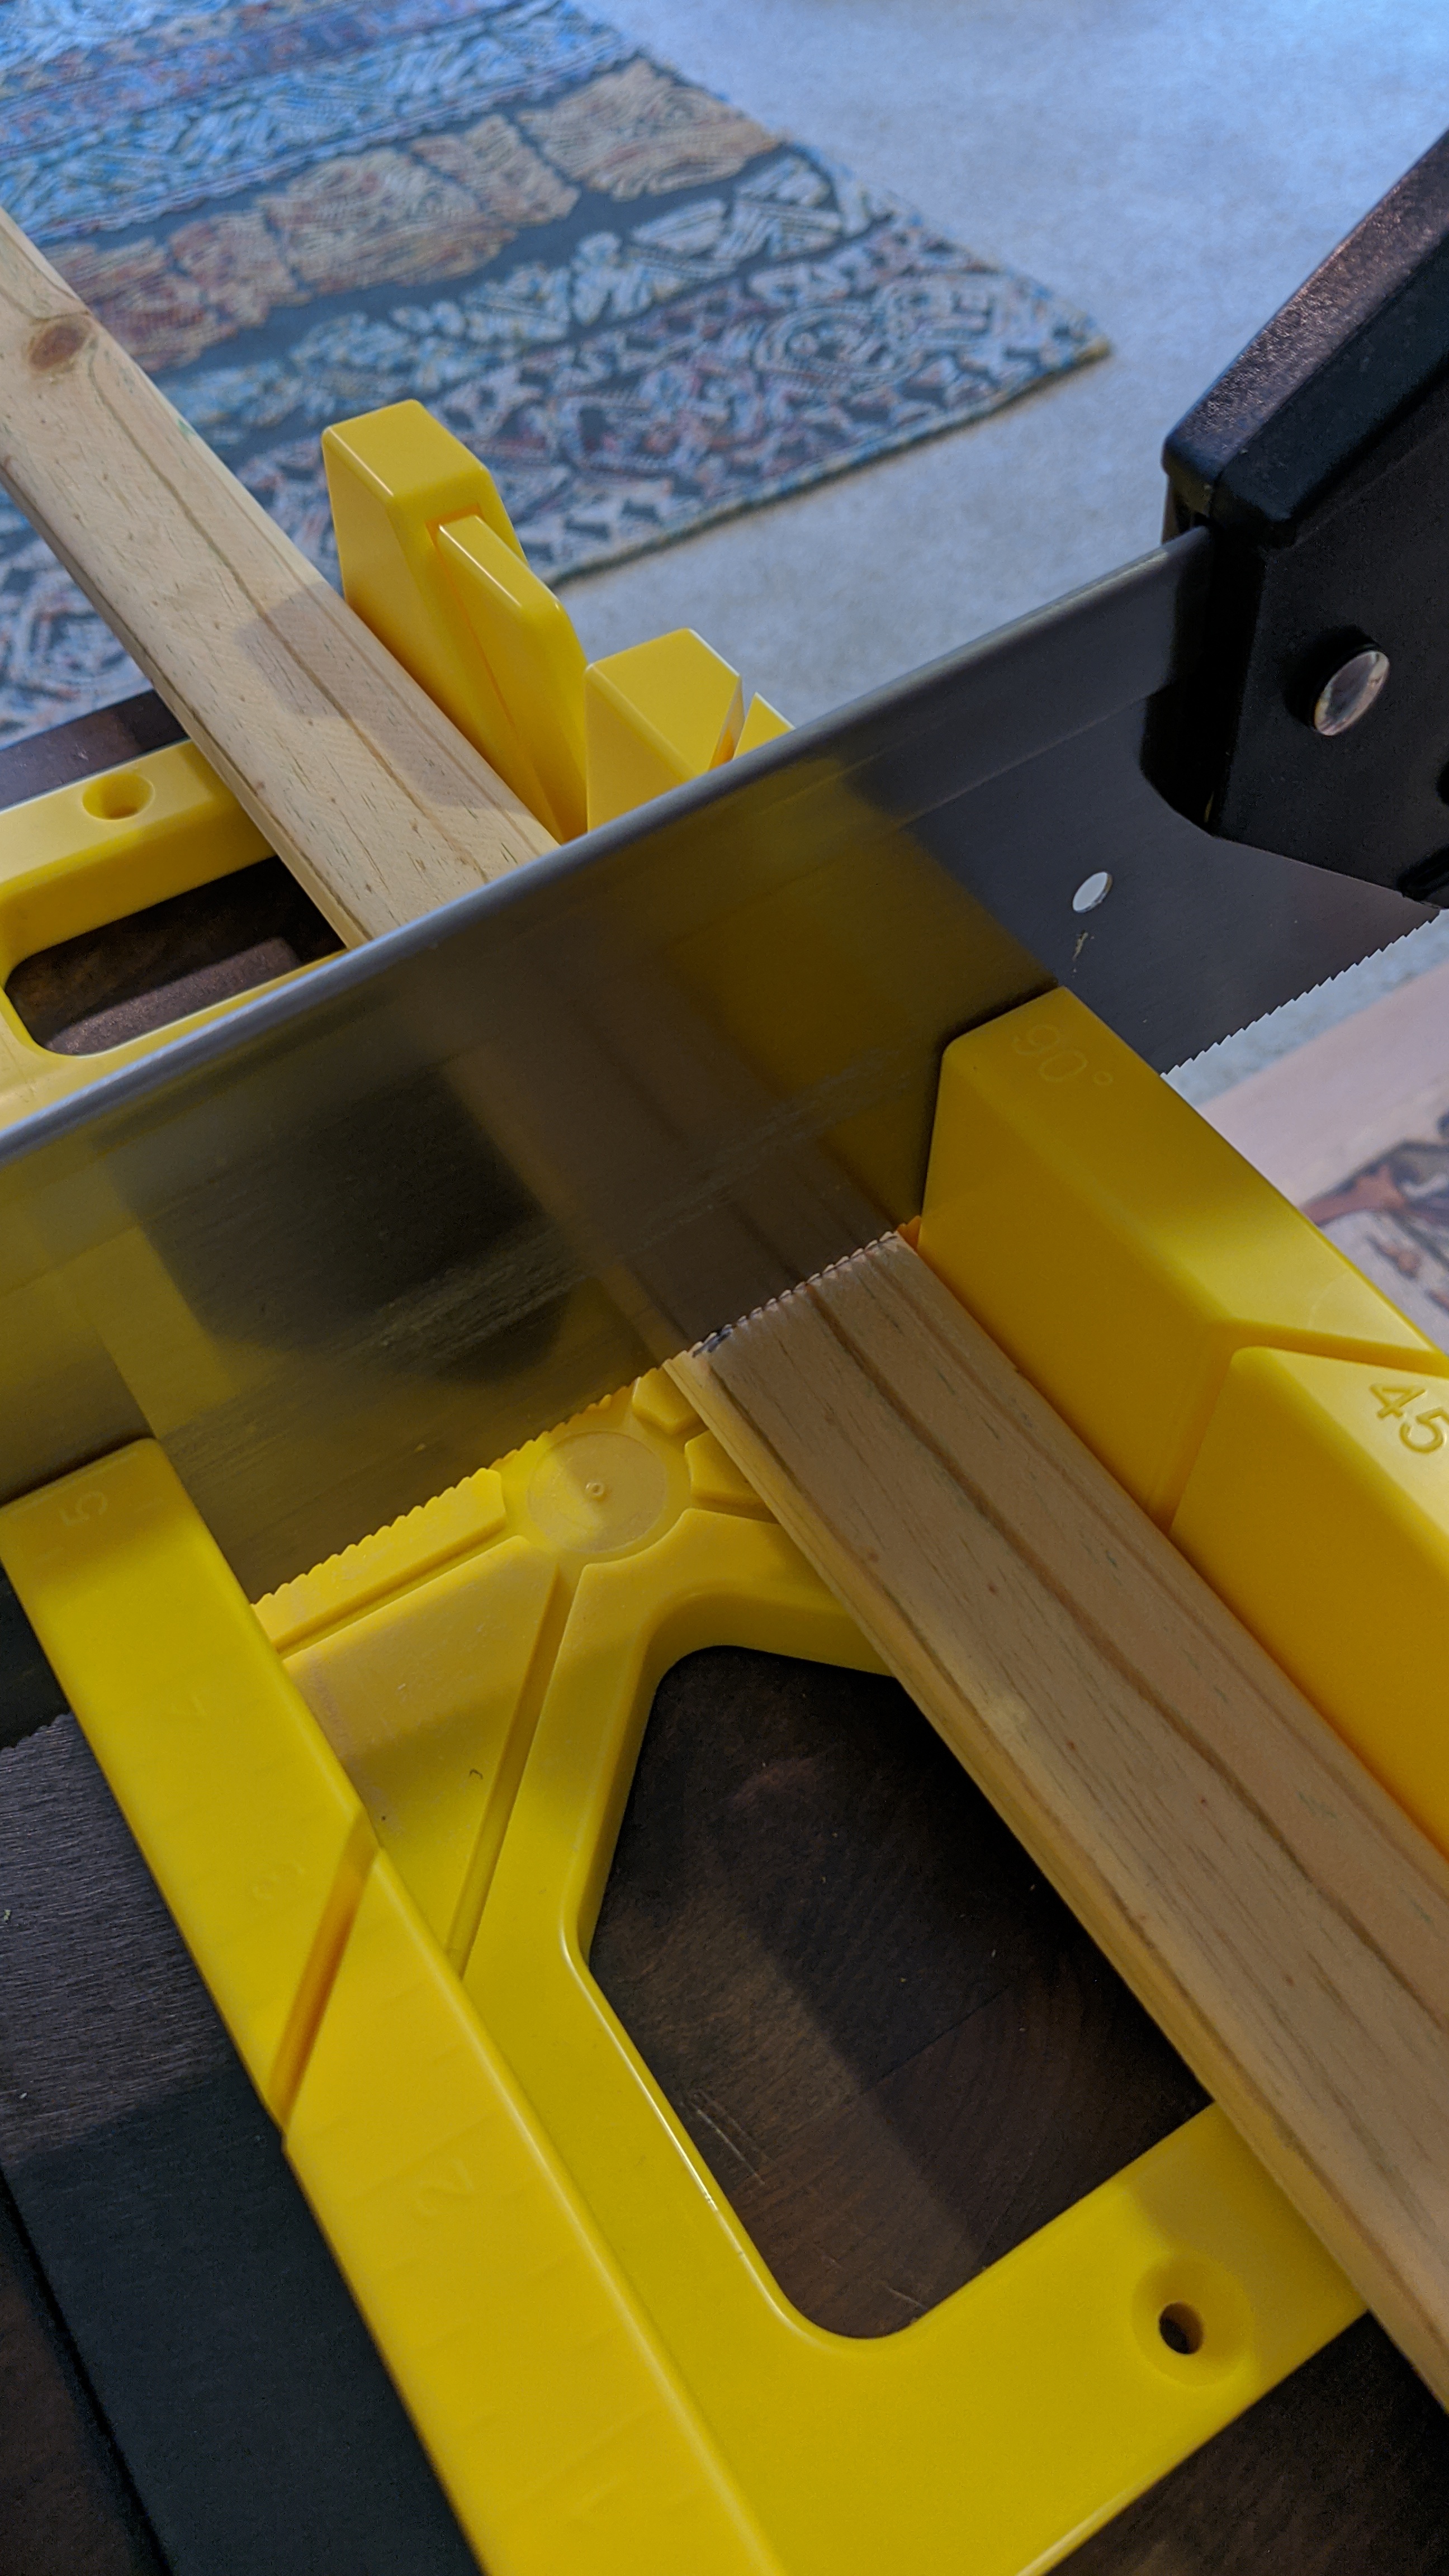
Cutting frame material using a miter box.
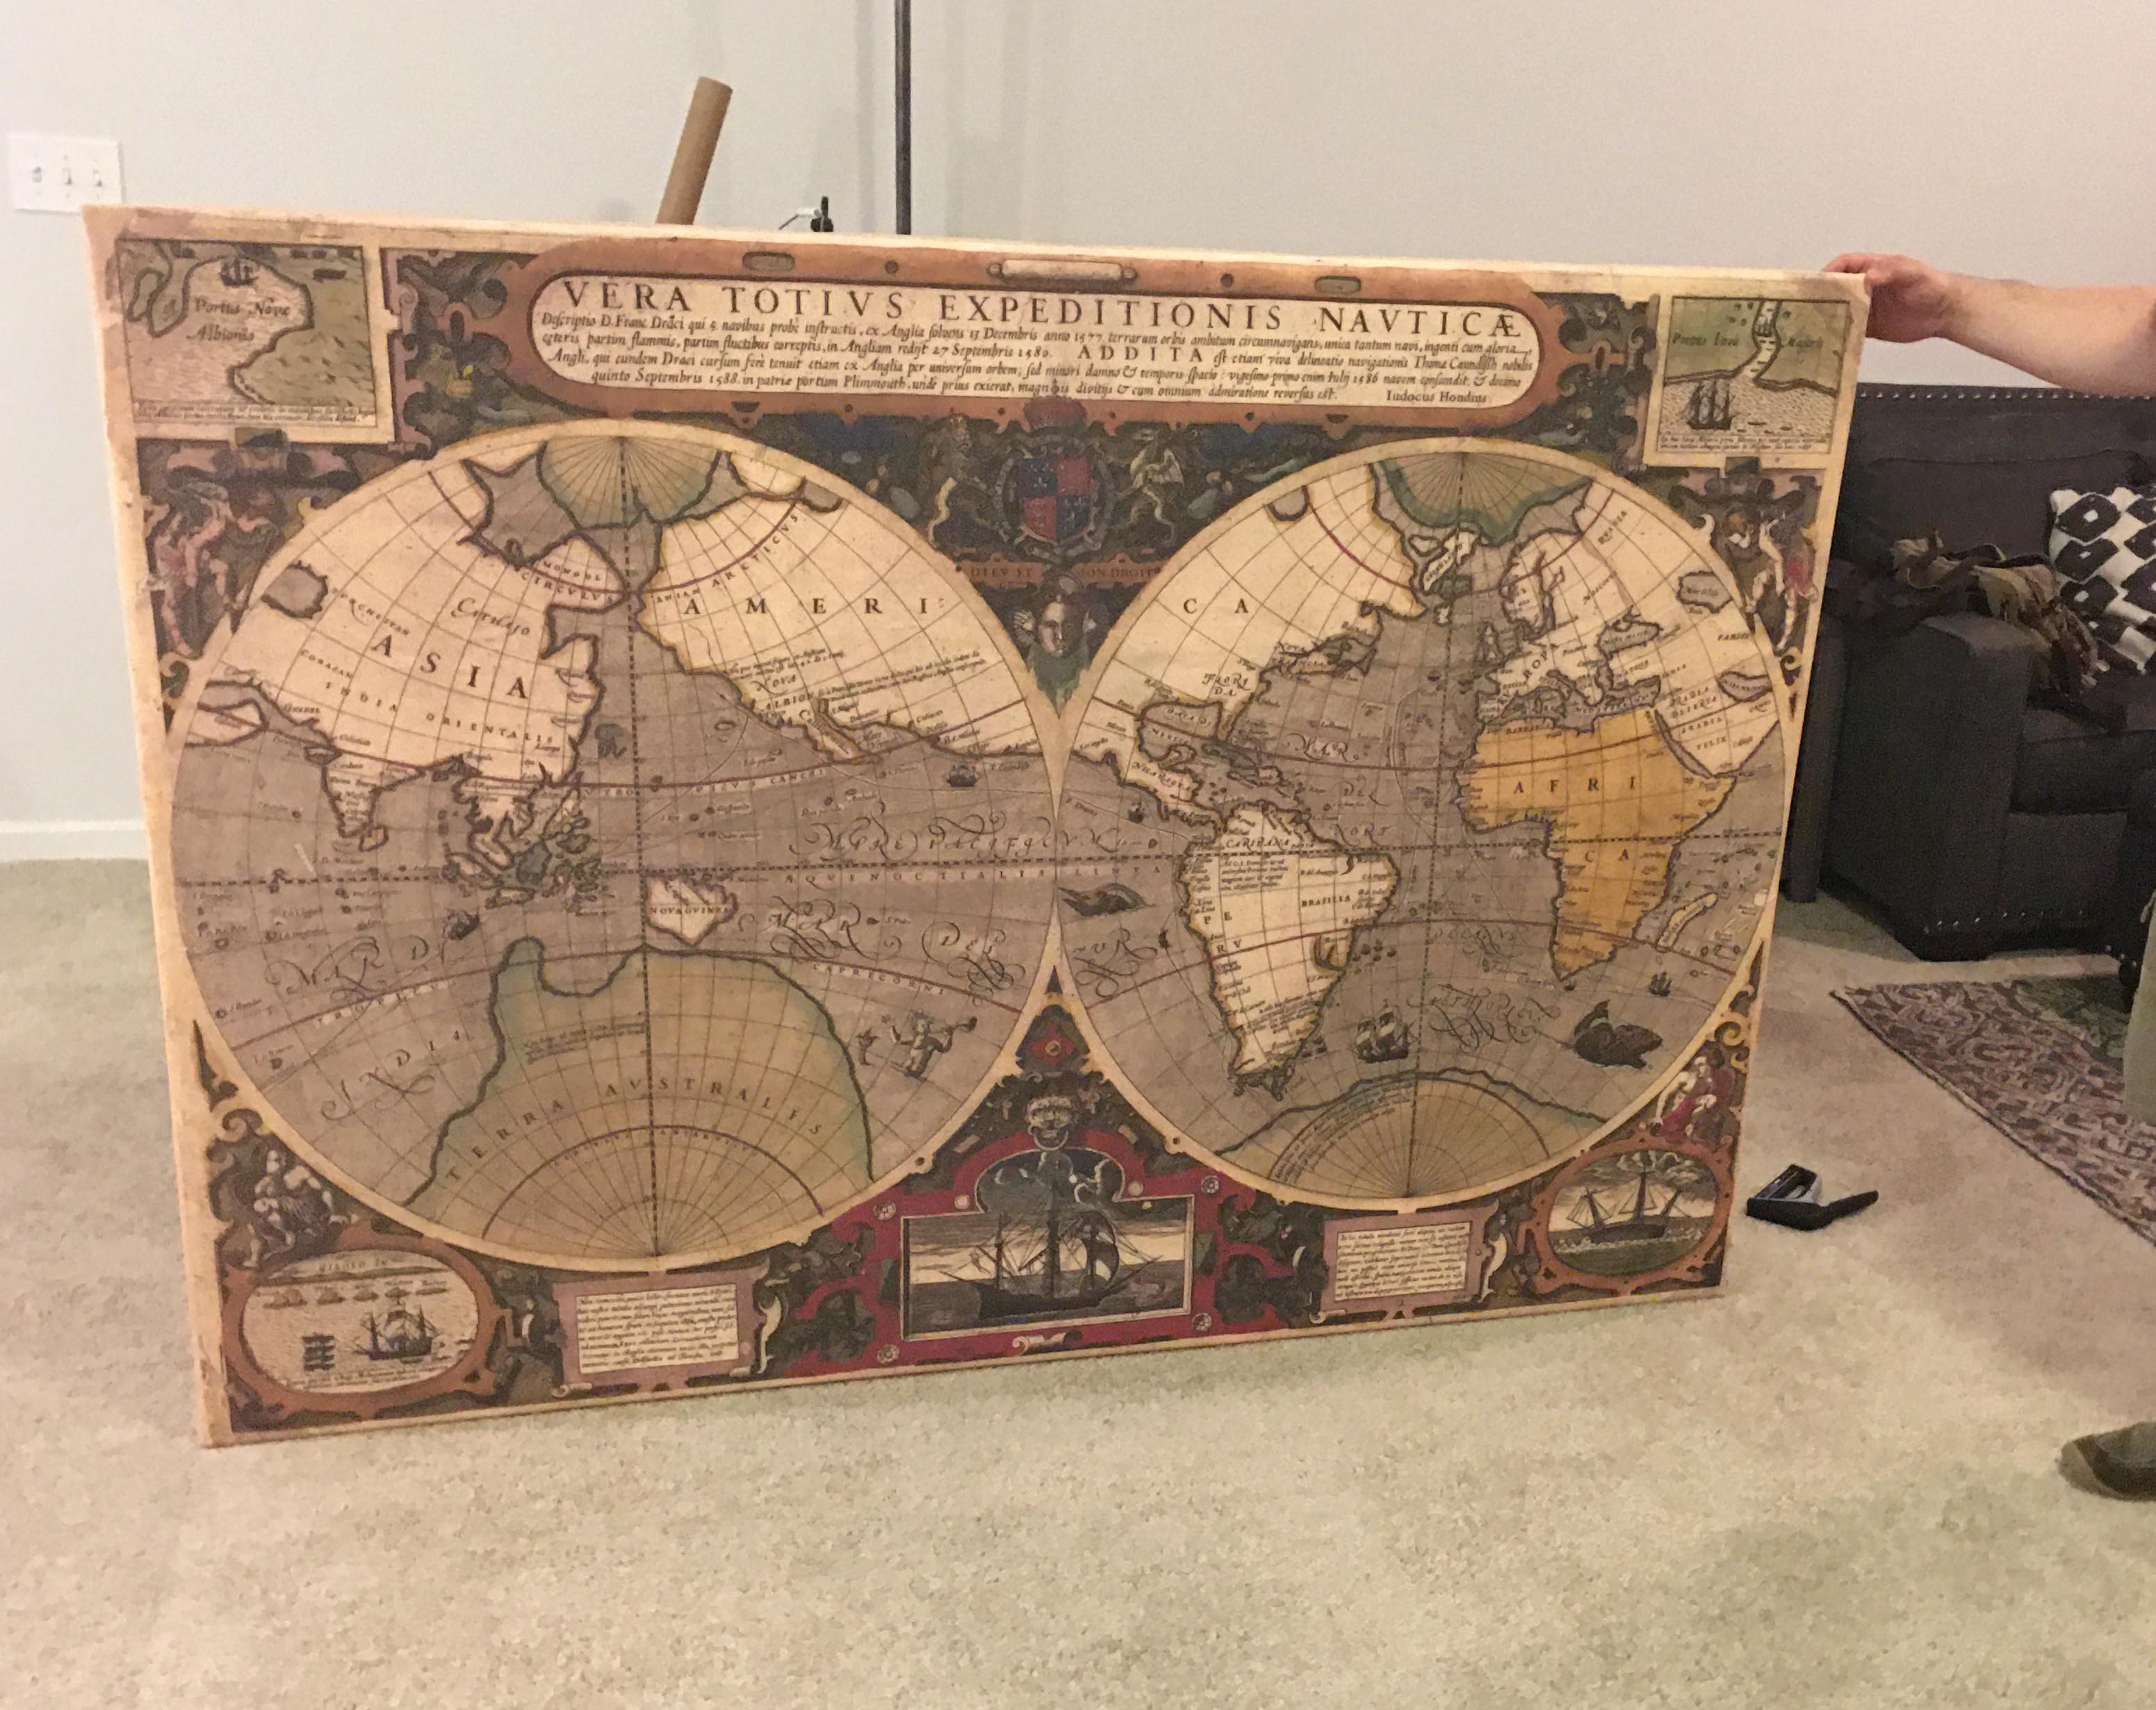
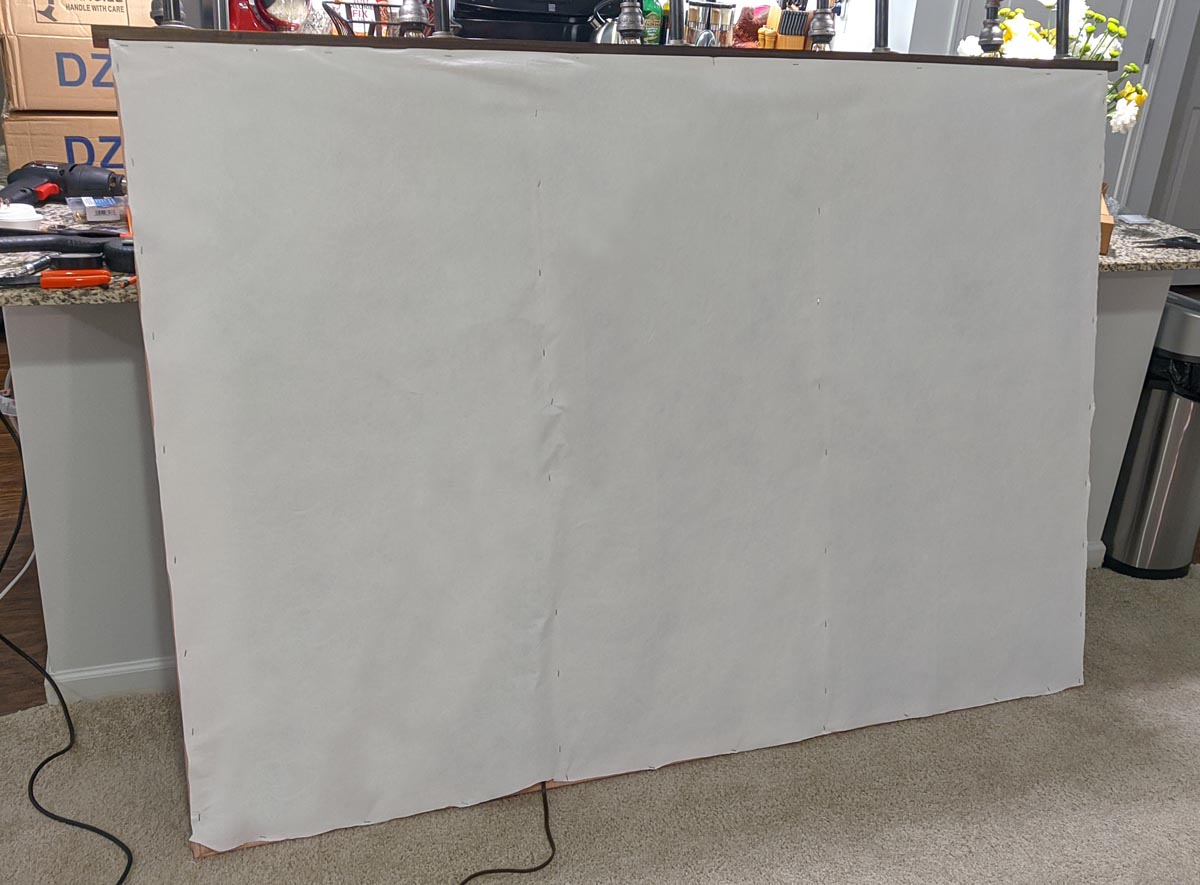
This design is an old map that was printed on a lightweight, polyester fabric banner material. This one is roughly 4′ x 6′ with extra material around the edge to wrap it around the back of the frame. It’s best to have your starting fabric oversize – the graphics sized to the frame, with a boarder wide enough to wrap to the back for fastening. (In this case we will simply staple it to the back of the frame.)

This is the printed fabric material that will be the face of the absorber.
Lay out the material and attach it to the frame. Be careful when putting the frame on the material. Take care in lining up the graphic to the frame, and keep an eye out for wrinkles and folds.

Put the face material face down.

Lay the frame onto the fabric, wrap the fabric to the back, and staple it to the frame.

Make the corners as neat as you can. Don’t spend too much time, this will be covered.
Fastening doesn’t need to be perfect on the back, but you do want it to be secure. Trim up the excess material if needed, and then flip it around and see what it looks like.
Now that you’ve attached it to the frame, let’s focus on the lights!
You could just fill it with the material and hang it like this if you didn’t want the lights, but this project is going the extra mile! We will attach a board to the top of the frame and attach the lights to that. This board will support the lights as well as the the frame. The hanging straps and rings will be attached to this as well, so don’t select a board that is too thin or flimsy.

Clamp a piece of wood to the top, like a mantle, and screw it to the frame.
How you mount the lights to the board and run the wires will be different if you are using different fixtures. This was made with 5 custom, black-pipe fixtures, that are basically just a flange, two 90° elbows, some pipe, and a lamp fixture mounted in a 1 1/4″ pipe reducer/coupler. Wire was stranded lamp wire (black and white), and it was left long to assist routing the wiring inside the panel.
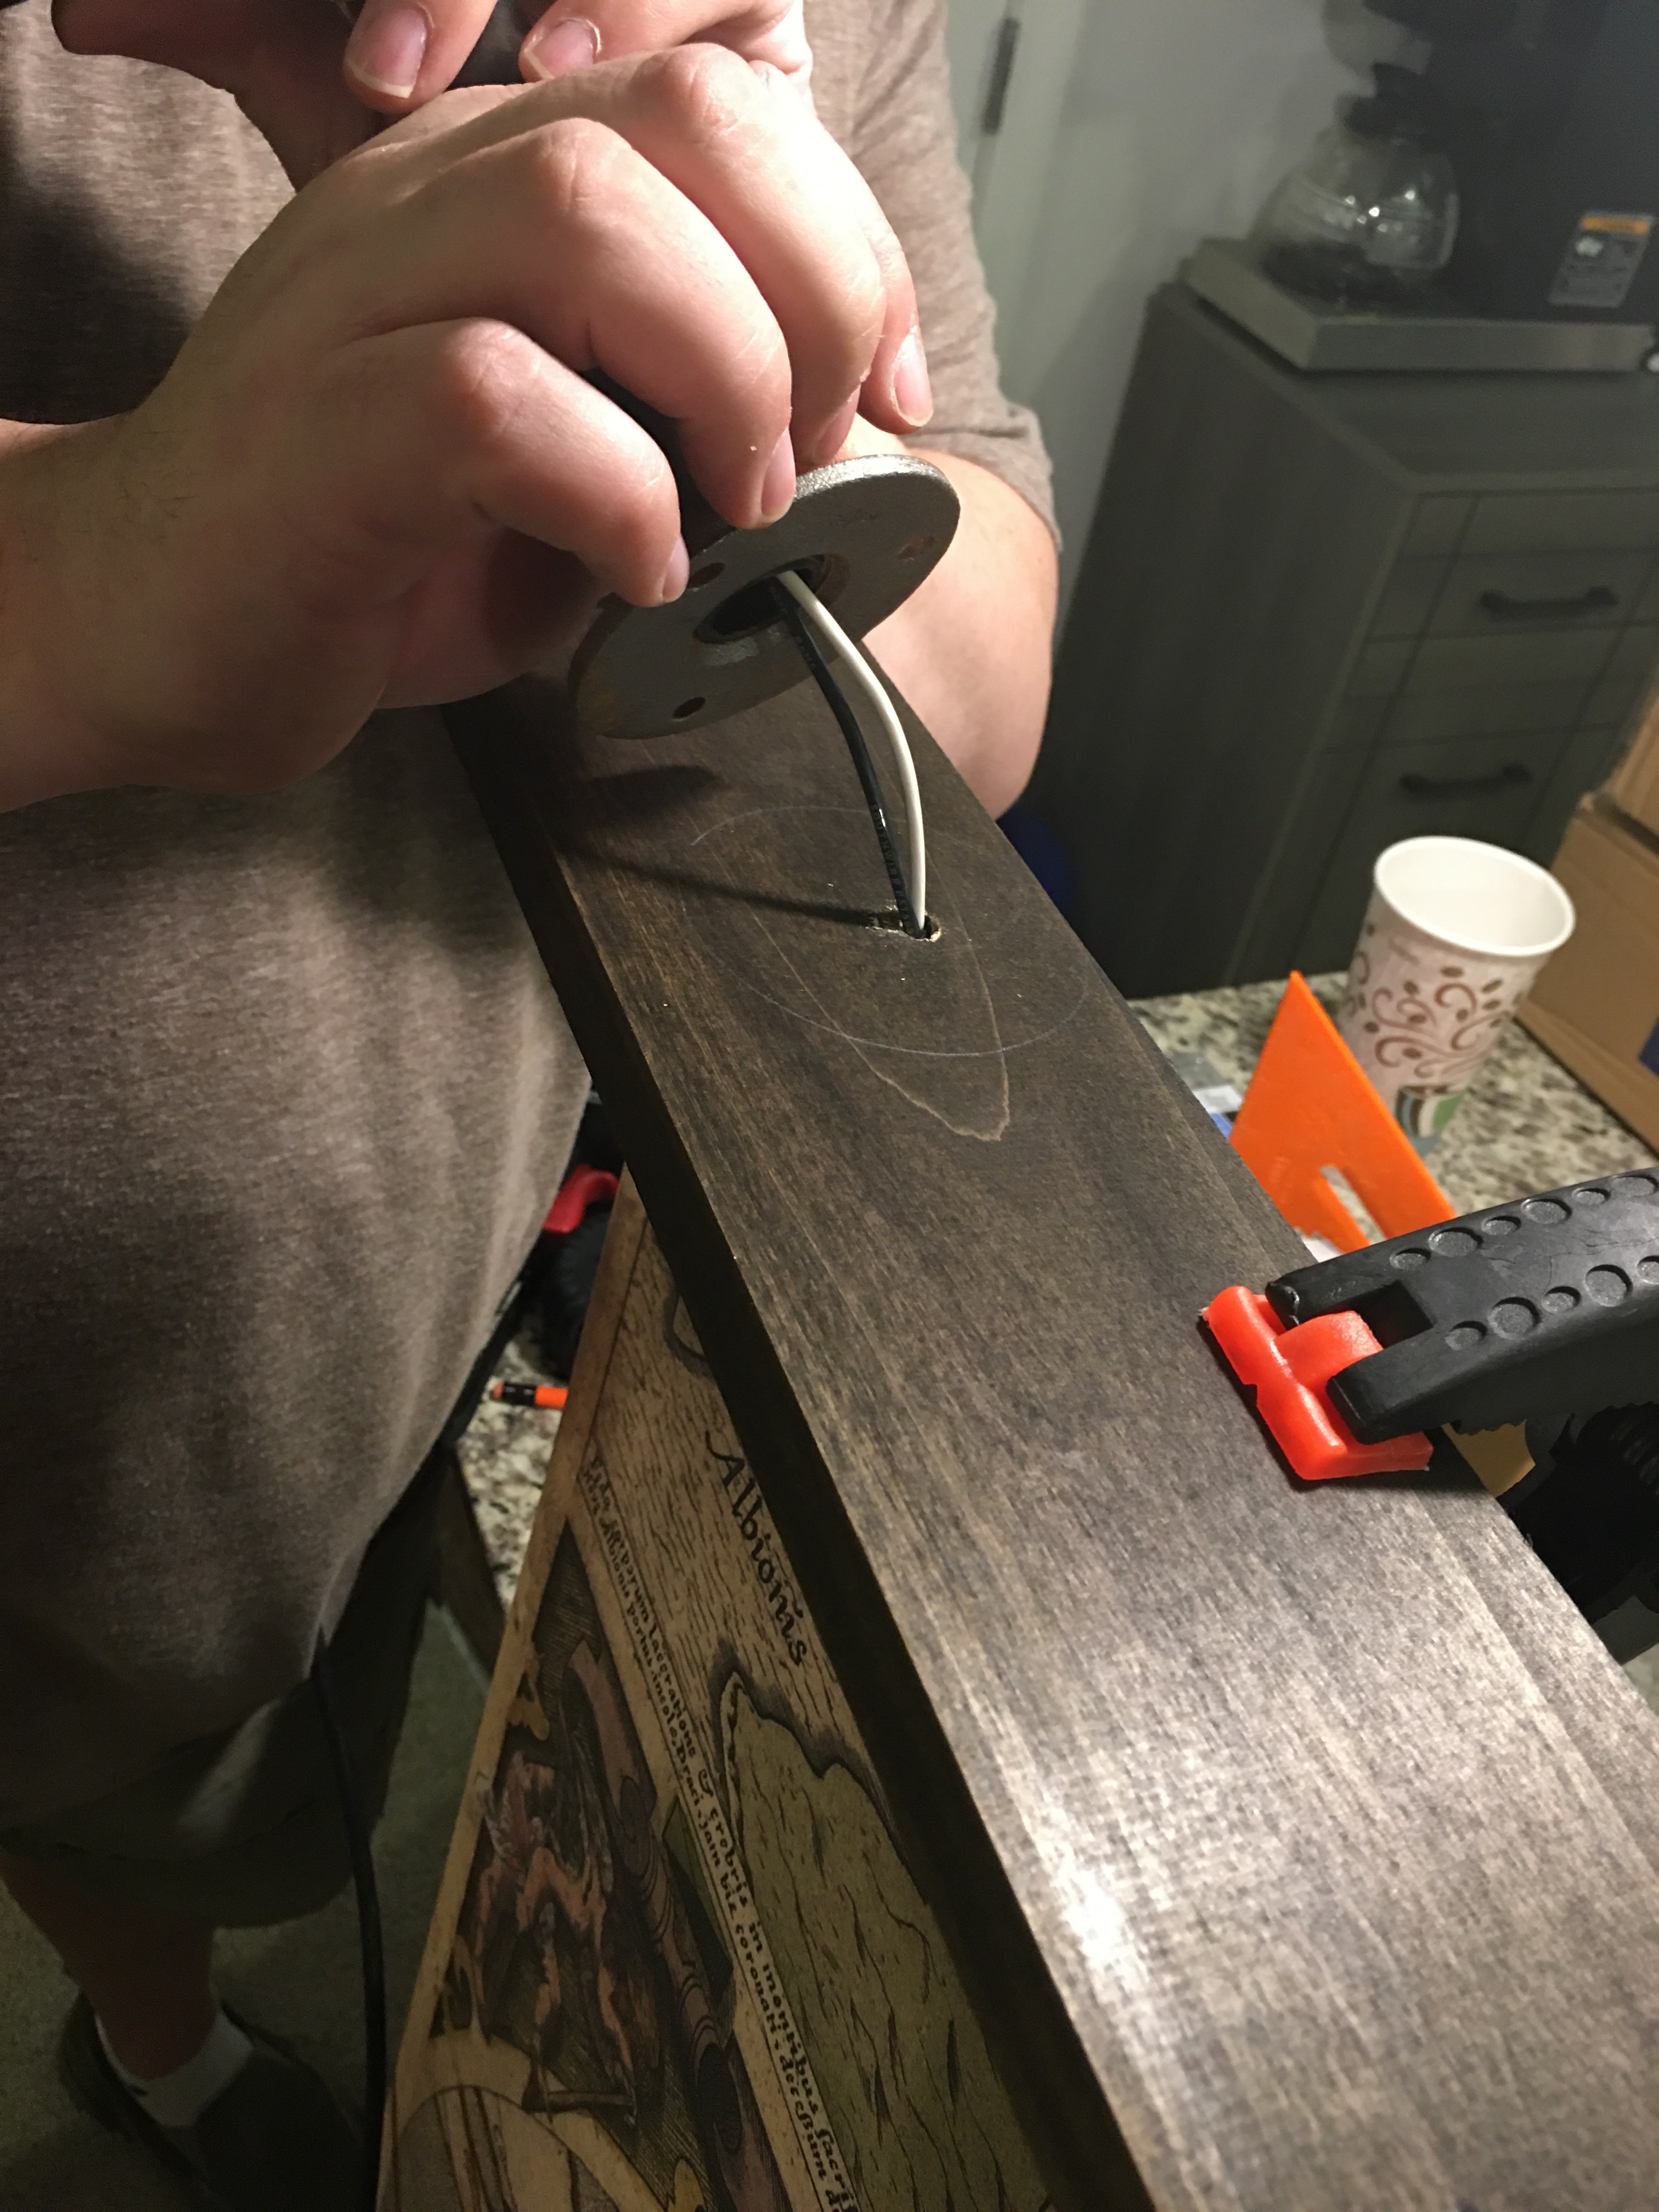
Mark the fixture location and drill a hole for the wire. Run the wire through the hole.
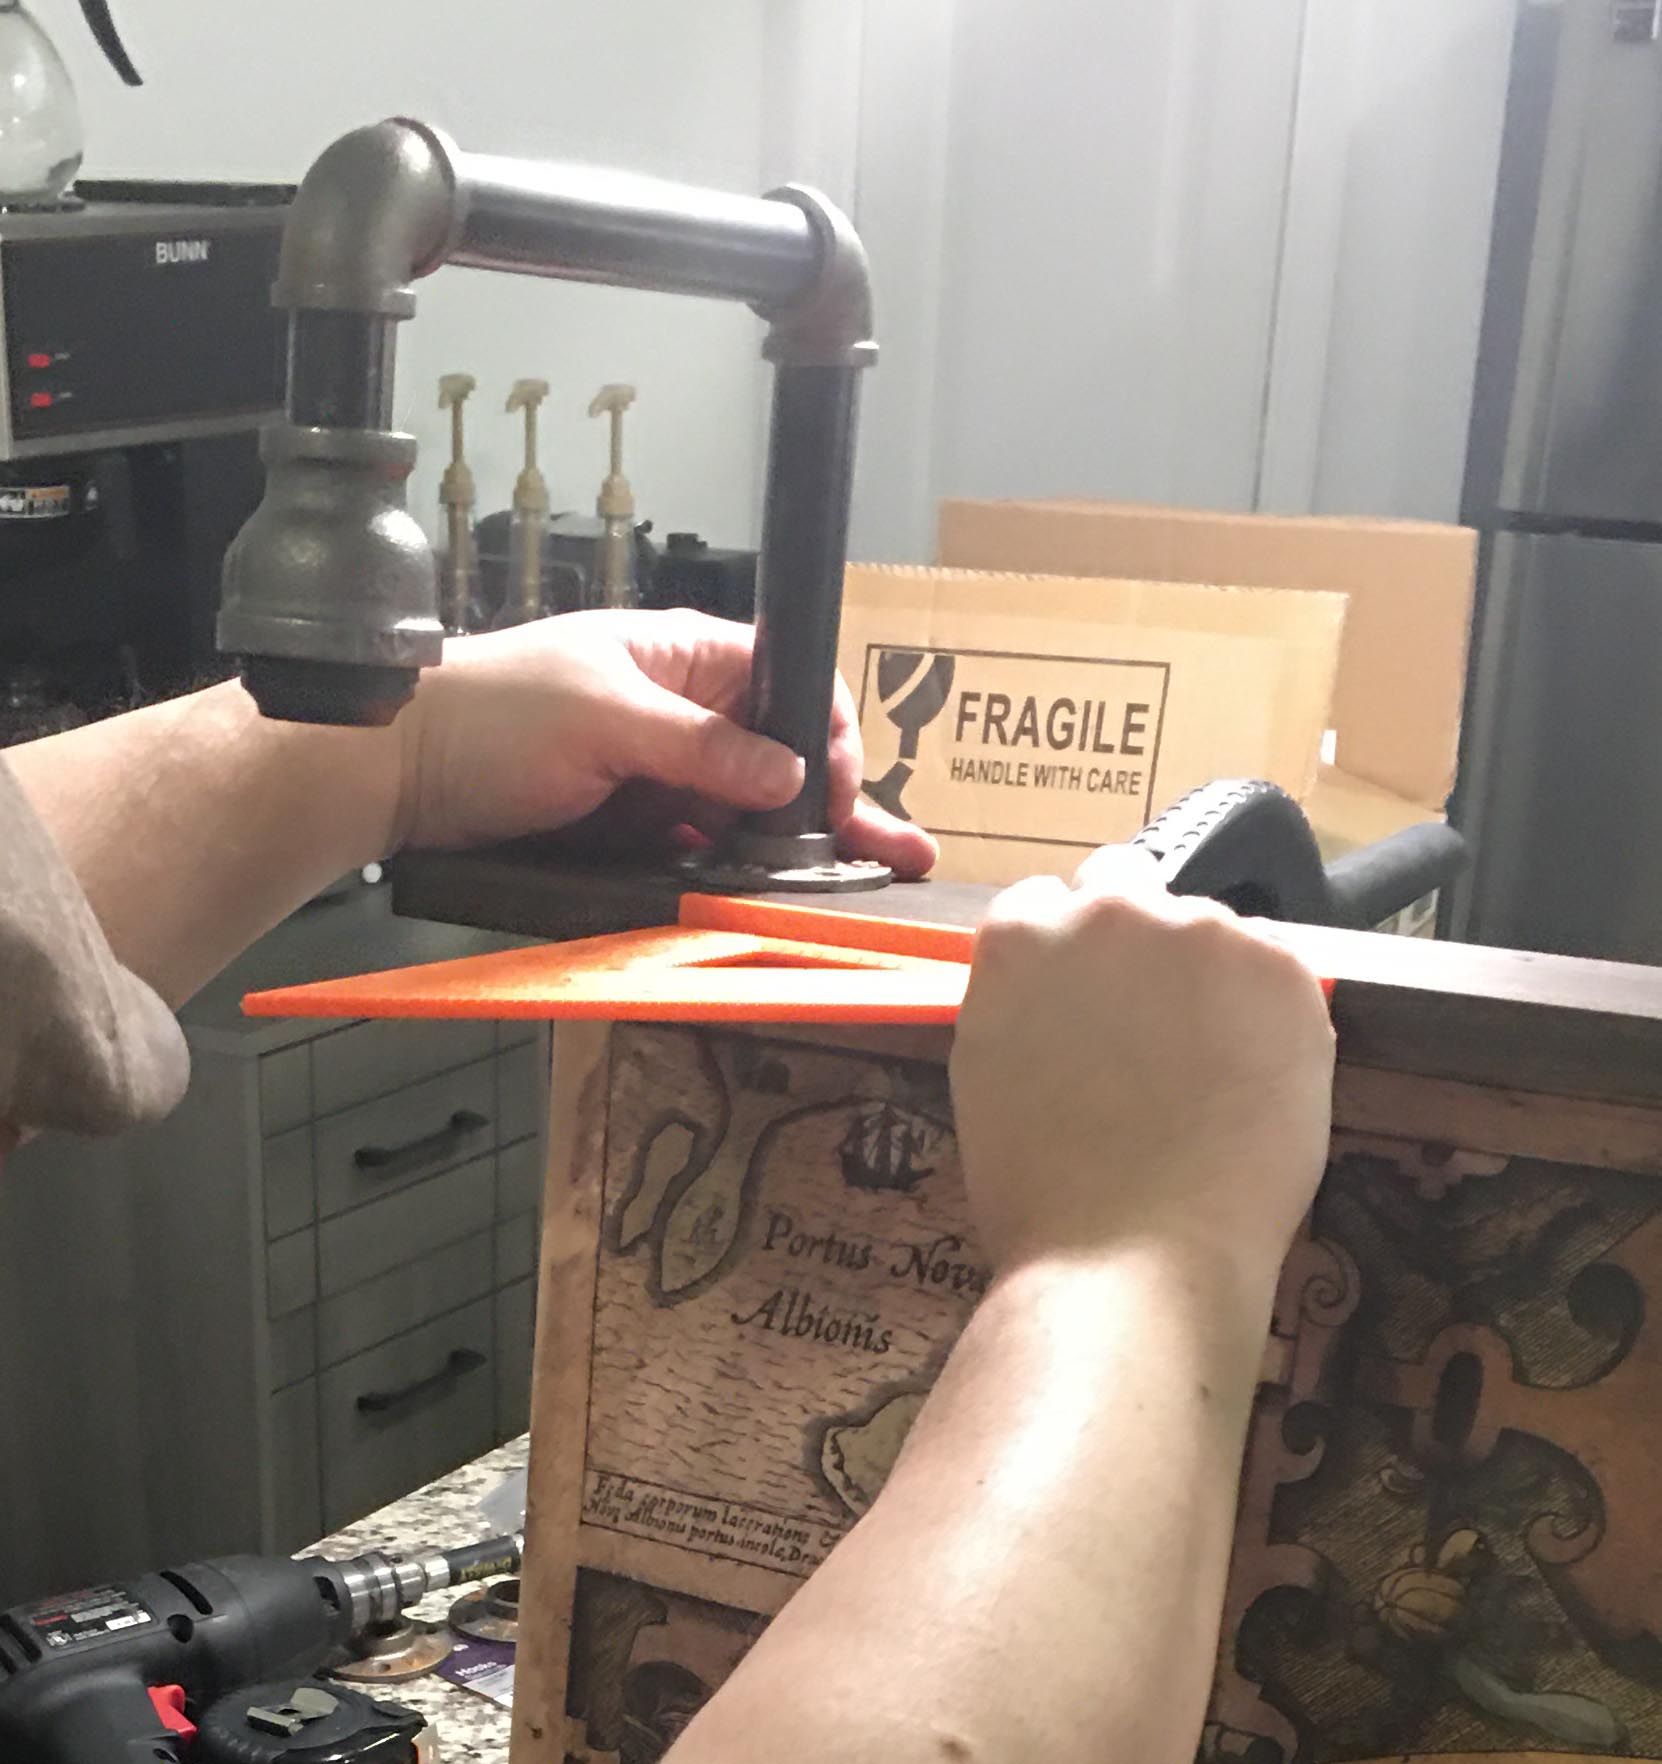
Orient the fixture and attach.
The flange on these lights had 3 screw holes. Some washers and wood screws were used to attach them to the frame. The remaining fixtures were then measured and mounted – paying close attention to keeping consistent spacing and orientation of the lamps.
Note: This will vary depending on the type and number of lamps you use.

Measure for the next fixture and repeat until all the fixtures are installed.
Now that we have all the fixtures mounted, let’s finish the wiring and put in the material!
(WARNING: If you are not comfortable with wiring – this is the point where you call in a friend, electrician, Wikipedia, or whatever other resource you use to make sure you don’t electrocute yourself, burn down the house, etc. Acoustics First assumes no responsibility for your DIY projects – but we wish you good luck!)

Flip the panel around to get at the wiring… hopefully you remembered to use long pieces!

Using wire nuts and electrical tape, wire all the black wires together and all the white wires together.
This wiring was all attached to a lamp cord that had a pre-molded plug, and readily recognizable hot (black) and neutral (white) wires. This entire fixture is being controlled by a smart outlet (“Alexa… Turn on the Awesome World Map.”), but could just as easily be hard wired to a junction box, or wired with an inline switch.
This is a good opportunity to test the lights and wiring, before installing the acoustic material and covering the back.
Now we can insert the acoustic material. Sonora® Black Scrim Ceiling tiles are easily trimmed to fit with a sharp knife. They are fiberglass! So… wear gloves minimize exposure to the fibers.

Test the lights then insert the acoustic material into the frame (Sonora® Black Scrim ceiling tiles) and organize your wires.
Covering the back of the panel will keep the Sonora® tiles in place, and keep any stray fibers from escaping. This will also make the panel easier to move in the future – without worrying about the tiles falling out or snagging on the wires.
Trim the excess off. It doesn’t need to be pretty back here, remember this will be up against the wall.

Cover the back of the panel with material and staple it into place.

Spin the map around…

…and enjoy the glow…
The hardware used to hang the panel will depend on a few different factors – wall construction, stud availability, final panel weight, etc. Make sure you use appropriate hardware for your environment. In this case the final panel weighed less than 30 lbs, and the decision was made to use drywall anchor hooks and industrial hanging eye loops.

Making sure the panel is level, and hang it on the wall! Then, sit back and enjoy the great looks and improved acoustics!
Now is a great time to get up and do some creative home improvement projects! Improve the acoustics of your home theater, living room, or home office… and have a cool new focal point for your space.
Improving your room’s acoustic system.
Posted by Acoustics First in Absorption, Articles, Company Information, Diffusion, DIY, Mentions, Multipurpose Rooms, Uncategorized, Worship Facilities on October 25, 2019
When RPN magazine needed an article to teach readers how to improve their room acoustics, they turned to Acoustics First® to get the scoop.
Read the Article:

Download (PDF)
or
Use online reader
or
Just keep reading!

Learn About
YOUR ROOM’S ACOUSTIC SYSTEM – and How to Improve It
Ever wonder why some rooms sound better than others? What components contribute to
perception of sound in a space? What knowledge do you need to solve the sound problems that
you have?
The System
When people read the heading “The System,” there will be a great number who assume I am
talking about the “sound system” in a room – the speakers, amplifiers, signal processors, and
other electronic components that generally produce sound in a space. This is only part of the
acoustic system that creates the soundscape we hear when we are exposed to sound in a space.
Yes, sound comes out of speakers, and they are important, but the source of sound isn’t what
gives us a perception of the space we are in – it’s the space itself!
The walls, ceiling, floors, seats, sculptures, drapes, artwork, construction, and even people in the
space are all contributing to how we perceive that sound source in any given acoustic
environment. I’m not saying that the speakers aren’t important – but they are just the source of
sound.
If you have a room with a 5-second reverb time, it doesn’t matter what type of speakers you
have, any sound they make is going to continue to be heard for five seconds – as is every sound
afterward.
What does this mean? Even if you have the best speakers in the world in that room, it will sound
terrible (unless you are listening to Gregorian Chants…then it will sound awesome.)
However, if someone is speaking at a normal rate of speed, it will be unintelligible after the first 2
or 3 words – as those words will continue to bounce around with the sound of the next 15
words…like listening to 15 people all saying different things at the same time.
Your room is an acoustic system – from the sound source, to the ears of the listeners – as well as
everything in, around, and even outside of that room.
The Acoustician
Have you ever watched an acoustical consultant begin the analysis of a new space? It’s
fascinating. You will undoubtedly see them walking around the room while making noises –
clapping their hands, snapping their fingers, whistling, even talking loudly, shouting, and singing.
It’s as if they are bats using different sounds to figure out the characteristics of the room they are
in. They are, in fact, analyzing the room’s acoustic system. Where does sound reflect? Are there
echoes or flutter? What is the character of the reverb? They look at the structure, materials,
corners, architectural elements, floors, carpets, walls, windows, doors, ceilings and more.
Note: They begin this analysis WITHOUT using the speakers.
Why? If the room is bad, your speakers will not fix it.
What are they doing? They are listening. That’s it. Nothing fancy here – just listening.
I will say that many acousticians have done this so many times, in so many different spaces, that
they have an idea of what the room is going to sound like, without even making a peep – just by
looking at it. What are they looking for? What are they listening to? What can you learn from this?
Time to Listen
Everyone has a room where they dislike the acoustics. Go in there. Clap your hands. What
happened? Clap again. Snap your fingers. Make some noise – but make sure to listen. Where is
the sound coming from? Turn around, clap again. Walk to another area…clap.
As you walk around, you will hear the sound change. Turn your head. Is the sound coming from
the corner, the ceiling, both? Angle your ears in between two corners. Maybe that’s where it’s
coming from. Is there a large open balcony or a curved wall? Ask yourself these questions as you
walk around and listen.
Are any of the surfaces hard? What about the floor? Is the sound lingering over your head up in
the ceiling? Is there a defined slap off the back wall when you clap your hands? Is there a ringing
noise? Does the echo wash over you and linger?
Sharpen your listening skills. Map the room with your ears.
What Are You Doing in the Room?
This is an important question. For most uses involving speaking and understanding speech, there
are some good general targets. For example, for most rooms over 100m3 (15’ cube), a 0.8 to 1.7
second reverb time is ideal for many different functions.
However, keep in mind, some spaces may have special reverb requirements. If you’re doing
Gregorian Chants, a three to five second reverb time is still great!
Now, How Do You Fix It?
Most rooms are going to benefit from reducing the acoustic energy in the space. Absorption is
the most direct and easy to understand method – add soft stuff.
This sounds overly simple, but the initial experiments on calculating absorption were done by
moving around seat cushions – simple, but effective.
Fabric-wrapped absorber panels are today’s high-tech equivalent to the seat cushions. Curtains,
blankets, carpets, and other soft materials will also help to reduce the acoustic energy of a space.
Treatments like diffusers help to reduce focused acoustic reflections by spreading the energy
around. When sound hits a surface that is not flat, it will cover the entire surface, bending
around the corners and curves, and then bounces off in different directions.
This reduces what we refer to as ‘specular’ reflections – or direct, mirror reflections – which are
responsible for slap echoes, ringing, and flutter.
However, some hard, reflective surfaces in the front of the room can be beneficial to help
reinforce acoustic sound sources, like speaking, singing, or acoustic instruments.
Treating corners with bass traps can help to reduce bass buildup, as well as corner reflections,
which can cause other clarity issues within the listening environment.
Don’t forget…look to the ceiling for rafters and other elements that cause sound to bounce
around and put some absorption up there.
The Legato®! Super-Customizable Sound Diffuser
Posted by Acoustics First in Deals, Diffusion, DIY, Products, Uncategorized on April 1, 2019
Acoustics First® is pleased to announce the super-customizable Legato® sound diffuser!

The Super-Customizable Legato® Sound Diffuser.
Configuring the Legato® Sound Diffuser for your specific listening environment is so easy… anyone can become a “Legato® Master!” With over 41 different acoustic configurations for the Legato®, you can block out the frequencies you need, within seconds!

Legato® in a Binary Array Configuration!
Create countless different sound diffusers and devices from one modular kit – quadratic, binary array, phase graters, Helmholtz resonators and MORE!

Ages 4-99. Only in Yellow. Not Fire Rated. Ideas included.
Buy your Legato® Sound Diffuser Kit today – and become the “Legato® Master” of your sound!
Only available on April Fool’s Day for those with a sense of humor. Not affiliated or endorsed by Lego®.
Bonus Room to Project Studio! Nick Lane Mastering
Posted by Acoustics First in Absorption, Customer Feedback, Diffusion, DIY, Recording Studio on February 23, 2017
Nick Lane, an independent audio engineer whose credits include Rascal Flatts and Reba McEntire, contacted Acoustics First® seeking help with his project studio. This process would convert the bonus room in his house (a second floor space above his garage) into a Project Studio.
After receiving some measurements and photos, we went to work designing a layout for the space.
 |
 |
Placement of panels and ceiling clouds were optimized to reduce early reflections and trap bass, and a combination of Model D’s and C’S were used to widen the “sweet spot” of his room.

“Sounds really good!….. High end is sooo much less harsh…… walking around the room, the low-end doesn’t disappear in places anymore” – Nick Lane

StratiQuilt™ Before and After – Graveyard Carz!
Posted by Acoustics First in Absorption, Construction Sites, Customer Feedback, DIY, Industrial Facilities, Product Applications, Products, Sound proofing, Uncategorized, Video on January 18, 2017
![]() For our first post of 2017, we thought we’d share this video produced by our friends at Graveyard Carz! When the reality show had noise issues with their compressors while filming, they solved the problem by using Stratiquilt™ Acoustic Blankets from Acoustics First®. This video shows a before and after comparison and is a great example of the practical application of these industrial sound control blankets.
For our first post of 2017, we thought we’d share this video produced by our friends at Graveyard Carz! When the reality show had noise issues with their compressors while filming, they solved the problem by using Stratiquilt™ Acoustic Blankets from Acoustics First®. This video shows a before and after comparison and is a great example of the practical application of these industrial sound control blankets.
Enjoy!
StratiQuilt™ Before and After – Graveyard Carz! from Acoustics First®.

You must be logged in to post a comment.