Archive for category Animal Shelters
DIY – Treating a Wall – BlockAid® and SoundChannels®
Posted by Acoustics First in Absorption, Animal Shelters, Auditorium, Broadcast Facilities, Classrooms, DIY, Fitness, Government, Gymnasium, Home Entertainment, Home Theater, HOW TO, Media Room, Multipurpose Rooms, Music Rehearsal Spaces, Music Tracking Room, Product Applications, Recording Facilities, Recording Studio, School & Educational Facilities, Sound proofing, Studio Control Room, Teaching Rooms, Teleconferencing, Theater, Uncategorized, Vocal Booth, Voice Over on July 16, 2015
![]() On many occasions, we get asked about common ways to treat a wall (or walls) either for broadcast, podcast, or other voice recording scenario – where they not only want to tame the reflections within the room, but also block a certain amount of sound coming into – or leaving the room.
On many occasions, we get asked about common ways to treat a wall (or walls) either for broadcast, podcast, or other voice recording scenario – where they not only want to tame the reflections within the room, but also block a certain amount of sound coming into – or leaving the room.
Budget is frequently an issue, major construction is usually unwanted, but effective results are always required.
We’re going to show you how to handle a room upgrade – cut down on the sound transmission and cut the room reflections – all with the same skills required to hang high quality wall coverings! Let’s see how you can cover a wall with BlockAid® vinyl sound barrier to block unwanted sound, then go back and cover that with an absorptive layer of Sound Channels® wall covering to finish it off!
This treatment is not recommended for renters, as this is not an easy upgrade to undo. However, if you have an extra bedroom you are using as Podcast studio, this is a great way to treat it… Let’s get started!
Installing BlockAid®
 1. Measure the wall for the first panel length. Mark the panel width on the wall. |
 2. Measure and Mark the length of the wall on the BlockAid® |
 3. Use a straightedge and a razor to cut the BlockAid®. |
 4. Using a trowel, apply vinyl tread adhesive to the wall, covering the whole area where the first panel is going. (You marked the wall right?) |
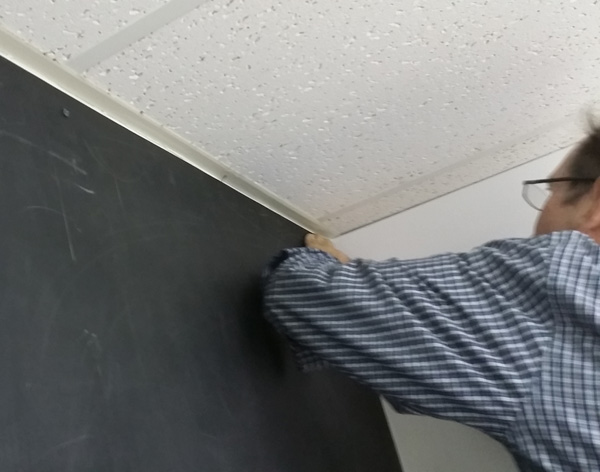 5. Hang the panel starting at the top, install a few screws to hold it in place while the adhesive sets. (You will probably need a friend to help, as BlockAid® is a pound per square foot!) |
 6. Using your hands and a putty knife, smooth out all the air bubbles from behind the BlockAid® so that you get a good bond when the adhesive cures. |
 7. Repeat the steps for the next strip. Measure, Mark, Cut, Trowl, Hang… |
 8. Make sure you line up those seams! push them right up agaist each other. Smooth out the air bubbles, cut out any outles, trim any extra… Let dry! |
Good job! Now, take a breather while that dries, and notice how much less sound is passing through the walls. This is when you will notice that the sounds are now coming from under the door, and through the leaky old window. These can be taken care of in different ways…. but the easiest way is the same way you deal with keeping the cold out! Get some weather strip, a door skirt, seal the gaps around the frame of the door, and windows, maybe go out and buy some heavy curtains for the windows… if you have some leftover BlockAid®, you can always get some Industrial Velcro and temporarily stick a piece over the window!
Installing Sound Channels®
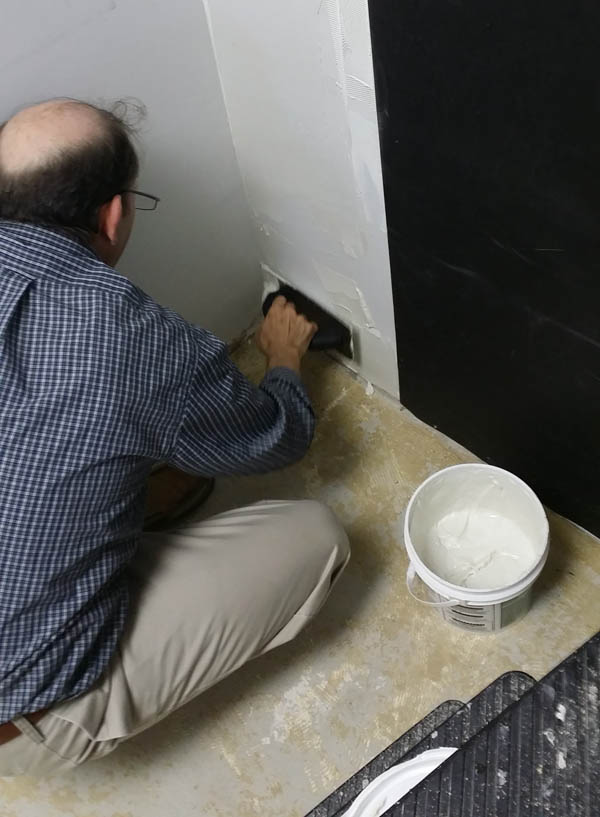
 1. Remove the Screws from the BLockAid® – if you didn’t already… then same as BlockAid®, measure the wall, mark it, measure and cut a piece of Sound Channels® and start troweling on the Chapco! |
 2. Well, when you get tired, make your friend finish troweling out the adhesive to cover where the panel is going. (You are going to overlap the seams.) |
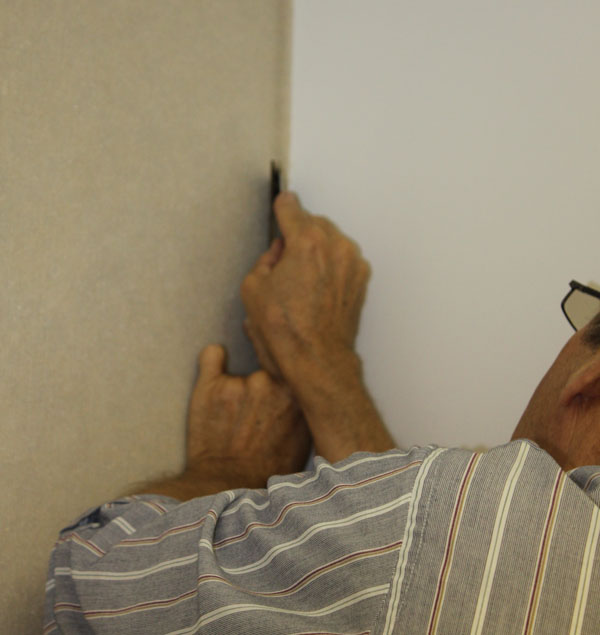
 3. Starting at the top, hang the Sound Channels® overlapping the seam of the BlockAid® under it. Smooth out the air bubbles with your hands. Make sure it lines up well. No screws needed! |
 4. Measure and cut the next strip, carefully following a rib in the fabric, while your friend, (who is way better at troweling than you are anyway,) preps the next section with adhesive. |
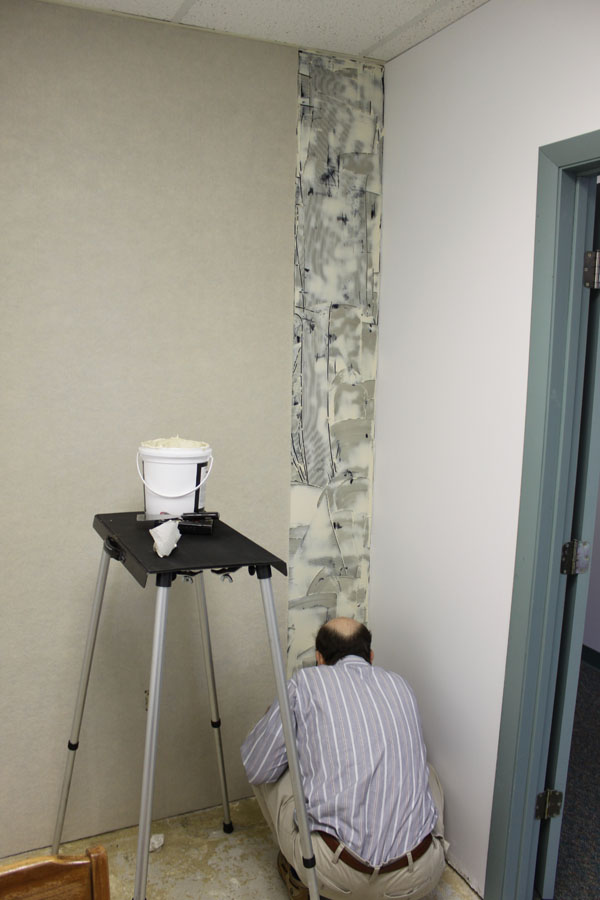
 5. Best practice is to run the fabric in the same direction every time. Not just with the ribs, but in the same direction it comes off the roll. So find the top. |
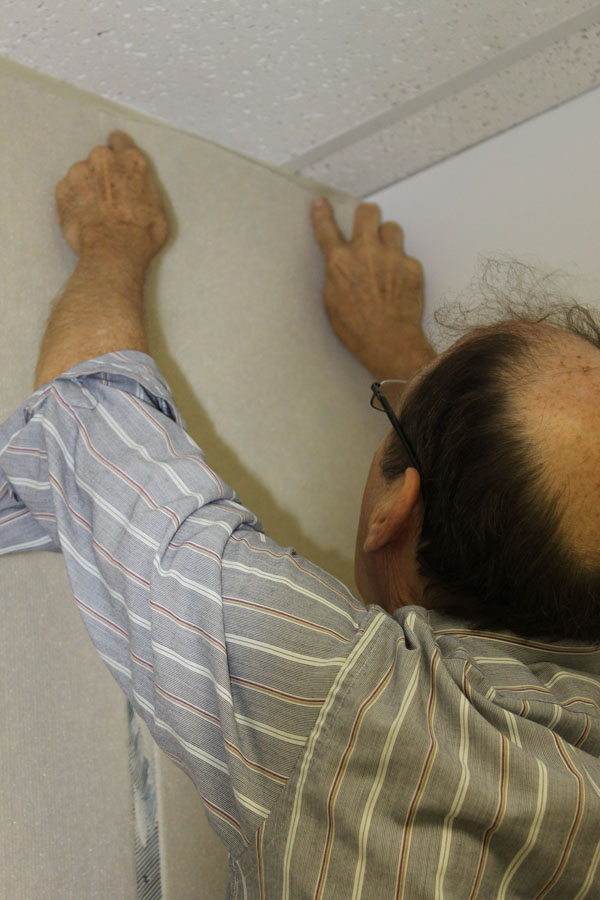 6. After you find the top, start hanging from the top, lining up the seams and smoothing out the bubbles as you go. |
 7. Keep those seams tight as you go. Keep smoothing… almost done! |
 8. Trim up the extra and repeat as many times as needed. |
That’s it!

Don’t forget to trim around those outlets!
This treatment is a common first step in treating many professional broadcast studios – it gives you extra isolation with the barrier and takes the edge of the sound reflections. Many professional environments then go back and add some additional treatments such as bass traps, diffusers, and broadband absorber panels – especially if these studios are planning on bringing in any musical guests.
This isn’t just for home studios. It works great for kids play rooms, bedrooms, home theaters, home gyms, and any place you want to block sound and tame the sound inside the room.
Customize your space as you will, but this treatment is a consistent winner for cost and performance, and is a great way to get started without breaking the bank!
DIY: StratiQuilt™ Room Treatment
Posted by Acoustics First in Absorption, Animal Shelters, Articles, Broadcast Facilities, Construction Sites, DIY, Home Entertainment, Home Theater, HOW TO, Music Rehearsal Spaces, Music Tracking Room, Product Applications, Products, Recording Facilities, Recording Studio, Sound proofing, Studio Control Room, Vocal Booth, Voice Over on June 6, 2013
There are some situations where people are looking for a more temporary (yet still durable and effective) room treatment. Maybe you have a garage, or a practice space, or a place where you are looking for a usable solution that isn’t a permanent installation. Here is a great (not to mention tax deductible) treatment that can address many of the isolation and absorption issues of a space, while remaining durable (Washable), and easy to remove and reuse.

Stuff you need:
- Enough StratiQuilt™ Double-Faced Barrier Blanket to cover all of the wall and ceiling surfaces of the room you need to treat.
- 2”x4” lumber for the edges (Used to attach the barrier to the walls and maintaining an air gap.)
- Short Lag bolts and Washers
- Misc. hardware to attach 2”x4” lumber to walls.
Here’s what you do.
Attach the 2”x4” lumber to the walls with enough spacing to line up the grommets on two overlapped edges of the StratiQuilt™ blankets – if you have purchased the roll, the finished edges are 4 feet wide. Leave enough room to overlap the edges and bolt the quilts to the 2”x4” lumber as shown in the diagram above. Continue around the room, overlapping the edges of the StratiQuilt™ blankets to seal off the room. The blankets can be left loose over doors to allow for entry and egress while maintaining a good acoustic seal.

If desired, continue the process across the ceiling to “lock in” the room acoustics. This treatment may be considered by some to be a little on the “dead” side (High Absorption); however, The benefits of the treatment far outweigh this issue, which can be compensated for by adding a few acoustically reflective surfaces to the room (Drum Kit, Amplifiers, Racks, Diffusers, etc.)
Why use this system?
Other than it being very simple to install, take down and move with minor modifications to the structure, it performs a few vital acoustic tasks – all with one product. The StratiQuilt™ design is two layers of quilted acoustic fiberglass with a layer of BlockAid® barrier in the middle. The BlockAid® help the soundproofing of the room by it’s STC of 29, which will add significant isolation to the room. Mounting on the 2”x4” lumber is not just done for ease – adding the air gap behind the barrier increases both its STC and NRC allowing it to work as a limp mass barrier/absorber. The material absorbs on both sides (being double-faced), forcing in-room reflections to be attenuated immensely through the many layers of material it must pass through.
And on a final note, this economical start-up solution has the benefit of not being a “Building Material” for tax purposes, allowing for its immediate deduction as an expense.
Record your garage band without sounding like you’re in a garage, Try StratiQuilt™.
This simple DIY project is provided as a way for our customers to learn better ways to use our products and get more value out of the products they buy. If you are looking for more ways to use the products you have, look to Acoustics First for Ideas. http://www.acousticsfirst.com
————————————————————————————————————————————————————————————
Acoustics First Corporation supplies acoustical panels and soundproofing materials to control sound and eliminate noise in commercial, residential, government, and institutional applications worldwide. Products include the patented Art Diffusor®, sound absorbers, noise barriers, acoustical fabrics and accessories. Acoustics First® products are sold for O.E.M applications, direct, and through dealers. For more information on acoustical materials and their application, please visit www.AcousticsFirst.com or call Toll Free 1-888-765-2900 (US & Canada).
Baffled by Acoustical Ceiling Treatments?
Posted by Acoustics First in Animal Shelters, Art Galleries, Auditorium, Construction Sites, Fitness, Gymnasium, Industrial Facilities, Multipurpose Rooms, Museums, Press Release, Products, Restaurants, School & Educational Facilities, Theater, Universities, Worship Facilities on June 7, 2012
 4'x2' x 1.5\"")
Cloudscape Ceiling Baffle (CSBF15P) 4’x2′ x 1.5″
Acoustics First® adds more ways to get ‘Baffled’ and improve large room acoustics.
Acoustics First® has ‘amped up’ the Cloudscape® line of ceiling baffles. These acoustical baffles reduce reverberation in applications such as gymnasiums, auditoriums, performance venues, theaters and restaurants. They can be suspended from open truss and pre-engineered suspension systems or alternatively mounted direct to a roof deck or wall. In addition to the standard 4’x2′ x1.5″ PVC encapsulated ‘echo-nomical’ baffle, Acoustics First® has expanded the selection to include three alternate finishes. If you wish to upgrade the size of the standard PVC Cloudscape® Ceiling Baffle, we now have a 2″ thick option available in sizes up to 4’x10′, with some limitations. If you wish to upgrade the finish, you can choose the durable rip-stop nylon sailcloth, product code CSBF2S with 9 color choices. If sailcloth doesn’t ‘float your boat’, choose the fabric encapsulated Cloudscape® Baffle. The CSBF2F is encapsulated in a sewn Guilford of Maine® FR701® fabric and will coordinate with the Sonora® ridgid acoustical wall panels. The acoustical ceiling baffles are extended even further with an offering of exterior grade fabric for outdoor applications. Overall, you now have 4 choices of baffle configurations, more sizes and 96 finish options. Additionally, all the 2″ thick options use environmentally friendly Ecose® glass fiber. For more information or to receive a quotation, please contact Acoustics First® via email, info@acousticsfirst.com, or call Toll Free 1-888-765-2900 (US & Canada).
 Sailcloth Finish")
Cloudscape Ceiling Baffle (CSBF2S) Sailcloth
 Fabric")
Cloudscape Ceiling Baffle (CSBF2F) Fabric

You must be logged in to post a comment.