Archive for category Theater
Demystifying Acoustic Data: Part 2 – Test Material Mounting
Posted by Acoustics First in Absorption, Home Entertainment, Home Theater, Products, Recording Facilities, Theater on October 13, 2016
For anyone new to the world of acoustics, there is a multitude of terms, coefficients and numbers that are thrown around. This flood of information can seem intimidating, especially to beginners. In this series, acoustician Cameron Girard of Acoustics First® hopes to help you distinguish between what’s useful and what’s not.
Part 2: How Mounting in Testing Affects Sound Absorption Data
As I discussed in my previous article, the best way to compare the performance of sound absorbing panels is by referencing the Sound Absorption Coefficient (SAC) and Noise Reduction Coefficient (NRC). However, these coefficients are often used as marketing tools. Be on the lookout for companies that list absorption coefficients and NRCs without mention of a particular testing standard or mounting method. It’s vital to check for this information, as direct comparisons to competitors and other materials can only be made if their testing procedures are the same.
The sound absorption of a material that covers a flat surface not only depends on the physical qualities of the material but also on how the material is mounted during installation. The mountings specified in laboratory tests are intended to simulate conditions that exist in normal use, such as direct wall mounting and installation into a ceiling grid.

Many materials for treatment of walls or ceiling are tested using what is called Type ”A” mounting. Type ”A” mounting means the test specimen was placed directly on the test surface of the reverberation chamber. Lay-in ceiling tiles, on the other hand, are often tested using ”E400” mounting. The ”E” designates a sealed air space behind the specimen (simulating the air gap between a dropped tile ceiling and the structural ceiling) and the number after the ”E” is the depth of the airspace in millimeters. The airspace behind the acoustic material affects the sound absorption by acting as a bass trap. The deeper the cavity behind the panels is, the lower the fundamental of the “trapped” frequencies will be.

To see what this look like in terms of actual numbers, let’s take a look at how different mounting methods effect the sound absorption coefficients of Acoustics First’s HiPer® Panel (a low-profile, composite absorber/diffuser panel).
Since the HiPer® Panel can be used effectively in multiple applications; we had it tested in accordance to the two most-common mounting procedures, Type E-400 and Type A. The results of the laboratory tests are as follows:
|
Product Info |
Sound Absorption Coefficients |
||||||||
| Product Name | Thickness | Mounting | 125Hz | 250Hz | 500Hz | 1kHz | 2kHz | 4kHz |
NRC |
| 1″ HiPer® Panel | 1″ | E-400 | 0.43 | 0.28 | 0.51 | 0.76 | 0.99 | 1.10 | 0.65 |
| 1″ HiPer® Panel | 1″ | A | 0.09 | 0.28 | 0.78 | 0.75 | 0.94 | 0.85 | 0.70 |
As you can see from the chart, the sound absorption coefficient at 125 Hz varies greatly between E-400 mounting (SAC of .43) and Type-A mounting (SAC of .09). If mounting the HiPer® Panel in a ceiling grid, with a sizable airspace, you can expect significant low-frequency absorption, but mounting it on a wall (Type-A) will result in much less absorption at 125Hz.
Other mounting methods are available, but are not used as frequently. Here are some of the basic mounting designations (See ASTM E795 for more information.)
Type A mounting – Test specimen laid directly against the test surface (wall panel on drywall).
Type B mounting – Test specimen cemented directly against the test surface. Type B mounting is intended to simulate acoustical ceiling tiles or other sound-absorptive products adhered to a hard surface with an adhesive.
Type C Mounting—Test specimen comprising sound-absorptive material behind a perforated, expanded, open facing or other porous material.
Type D Mounting—Test specimen mounted on wood furring strips.
Type E Mounting—Test specimen mounted with an air space behind it (dropped tile ceiling).
As we’ve discussed, acoustical data can vary greatly depending on the mounting method used during testing. Acoustics First tries to include as much information about testing procedures as possible, because we feel an informed client makes the best client.
Contact Acoustics First for your all your sound control needs!
DIY – Back Wall Diffuser Array/Bass Trap: Revisited
Posted by Acoustics First in Absorption, Articles, Broadcast Facilities, Customer Feedback, Diffusion, DIY, Home Entertainment, Home Theater, HOW TO, Media Room, Music Rehearsal Spaces, Music Tracking Room, Product Applications, Recording Facilities, Recording Studio, Studio Control Room, Teleconferencing, Theater, Vocal Booth, Voice Over on July 14, 2016

DIY – Diffuser Array/Bass Trap
 This month we thought we’d share a few Real-Life pictures of an idea we first introduced back in summer of 2013: The “Back Wall Diffuser Array/Bass Trap”.

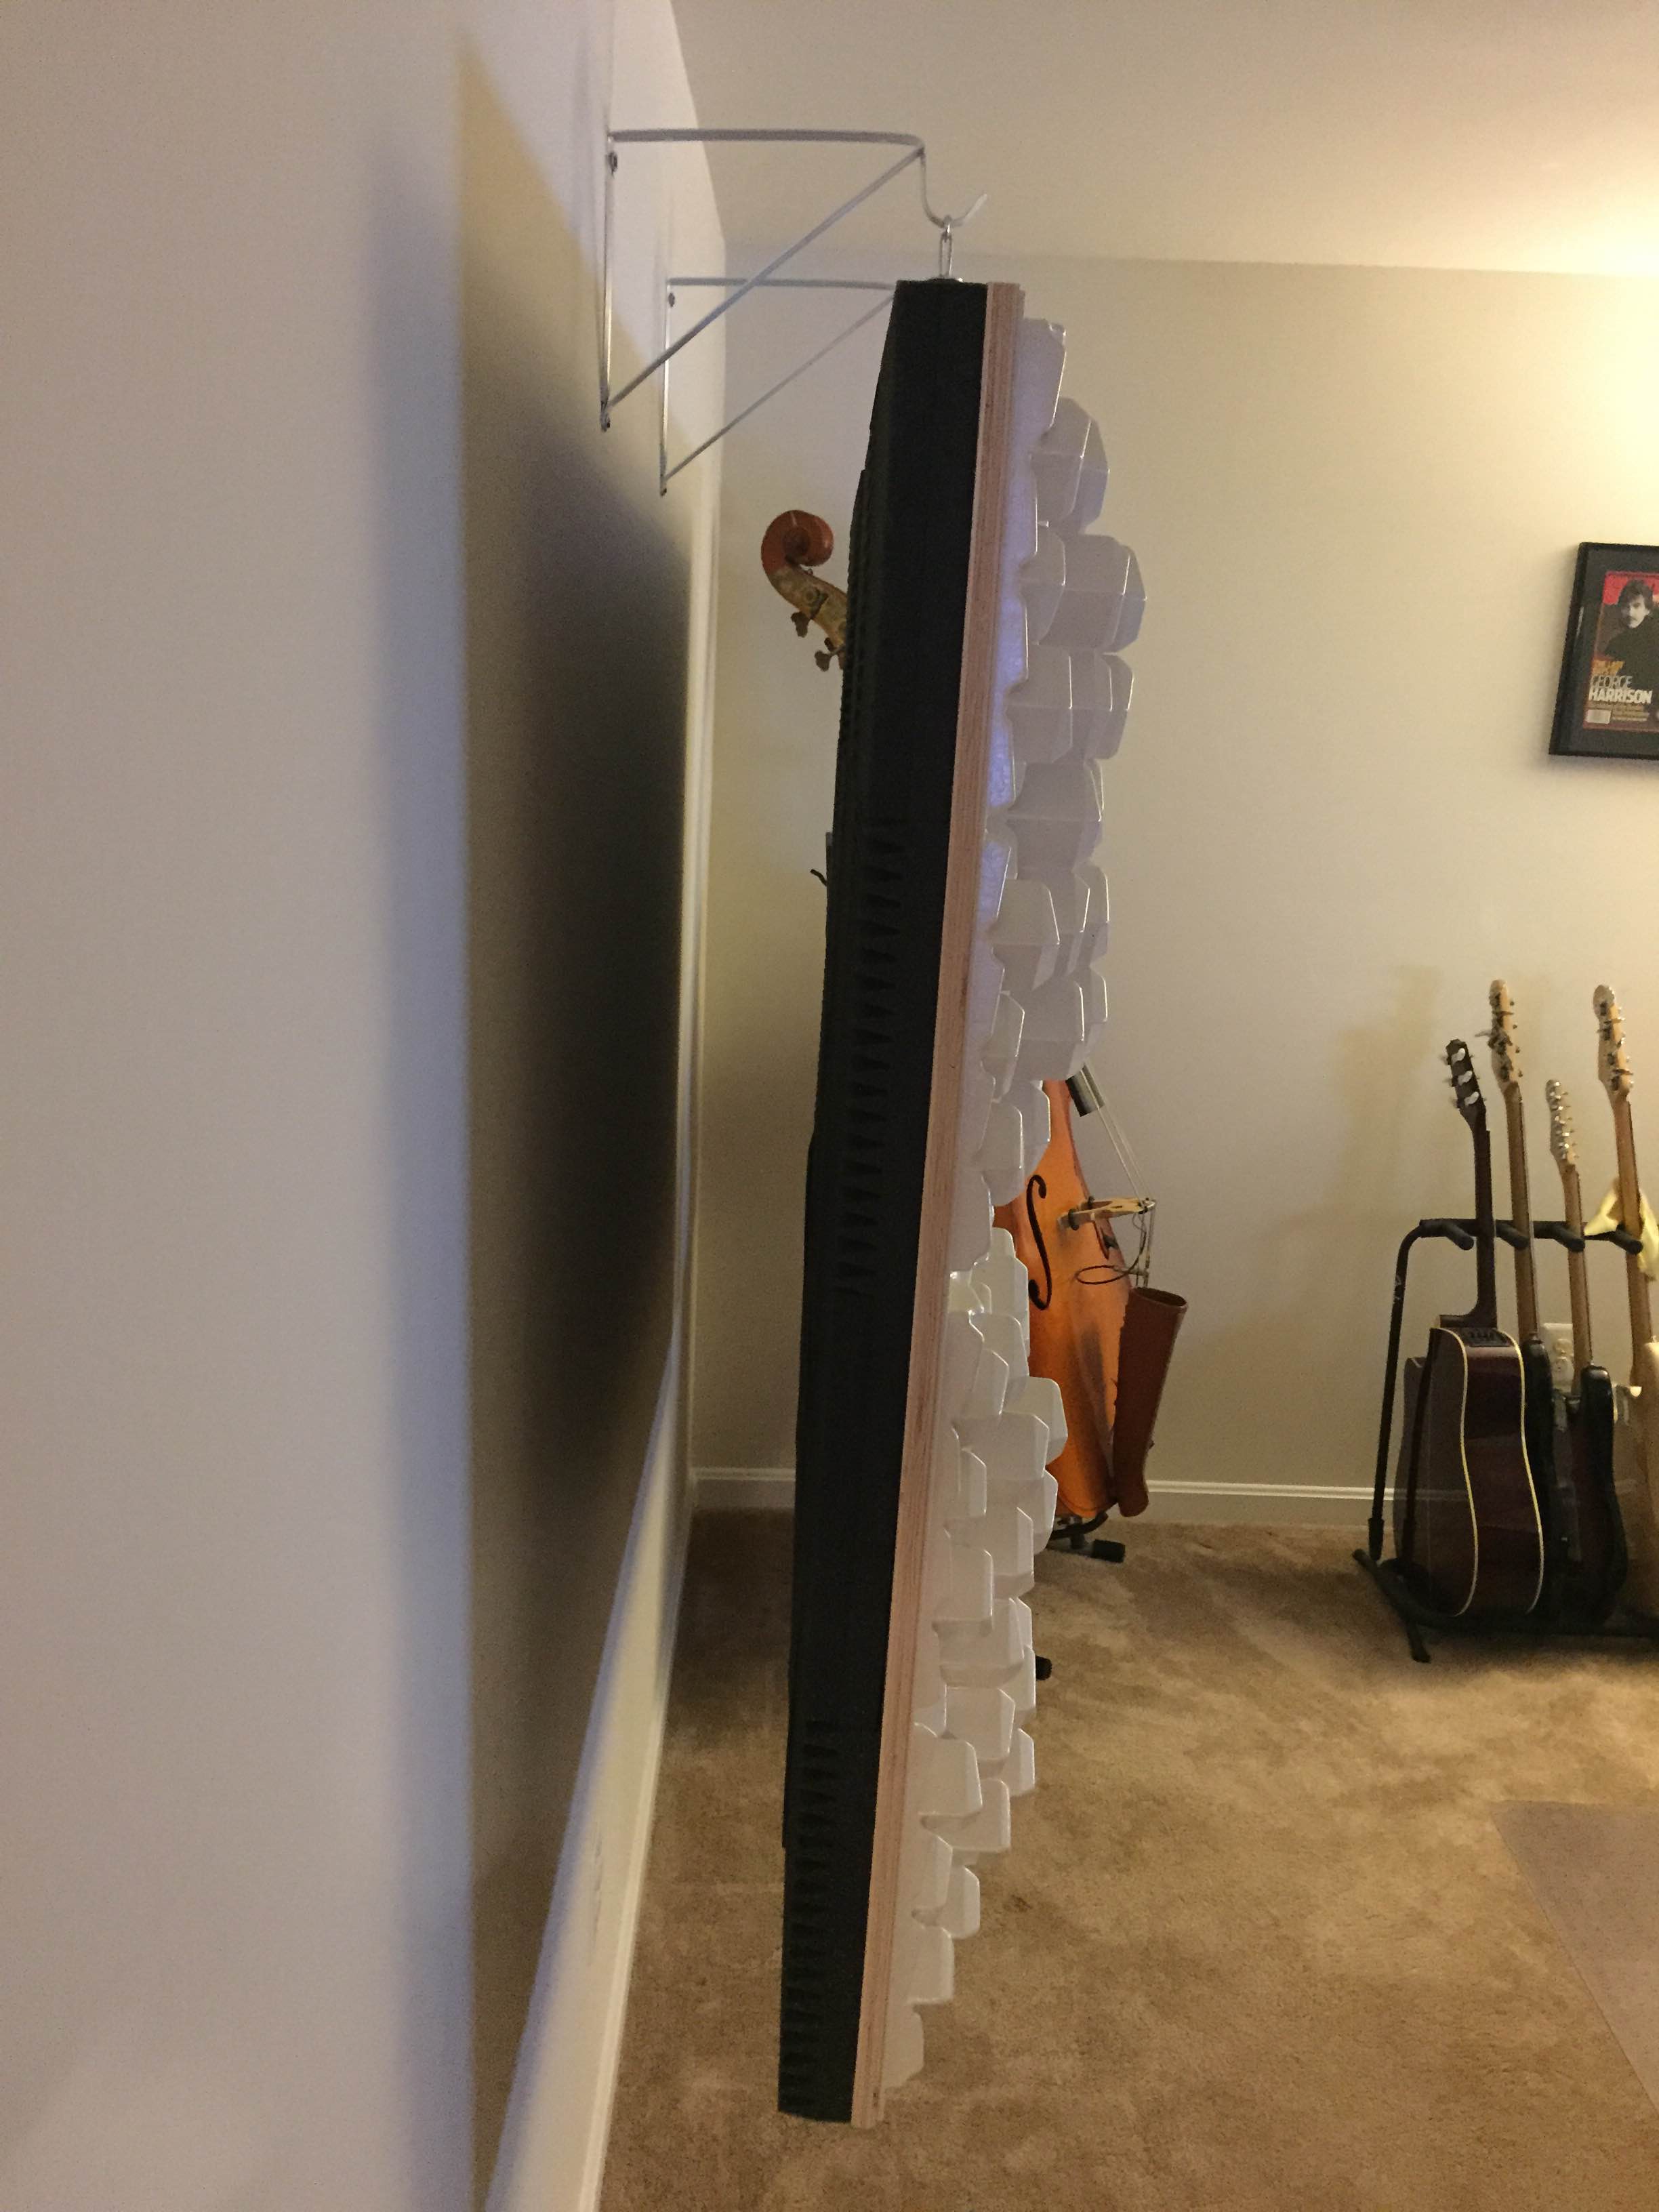
Isolation Hanger
This is the DIY project which incorporates our Art Diffusors®, Cutting Wedge® foam and a couple of isolation hangers into one large free-floating unit, which is acoustically decoupled from the wall.
This particular array was put together by a music producer/bass player for his home. As you can tell from the pics, the construction of this unit was executed beautifully and it’s very close to the original concept drawings.
It’s never too late to get started on your own DIY project.
 Real World – DIY |

Visit the Original DIY page to find out how to make your own.
DIY – Treating a Wall – BlockAid® and SoundChannels®
Posted by Acoustics First in Absorption, Animal Shelters, Auditorium, Broadcast Facilities, Classrooms, DIY, Fitness, Government, Gymnasium, Home Entertainment, Home Theater, HOW TO, Media Room, Multipurpose Rooms, Music Rehearsal Spaces, Music Tracking Room, Product Applications, Recording Facilities, Recording Studio, School & Educational Facilities, Sound proofing, Studio Control Room, Teaching Rooms, Teleconferencing, Theater, Uncategorized, Vocal Booth, Voice Over on July 16, 2015
![]() On many occasions, we get asked about common ways to treat a wall (or walls) either for broadcast, podcast, or other voice recording scenario – where they not only want to tame the reflections within the room, but also block a certain amount of sound coming into – or leaving the room.
On many occasions, we get asked about common ways to treat a wall (or walls) either for broadcast, podcast, or other voice recording scenario – where they not only want to tame the reflections within the room, but also block a certain amount of sound coming into – or leaving the room.
Budget is frequently an issue, major construction is usually unwanted, but effective results are always required.
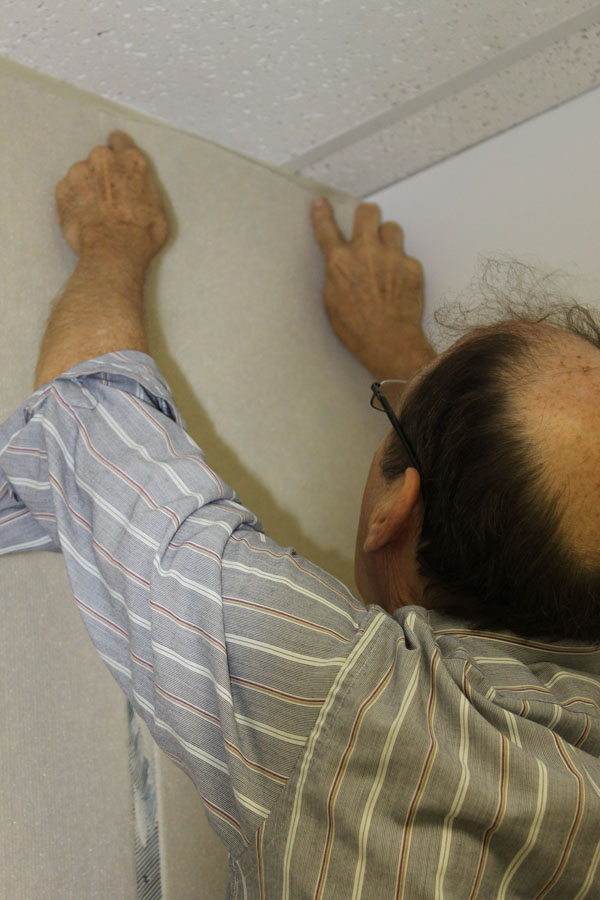
We’re going to show you how to handle a room upgrade – cut down on the sound transmission and cut the room reflections – all with the same skills required to hang high quality wall coverings! Let’s see how you can cover a wall with BlockAid® vinyl sound barrier to block unwanted sound, then go back and cover that with an absorptive layer of Sound Channels® wall covering to finish it off!
This treatment is not recommended for renters, as this is not an easy upgrade to undo. However, if you have an extra bedroom you are using as Podcast studio, this is a great way to treat it… Let’s get started!
Installing BlockAid®
 1. Measure the wall for the first panel length. Mark the panel width on the wall. |
 2. Measure and Mark the length of the wall on the BlockAid® |
 3. Use a straightedge and a razor to cut the BlockAid®. |
 4. Using a trowel, apply vinyl tread adhesive to the wall, covering the whole area where the first panel is going. (You marked the wall right?) |
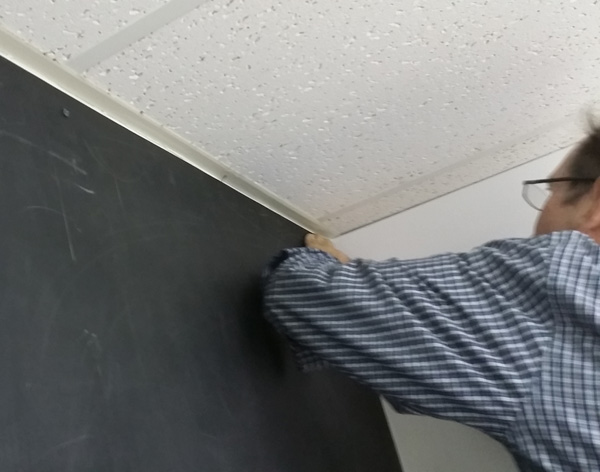 5. Hang the panel starting at the top, install a few screws to hold it in place while the adhesive sets. (You will probably need a friend to help, as BlockAid® is a pound per square foot!) |
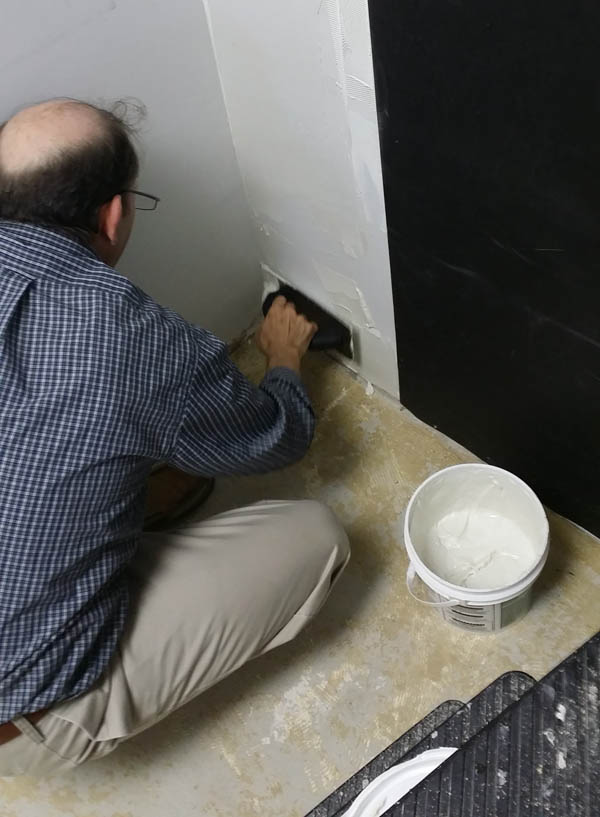
 6. Using your hands and a putty knife, smooth out all the air bubbles from behind the BlockAid® so that you get a good bond when the adhesive cures. |
 7. Repeat the steps for the next strip. Measure, Mark, Cut, Trowl, Hang… |
 8. Make sure you line up those seams! push them right up agaist each other. Smooth out the air bubbles, cut out any outles, trim any extra… Let dry! |
Good job! Now, take a breather while that dries, and notice how much less sound is passing through the walls. This is when you will notice that the sounds are now coming from under the door, and through the leaky old window. These can be taken care of in different ways…. but the easiest way is the same way you deal with keeping the cold out! Get some weather strip, a door skirt, seal the gaps around the frame of the door, and windows, maybe go out and buy some heavy curtains for the windows… if you have some leftover BlockAid®, you can always get some Industrial Velcro and temporarily stick a piece over the window!
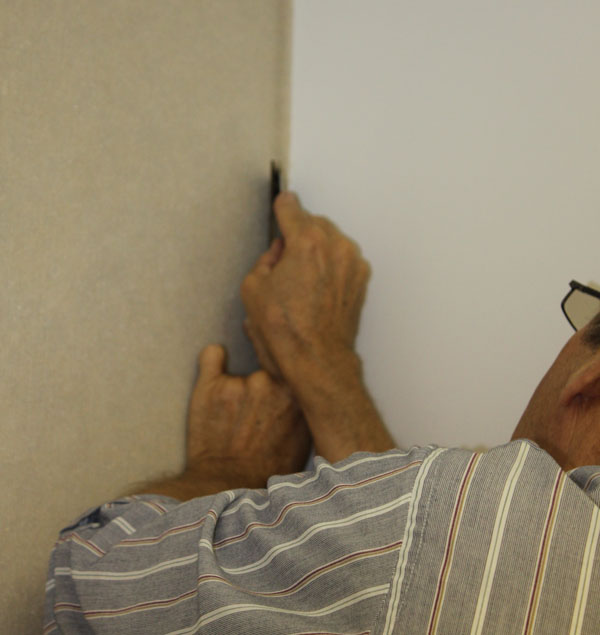
Installing Sound Channels®
 1. Remove the Screws from the BLockAid® – if you didn’t already… then same as BlockAid®, measure the wall, mark it, measure and cut a piece of Sound Channels® and start troweling on the Chapco! |
 2. Well, when you get tired, make your friend finish troweling out the adhesive to cover where the panel is going. (You are going to overlap the seams.) |
 3. Starting at the top, hang the Sound Channels® overlapping the seam of the BlockAid® under it. Smooth out the air bubbles with your hands. Make sure it lines up well. No screws needed! |
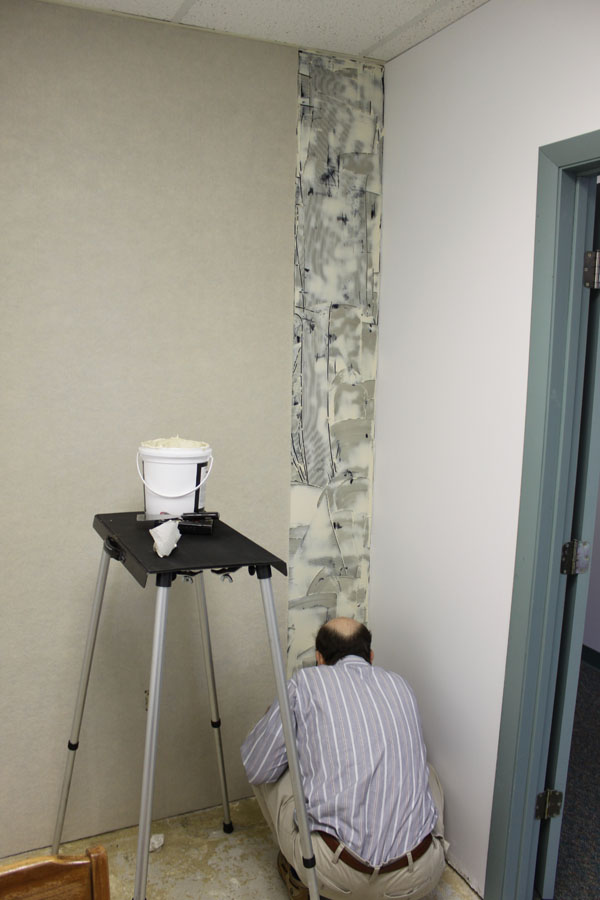 4. Measure and cut the next strip, carefully following a rib in the fabric, while your friend, (who is way better at troweling than you are anyway,) preps the next section with adhesive. |
 5. Best practice is to run the fabric in the same direction every time. Not just with the ribs, but in the same direction it comes off the roll. So find the top. |
 6. After you find the top, start hanging from the top, lining up the seams and smoothing out the bubbles as you go. |
 7. Keep those seams tight as you go. Keep smoothing… almost done! |
 8. Trim up the extra and repeat as many times as needed. |
That’s it!

Don’t forget to trim around those outlets!
This treatment is a common first step in treating many professional broadcast studios – it gives you extra isolation with the barrier and takes the edge of the sound reflections. Many professional environments then go back and add some additional treatments such as bass traps, diffusers, and broadband absorber panels – especially if these studios are planning on bringing in any musical guests.
This isn’t just for home studios. It works great for kids play rooms, bedrooms, home theaters, home gyms, and any place you want to block sound and tame the sound inside the room.
Customize your space as you will, but this treatment is a consistent winner for cost and performance, and is a great way to get started without breaking the bank!
Yocumtown gets Peace and Quiet
Posted by Acoustics First in Absorption, Customer Feedback, Gymnasium, Multipurpose Rooms, Product Applications, School & Educational Facilities, Theater, Worship Facilities on May 14, 2014
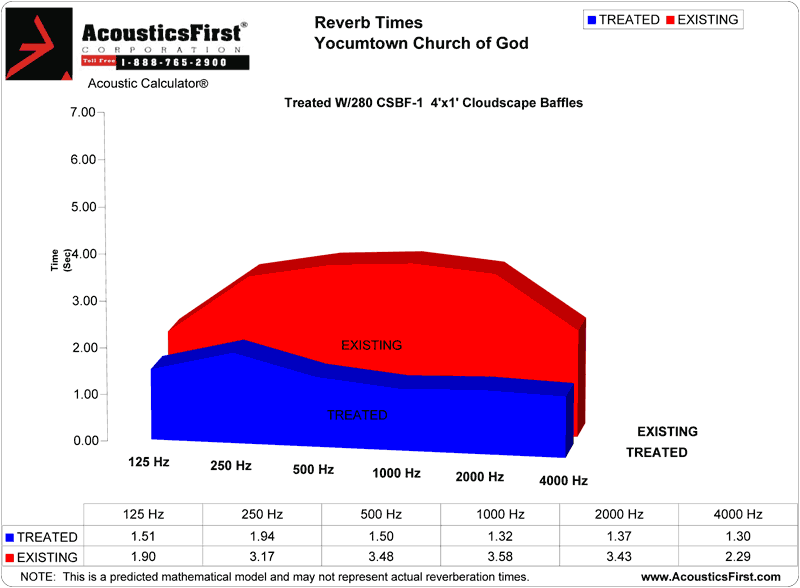
Yocumtown Church of God had a bit of an issue with their multipurpose room – They couldn’t understand anything anyone was saying.
While the space was designed well with a full court, dampers on the HVAC, a stage, movie screen and a good speaker system – they couldn’t overcome the poor acoustics of the space. A great deal of work had gone into the design and they wanted an unobtrusive way to treat the acoustic problems… enter Acoustics First.
We started the work of gathering information about the space; dimensions, some pictures and a few balloon pops.
Here’s what we got.

Big Gym – perfect example of a common problem space.
Wow! This room is big, all the surfaces are parallel and hard, there’s very little to break up the sound… You can almost imagine what it sounds like.
You actually don’t need to imagine. Here’s a balloon pop. CLICK HERE!
What you’re hearing is about 3.5 seconds of reverberation after the balloon pop. (Not good.)
So, whatever shall we do? How will we tame this space?!?!?! Will they ever be able to have movies for youth groups!?
Sure they will! We have Joe. You remember Joe from the Sabot School Big Room Big Boom Post?
Well, I would say that Joe has a 6th sense for hearing, but since that’s one of the 5 standard ones anyway, we’ll just say Joe has great ears – and they should be. Joe’s been using his ears as his primary tools for the past 40+ years; from Studio Engineer to Acoustic Engineer. His ears are tuned instruments, and we rely on his expertise with them to get the job done right – time and time again. (He also makes a mean spreadsheet.)
So after listening to the room, looking at the data, and running some numbers – Joe magically answers the question of what do they need? (Ok it isn’t magic – Joe’s just really good at this… did I mention his spreadsheet skills?)
When he says, “this is what you need,” he also shows you what you have and what it will do.
So Joe says, “You put 280 – 4’x1′ Cloudscape®baffles up on that ceiling and you’ll bring that room down from about 3.5 seconds to about 1.5 seconds.”
Joe knows.
So, Yocumtown goes from a 3.5 second balloon pop (Here) to a 1.5 second balloon pop (Here).
Not only does it look great…

NICE!
… But now they say that they can watch movies and it sounds just like you’re in a movie theater.
That’s about the best compliment you can give us.
(And the best compliment I can give Joe is, his calculation for RT60 time was about 1.5 seconds. When I ran the measurement of the “treated balloon pop” – I got 1.501 seconds. This is why we have Joe – he can tell you what you will get, before you even start!)
Barrett’s Technology Solutions has a Happy Easter
Posted by Acoustics First in Absorption, Customer Feedback, Diffusion, Home Theater, Media Room, Product Applications, Theater, Uncategorized on April 20, 2014
Sometimes at Acoustics First we get a call from someone who is so knowledgeable that we can’t help but be tickled that they called us to help them. We received one such phone call from Pete Heskin at Barrett’s Technology Solutions in Naperville, IL.
Pete and his team were putting together an acoustic treatment for a listening room at their facility and wanted the room’s acoustics to really showcase their lineup of high-end audiophile speakers. No joke here – these guys have over 50 years of experience in the audio industry – and they keep on the bleeding edge of audio and video. This treatment is serious acoustic business – and these are some of the most discriminating ears in audio.
Happy Easter guys!

Happy Easter Guys!
In keeping with their high-standards and cutting edge approach, they were looking for an acoustic treatment that is as visually stunning as it is capable of treating a room containing some of the world’s greatest sound sources. As you can see, the results are simple and elegant.
The room contains an array of Sonora® panels, Silent Pictures® and clusters of ArtDiffusor® Model D‘s to make this space sound as good as it looks. (While all of their gear makes the gear junkies at Acoustics First drool…)
So, if you find yourself near Chicago, or on a “Wayne’s World” pilgrimage, stop into Barrett’s – and if you fancy yourself an audiophile – put your money where your ears are, and hear how discriminating ears listen to music…
… No Stairway to Heaven.

You must be logged in to post a comment.