Posts Tagged sound channels
Acoustical Considerations for Classrooms
Posted by Acoustics First in Absorption, Articles, Classrooms, Product Applications, Products, School & Educational Facilities, Teaching Rooms on September 19, 2024
Poor classroom acoustics has long been the invisible problem that has the farthest reaching implications for learning. Excessive noise and reverberation degrade speech intelligibility, resulting in reduced understanding and therefore reduced learning. In many classrooms in the United States, the speech intelligibility rating is 75% or less. That means, in speech intelligibility tests, listeners with normal hearing can only understand 75% of the words read from a list. Imagine reading a textbook with every fourth word missing. Wouldn’t that make comprehension near impossible? Fortunately, poor classroom acoustics can usually be remedied with some basic knowledge and commercially available treatment. But before getting into specific treatment, let’s go over some basic acoustic principles.
Noise
Obviously, it’s difficult to understand what the instructor is saying when there is a lot of naturally occurring noise in the room. A glut of factors can be considered noise sources, including HVAC “rumble”, traffic outside the building and students moving in their chairs. These sources contribute to a “noise floor” that makes understanding speech very difficult. Since there is no one “cure-all” for an excessive noise floor, it is often best to seek the assistance of a professional acoustical consultant to properly diagnose and find a solution to these issues.
Reverberation: Undesirable vs Useful Reflections
When not attributed to a noise issue, the culprit of poor classroom acoustics is often excessive reverberation. In simple terms, reverberation is the sound energy that remains in the listening environment as a result of lingering reflections. As mentioned before, these reflections can easily interfere with speech intelligibility. As you may have experienced at some point, it can be difficult to understand what is being said when reflections from old information cover up what is newly spoken.
The reverberation time (RT or RT60) is used to determine how quickly sound decays. The RT is dependent upon the volume and surface materials of a given room. Large spaces with hard materials (tile, drywall, etc.) have longer reverberation times, while small rooms built with “softer” materials sound more “dead”. Ideally, classrooms should have relatively short RT’s, somewhere in the .6-.8 second range.
A long reverberation time is not the only factor that should be considered when treating a classroom with poor acoustics. Flutter echo is a particularly significant problem when it occurs between the side walls at the front of the classroom where the teacher is speaking. This condition can be heard as a “ringing” sound (when one claps) as the sound rapidly bounces back and forth between two parallel walls. Flutter and other discrete echoes are considered “undesirable reflections” and should be controlled with absorptive or diffusive materials.
Not all reflections are bad though. There are “useful reflections” that reinforce spoken word, rather than cover it up. The teacher’s voice can be propagated throughout the room by shaping a sound reflecting gypsum board ceiling over the front of the room or by making the center of the ceiling a hard, reflecting surface (see figure 1). This will help project the speaker, so they don’t have to strain their voice to be heard over the students.

Reducing Reverberation
Often reducing the dimensions of a classroom to attain a more suitable reverberation time is not feasible, but one can improve the acoustics by introducing sound absorptive materials. Typical classrooms usually have a dropped “acoustical” ceiling that has some absorptive qualities. In classrooms that don’t have this ceiling, reverberation can be reduced by installing an acoustical ceiling or a number of fabric faced fiberglass panels, like Sonora® Ceiling Clouds. Likewise, if there isn’t carpeting in the room, you can marginally reduce the reverberation time by installing sound absorptive flooring.
Wall treatment: Acoustic Panels
If the ceiling and floor are at least rudimentarily treated, then hard walls are usually at fault for poor speech intelligibility. Absorptive wall panels, like Acoustics First Sonora® panels, are a common treatment to control lateral reflections and reverberation.
These panels are popular because they can be customized with a variety of colors, edge designs and fabric facings. They also can come with a high-density fiberglass adder that improves durability. In classrooms, these “Hi-impact” panels are particularly useful because the adder allows for the panels to be used as tack boards. This brings an extra level of functionality to the panels outside of their absorptive properties.
Though wall panels are a perfectly suitable treatment, uncovered areas between the panels can sometimes allow a few hard reflections and/or flutter echo to still occur (although full treatment of the walls would likely result in a room sounding too “dead”). For these situations, Acoustics First often recommends Sound Channels® acoustic wall fabric.

Acoustical Wall Fabric
In many instances, acoustic wall fabric is actually a viable alternative to traditional wall panels. Unlike a typical “wall carpet”, Sound Channels® is made of 100% recycled content and has ridges to increase surface area and absorption. Perhaps most importantly, the uniform coverage you get by treating the walls with acoustic wall fabric eliminates the flutter/slap from reflective parallel walls (without making the space too “dead”). Acoustic wall fabrics are generally light weight and most can be put up just like any other wallcovering.
Also of note are the additional benefits when using Sound Channels® in early education classrooms. The effective range that this wall fabric controls is the higher speech frequencies, which is the ideal range for classrooms with younger children (there are not many bass/baritone kindergarteners). Another advantage is in keeping the treatment clean. Wall panels may suck up sound, but they can also absorb fluids (like the occasional juice box). Sound Channels®, on the other hand, is resistant to moisture, mildew and rot. It is also is non-allergenic, easy to clean, and is highly resilient to common wear.
Acoustical Considerations for Classrooms
Although this knowledge has been around for decades, classrooms across the country continue to be plagued by a lack of acoustical forethought. Perhaps as this information becomes more readily available to architects, contractors, administrators and teachers we will begin to see (and hear) better sounding classrooms. School is challenging enough on students and teachers as it is, let’s not compound their daily obstacles by continuing to overlook classroom acoustics.
(Originally published in Christian School Products Magazine – November, 2015)
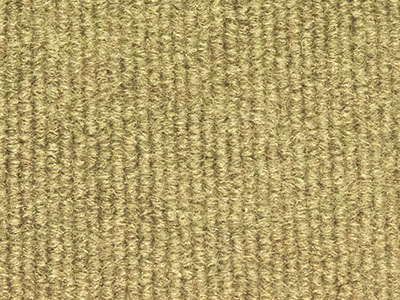
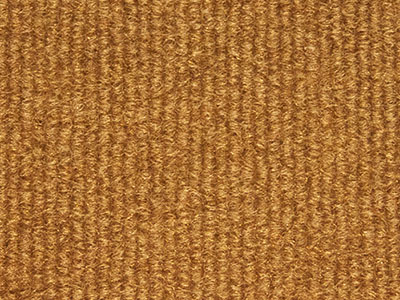
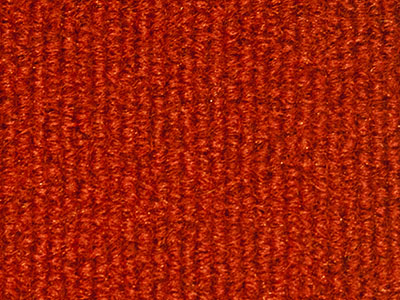
New Sound Channels® Colors!
Posted by Acoustics First in Absorption, Press Release, Products on March 23, 2018
Acoustics First® is pleased to announce that our Sound Channels® wall fabric is now available in eight new colors! Just in time for Spring!


Remember, Sound Channels® and Blockaid® Viny Sound Barrier make an excellent combo for treating existing walls. You can block unwanted sound, while improving speech intelligibility and give your room a jazzy new look all at the same time!
Here’s a link to our Sound Channels®/Blockaid® install guide.
https://acousticsfirst.info/2015/07/16/treating-a-wall-blockaid-and-soundchannels/
Exploring Green Acoustic Treatment: Sound Channels® Acoustical Wall Fabric
Posted by Acoustics First in Absorption, Press Release, Products, Sound proofing on March 15, 2016
Sound Channels® Acoustical Wall Treatment – Made from Plastic Bottles?
Buzz words like “renewable”, “100% recycled” and “eco-friendly” seem to be everywhere we look, from coffee cups to building codes. This preoccupation with all things “green” has long passed the point of being just another fad. The desire for environmentally responsible products has shifted from being simply in vogue to being firmly requisite.
Leadership in Energy and Environmental Design (LEED) certification has become a standard benchmark for most modern buildings. To achieve the most points towards a LEED certified building, many architects are looking for “green” materials that show a commitment to the environment and responsible, eco-friendly practices. This includes the focus on materials that go beyond how much is used; to get a better understanding of what’s in the materials they specify for buildings and the effect those components have on human health and the environment. LEED certification also requires a more performance-based approach to indoor environmental quality to ensure improved occupant comfort. Specifying Sound Channels® acoustic wall fabric can help designers realize the above goals.
Obviously, specifying acoustic materials that use recycled content gets big points towards LEED certification. That said, the use of recycled content for acoustical products is not necessarily unique. For example, the fiberglass substrate for our Sonora Panels are made of 52 percent pre-consumer and 5 percent post-consumer recycled content. What is truly unique is the extent that Sound Channels® utilizes the waste product of one of our most widespread habits: the use of plastic water bottles.
Sound Channels – Recycled Textiles by the Numbers:
One yard of Sound Channels® acoustic wall fabric utilizes 15 post consumer plastic bottles. Recycling one ton of plastic from bottles saves approximately 7.4 cubic yards of landfill space. This means that 36.5 million pounds of Sound Channels® fiber saves 365 million bottles from landfills, 91,250 barrels of oil and over 64,000 tons of emissions!
How does a discarded plastic bottle become wall fabric? Let’s take a look at the process…
First, bottles are picked up at recycling centers then sorted by type and color. Then labels and caps are removed; the bottles are washed, crushed and chopped into very small pieces called “flakes”. These flakes are melted down and color is added. Lastly, anti-microbial technology is added before the product is made into Sound Channels® acoustical wall fabric. Sound Channels® then can be recycled back into fiber at the end of its life cycle.
Besides the “green” benefits, there are performance advantages with Sound Channels® acoustic wall fabric. The anti-microbial technology incorporates silver and copper ions into the root fiber which naturally attack microbes. This technology works against the types of airborne bacteria that we are most concerned about, making this product ideal for hospitals and classrooms.
Recently, an improved design has increased its sound absorption by 25% (NRC of .25). The uniform coverage you get with treating the walls with Sound Channels® eliminates the flutter/slap from reflective parallel walls, while helping to control excessive reverberation and noise buildup.
Whatever your application, Sound Channels® acoustical wall fabric and Acoustics First can help you towards your “green” goals!
Sound Channels® – Top Product!
Posted by Acoustics First in Absorption, Classrooms, Customer Feedback, Mentions, Press Release, School & Educational Facilities on December 22, 2015
Acoustics First® Sound Channels® wall fabric has been named a ‘2015 Top Product’ by Christian School Products magazine!
http://www.cspmagdigital.com/publication/?i=284531&p=18

Christian School Products – 2015 Top Products
This article from their November issue explains why:
Merry Christmas and Happy New Year from all of us at Acoustics First!
DIY – Treating a Wall – BlockAid® and SoundChannels®
Posted by Acoustics First in Absorption, Animal Shelters, Auditorium, Broadcast Facilities, Classrooms, DIY, Fitness, Government, Gymnasium, Home Entertainment, Home Theater, HOW TO, Media Room, Multipurpose Rooms, Music Rehearsal Spaces, Music Tracking Room, Product Applications, Recording Facilities, Recording Studio, School & Educational Facilities, Sound proofing, Studio Control Room, Teaching Rooms, Teleconferencing, Theater, Uncategorized, Vocal Booth, Voice Over on July 16, 2015
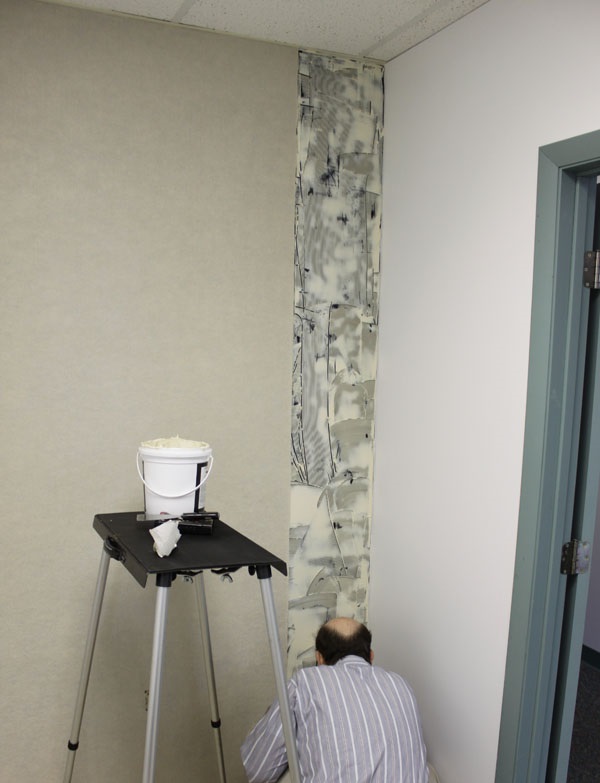
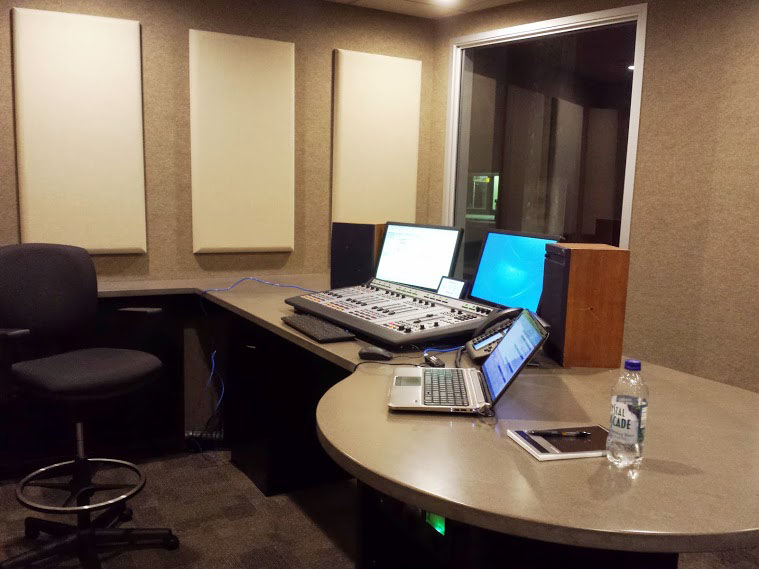
![]() On many occasions, we get asked about common ways to treat a wall (or walls) either for broadcast, podcast, or other voice recording scenario – where they not only want to tame the reflections within the room, but also block a certain amount of sound coming into – or leaving the room.
On many occasions, we get asked about common ways to treat a wall (or walls) either for broadcast, podcast, or other voice recording scenario – where they not only want to tame the reflections within the room, but also block a certain amount of sound coming into – or leaving the room.
Budget is frequently an issue, major construction is usually unwanted, but effective results are always required.
We’re going to show you how to handle a room upgrade – cut down on the sound transmission and cut the room reflections – all with the same skills required to hang high quality wall coverings! Let’s see how you can cover a wall with BlockAid® vinyl sound barrier to block unwanted sound, then go back and cover that with an absorptive layer of Sound Channels® wall covering to finish it off!
This treatment is not recommended for renters, as this is not an easy upgrade to undo. However, if you have an extra bedroom you are using as Podcast studio, this is a great way to treat it… Let’s get started!
Installing BlockAid®
 1. Measure the wall for the first panel length. Mark the panel width on the wall. |
 2. Measure and Mark the length of the wall on the BlockAid® |
 3. Use a straightedge and a razor to cut the BlockAid®. |
 4. Using a trowel, apply vinyl tread adhesive to the wall, covering the whole area where the first panel is going. (You marked the wall right?) |
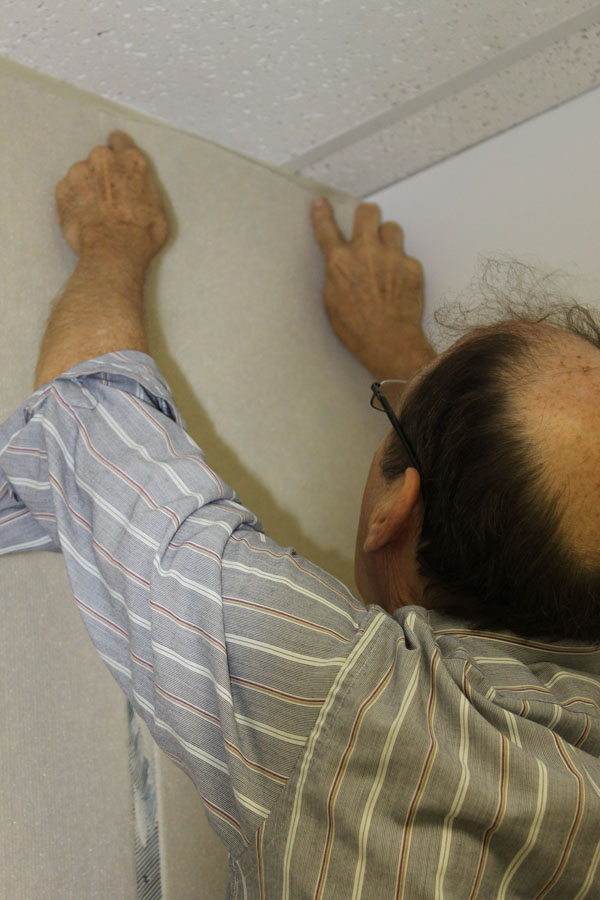
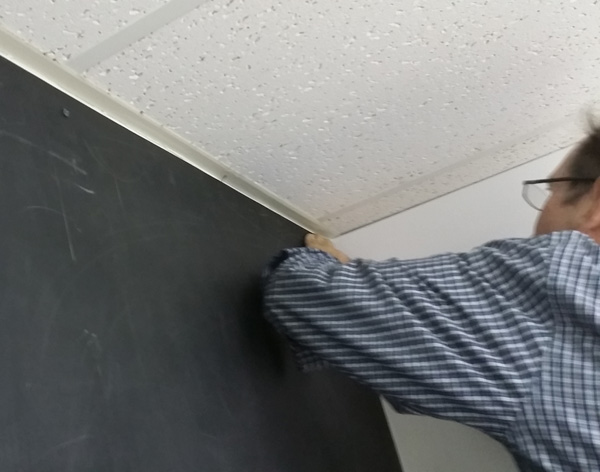 5. Hang the panel starting at the top, install a few screws to hold it in place while the adhesive sets. (You will probably need a friend to help, as BlockAid® is a pound per square foot!) |
 6. Using your hands and a putty knife, smooth out all the air bubbles from behind the BlockAid® so that you get a good bond when the adhesive cures. |
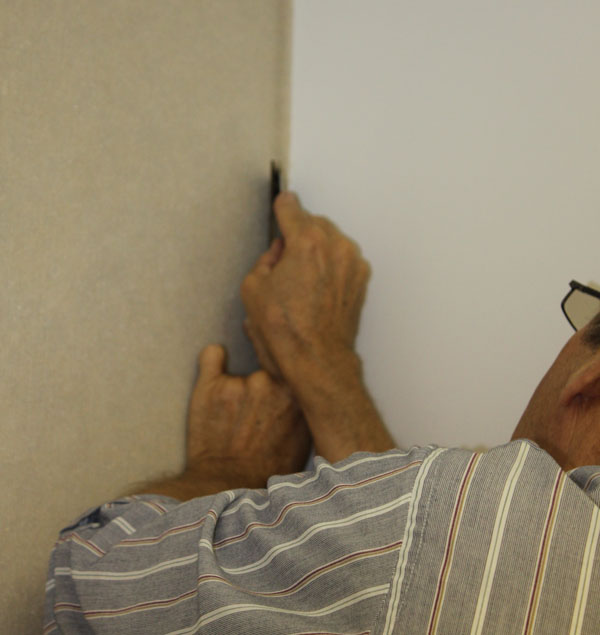
 7. Repeat the steps for the next strip. Measure, Mark, Cut, Trowl, Hang… |
 8. Make sure you line up those seams! push them right up agaist each other. Smooth out the air bubbles, cut out any outles, trim any extra… Let dry! |
Good job! Now, take a breather while that dries, and notice how much less sound is passing through the walls. This is when you will notice that the sounds are now coming from under the door, and through the leaky old window. These can be taken care of in different ways…. but the easiest way is the same way you deal with keeping the cold out! Get some weather strip, a door skirt, seal the gaps around the frame of the door, and windows, maybe go out and buy some heavy curtains for the windows… if you have some leftover BlockAid®, you can always get some Industrial Velcro and temporarily stick a piece over the window!
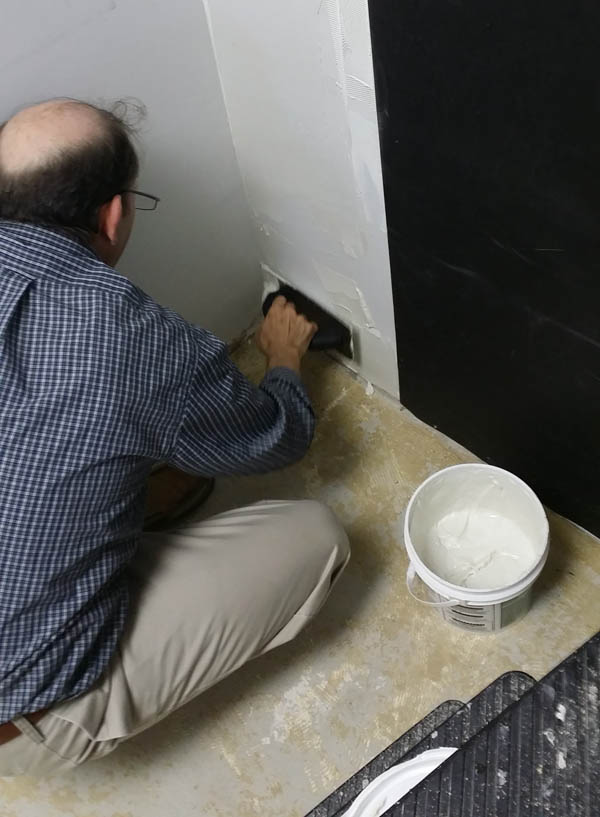
Installing Sound Channels®
 1. Remove the Screws from the BLockAid® – if you didn’t already… then same as BlockAid®, measure the wall, mark it, measure and cut a piece of Sound Channels® and start troweling on the Chapco! |
 2. Well, when you get tired, make your friend finish troweling out the adhesive to cover where the panel is going. (You are going to overlap the seams.) |
 3. Starting at the top, hang the Sound Channels® overlapping the seam of the BlockAid® under it. Smooth out the air bubbles with your hands. Make sure it lines up well. No screws needed! |
 4. Measure and cut the next strip, carefully following a rib in the fabric, while your friend, (who is way better at troweling than you are anyway,) preps the next section with adhesive. |
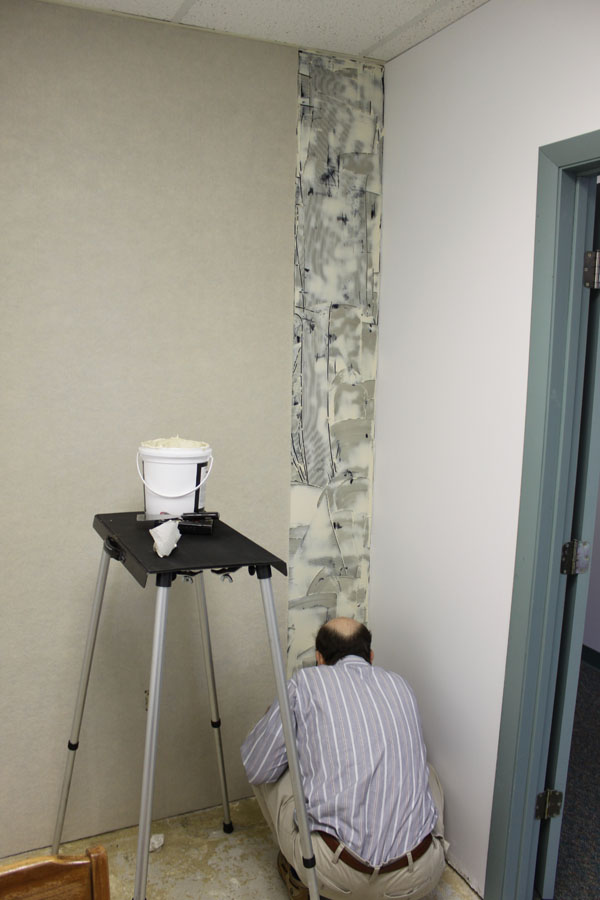
 5. Best practice is to run the fabric in the same direction every time. Not just with the ribs, but in the same direction it comes off the roll. So find the top. |
 6. After you find the top, start hanging from the top, lining up the seams and smoothing out the bubbles as you go. |
 7. Keep those seams tight as you go. Keep smoothing… almost done! |
 8. Trim up the extra and repeat as many times as needed. |
That’s it!

Don’t forget to trim around those outlets!
This treatment is a common first step in treating many professional broadcast studios – it gives you extra isolation with the barrier and takes the edge of the sound reflections. Many professional environments then go back and add some additional treatments such as bass traps, diffusers, and broadband absorber panels – especially if these studios are planning on bringing in any musical guests.
This isn’t just for home studios. It works great for kids play rooms, bedrooms, home theaters, home gyms, and any place you want to block sound and tame the sound inside the room.
Customize your space as you will, but this treatment is a consistent winner for cost and performance, and is a great way to get started without breaking the bank!

You must be logged in to post a comment.