DIY Wood Diffusion Panel – ArtDiffusor® Trim
Posted by Acoustics First in Diffusion, DIY, HOW TO, Products on April 13, 2016

DIY Wood Diffuser Panel – Using ArtDiffusor Trim
Here at Acoustics First®, we are often asked about wood acoustic treatment for spaces ranging from recording studios and auditoriums to churches and home theaters. Although the acoustic properties of wood are comparable to other reflective materials like gypsum and thermoplastic, wood’s superior aesthetic makes it a desirable treatment (wood is often perceived to “sound better” simply because of its visual properties).

Two different profiles that work together!
Our newest wood acoustic treatment, ArtDiffusor® Trim, is a versatile, high frequency quadratic diffuser that can help improve the clarity of speech and music. Both Profiles (Type A & B) offer diffusion in similar ranges and allow for customizable installations. The different profiles can be used individually or together to modify the aesthetics of a room, while achieving the desired acoustic performance. In fact, in recent tests of ArtDiffusor® Trim, alternating the A and B profiles resulted in the best diffusion. Some examples of different installations include:
- Back wall Diffusion for a theater, listening or mixing studio.
- Slatted Ceiling Absorber.
- Installation over or behind stretch wall
- Chair rail, door and window molding.
ArtDiffusor® Trim can come in lengths up to 8’ and is available in Maple (other woods can be quoted). Later in this article we’ll walk you through how to build your very own diffusion panel using 4’ lengths of ArtDiffusor® Trim.
Diffusion at a Glance
Where typical fiberglass and foam panels absorb sound by transferring sonic energy into kinetic and thermal energy, diffusers act to scatter the energy, creating ambiance and a sense of open space. The function of sound diffusers is not to remove energy from your room, but to redistribute it, accurately reinforcing the sound source by controlling standing waves and flutter echoes, while retaining the room’s “liveliness”.
As is the case with any sound absorbing panels and diffusers, the treatment needs to cover enough critical surface area to make a noticeable impact. Simply installing a single piece of ArtDiffusor® Trim will not significantly improve the acoustics of a room. One way to ensure enough improvement is by using ArtDiffusor® Trim to build a series of diffusion panels and installing them as you would sound absorbing panels.
Building a Diffusion Panel – A step by step guide
- Plan out your Panel: Find out how many ArtDiffusor® Trim boards you want in your panel assembly. Our diffusion panel was to occupy an alcove that was 29” wide and each board has a width of just about 4”, so we opted for 7, 4’ boards. Remember, alternate type A and B profiles for optimal diffusion.

Plan your Layout.
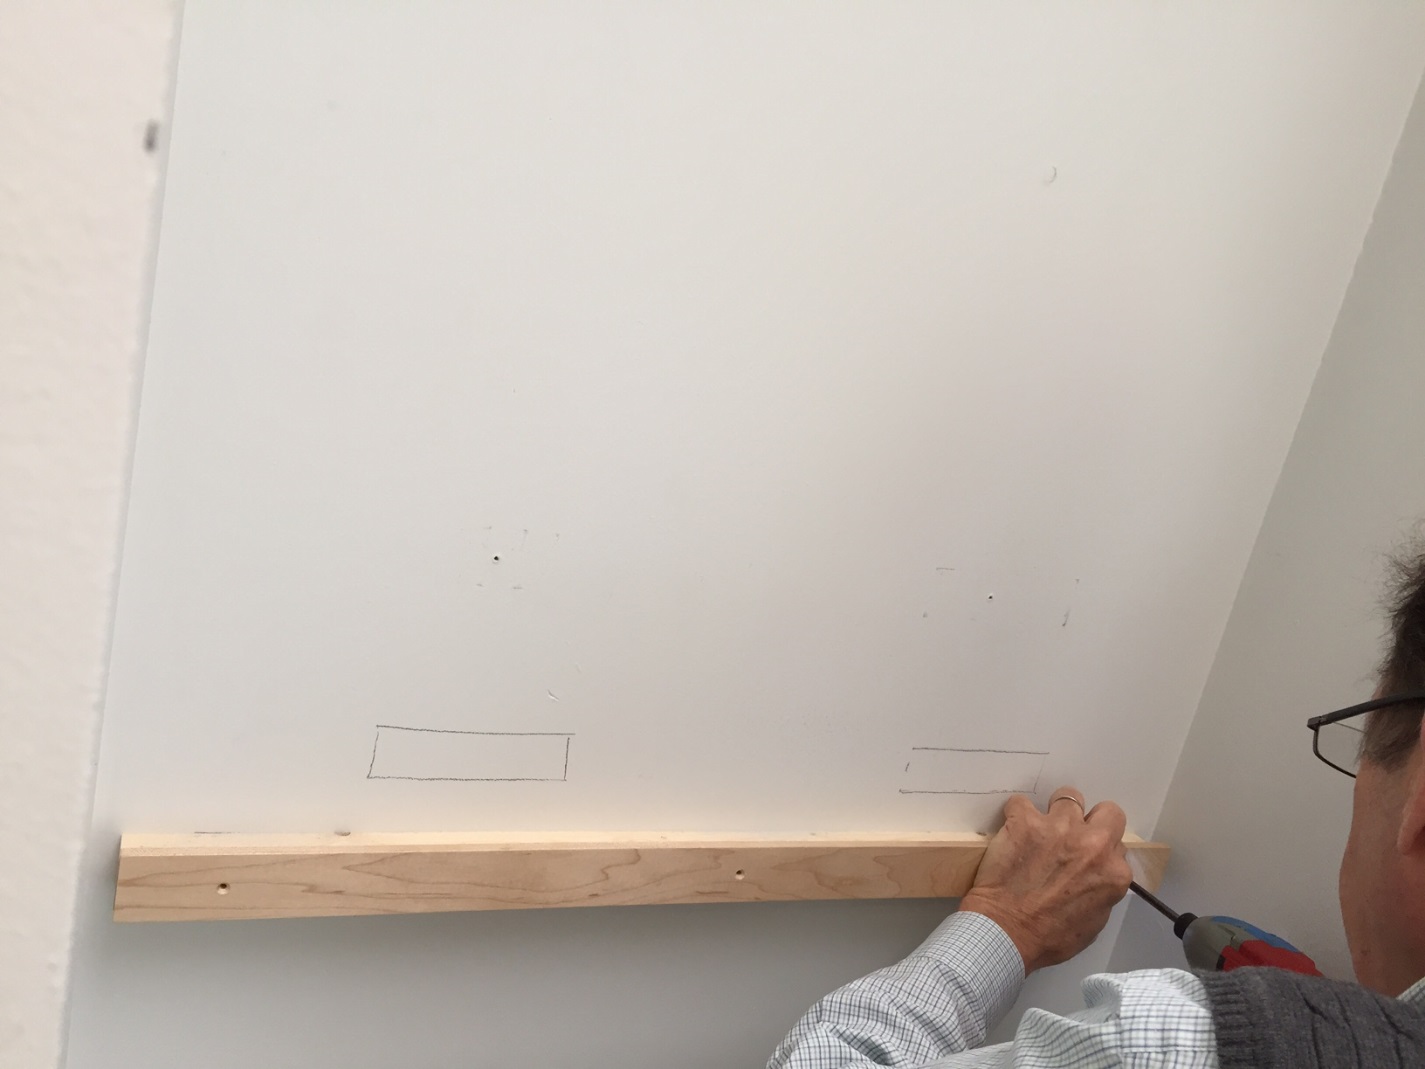
- Install the lower support board: This is what the ArtDiffusor® Trim boards will “stand” on. It is best to install acoustic treatment above chair rail height (3’-4’), to ensure that it’s effective around ear height. Measure and use a level to mark where the support board will go, install drywall anchors for a sure hold into the drywall, then drill and screw the support board into place. Be sure to countersink the holes so the facing strip has a flat surface to rest against.

Install the Lower Support.

Install the upper support board: This time using the ArtDiffusor ® Trim boards as a guide, measure, level and mark the location of the upper support board. Again, using drywall anchors, mount the upper support board (don’t forget to countersink!).The picture shows both support boards installed.
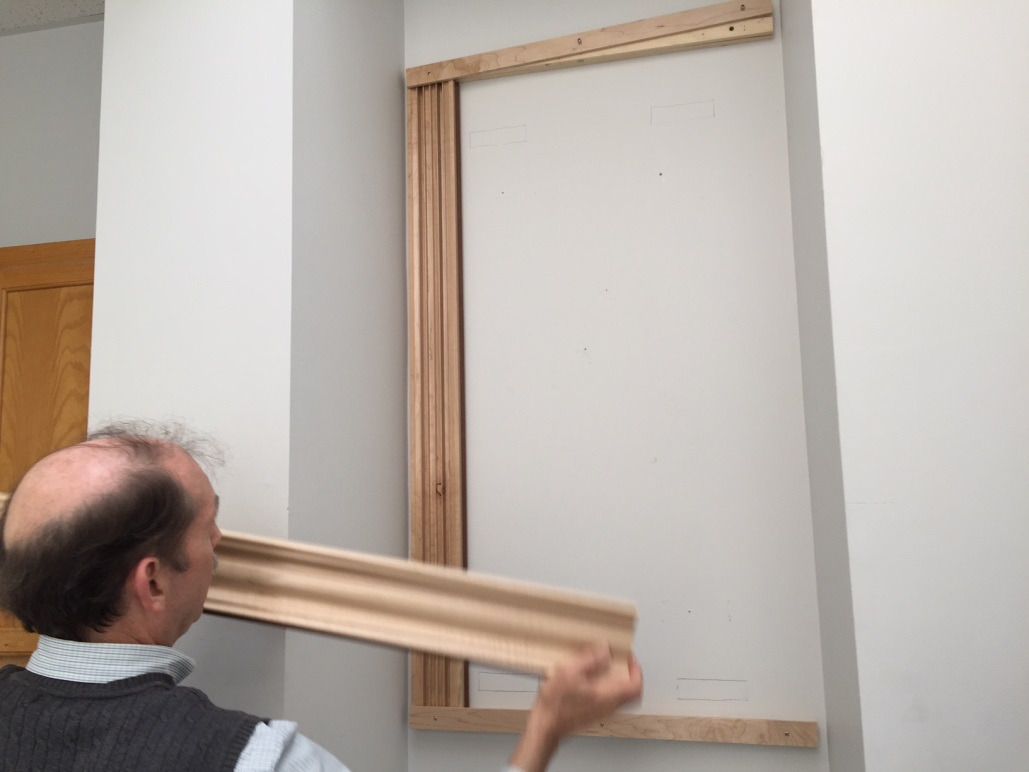
———————————————————————————————–>>>- Attach lower facing strip: Use facing strip that is approximately a ½” wider than the support board. Line up the facing strip next to the support board and mark your screw locations ensuring that they won’t run into the support board screws. Drill the holes and counter sink, lining up the boards so the ½” overlaps on the top, and screw into place.

Lower facing strip installed.
- Partially attach upper facing strip: Same as the lower facing strip, but mount so the ½” overlap is on the bottom, and only screw one side in so it’s easier to slide in the ArtDiffusor ® Trim boards later.

Partially attach top facing strip.
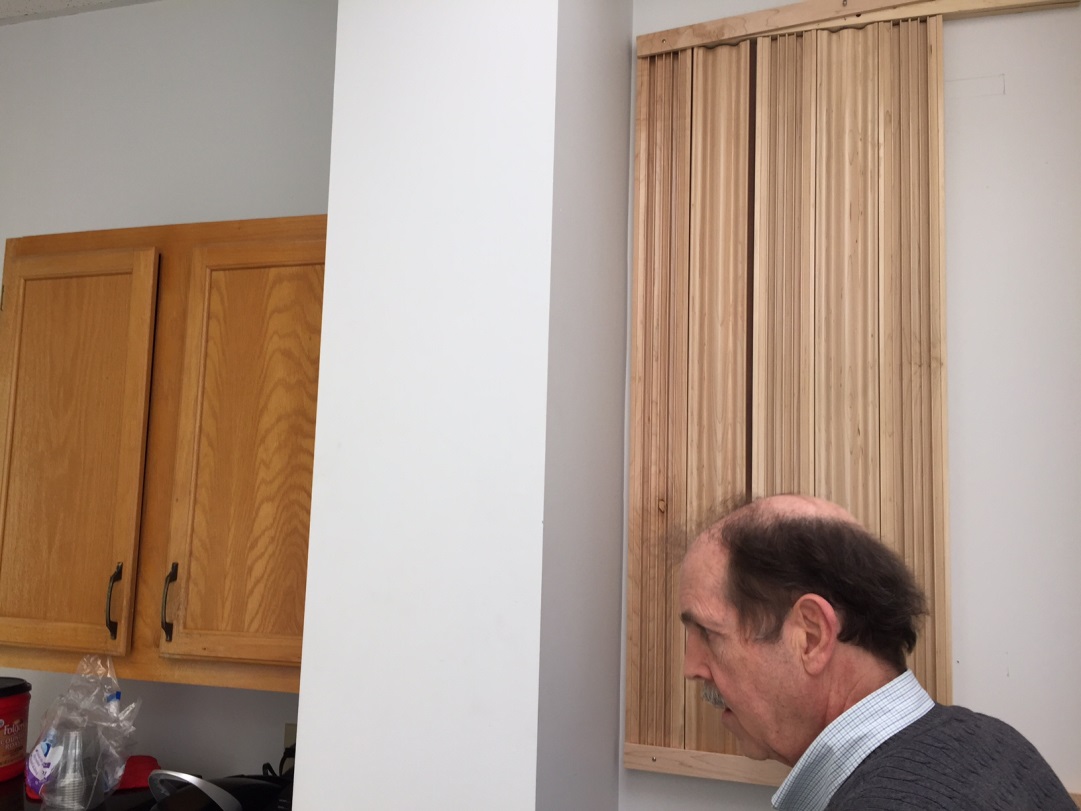
- Slide in Art Trim: Slide in the ArtDiffusor® Trim behind the facing strip and use biscuits to fit the boards together. We decided to position the boards with an approximately 1/8” spacing.

Slide in ArtDiffusor® Trim panels.
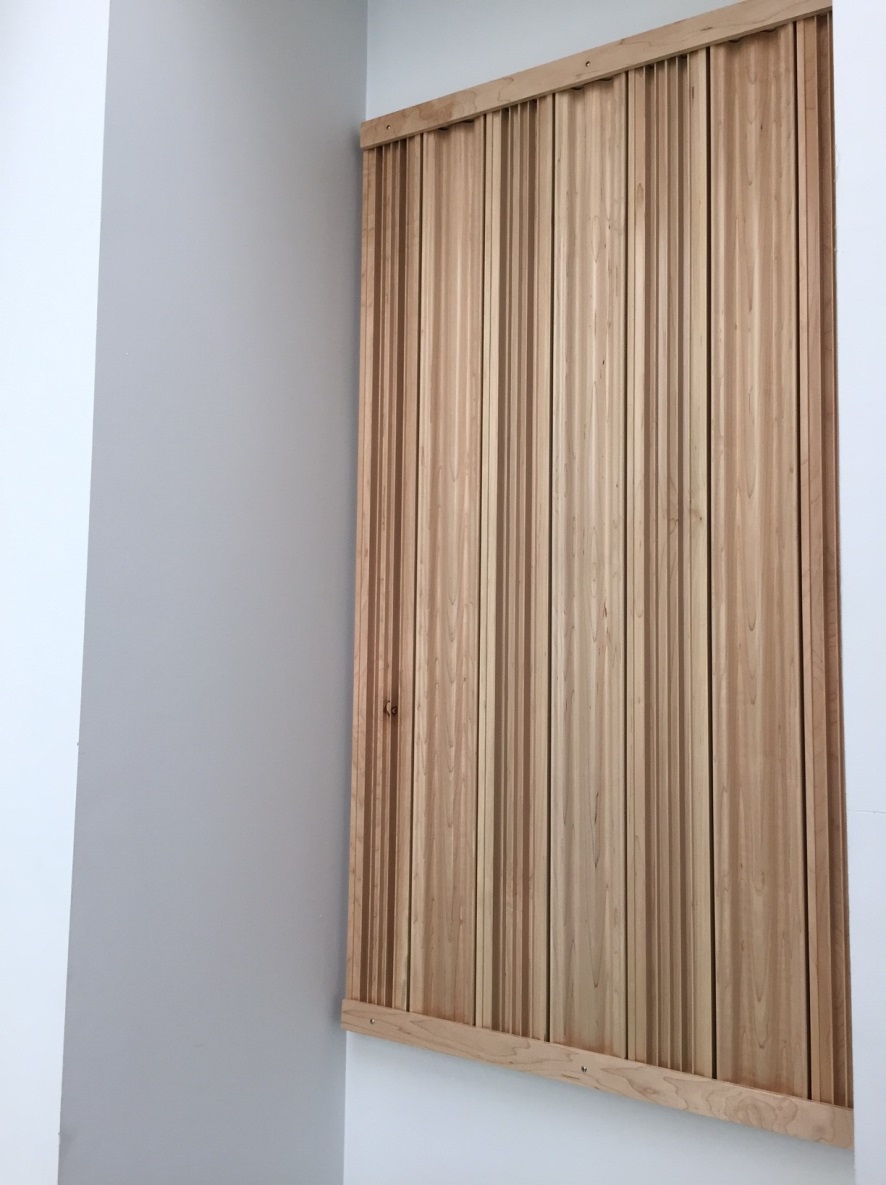
- Finish attaching upper facing strip & admire your new DIY Diffusion Panel!

Final DIY Diffusing Wall Panel with ArtDiffusor® Trim!


ArtDiffusor® – MicroModel D – Big Sound, Small Package
Posted by Acoustics First in Articles, Press Release, Uncategorized on April 1, 2016
With current trends leaning toward improving the quality of life for all creatures living on our great planet, we at Acoustics First® feel that we can contribute to this in our own small way.
So we proudly introduce, the ArtDiffusor® – Micro Model D!

Beaker says, “It really helps to control unwanted specular reflections and flutter echos!”
Birds are very musical creatures, in the past, while Beaker was listening to the Bee Gees, he was bombarded with harsh specular reflections and flutter echos, it was a tragedy – but no longer.
Beaker tweets, “After installing my Micro Model D, Barry’s falsetto is so much clearer – It’s Amazing!”
Harsh acoustic environments are not for the birds… The ArtDiffusor®- Micro Model D… is.
Exploring Green Acoustic Treatment: Sound Channels® Acoustical Wall Fabric
Posted by Acoustics First in Absorption, Press Release, Products, Sound proofing on March 15, 2016
Sound Channels® Acoustical Wall Treatment – Made from Plastic Bottles?
Buzz words like “renewable”, “100% recycled” and “eco-friendly” seem to be everywhere we look, from coffee cups to building codes. This preoccupation with all things “green” has long passed the point of being just another fad. The desire for environmentally responsible products has shifted from being simply in vogue to being firmly requisite.
Leadership in Energy and Environmental Design (LEED) certification has become a standard benchmark for most modern buildings. To achieve the most points towards a LEED certified building, many architects are looking for “green” materials that show a commitment to the environment and responsible, eco-friendly practices. This includes the focus on materials that go beyond how much is used; to get a better understanding of what’s in the materials they specify for buildings and the effect those components have on human health and the environment. LEED certification also requires a more performance-based approach to indoor environmental quality to ensure improved occupant comfort. Specifying Sound Channels® acoustic wall fabric can help designers realize the above goals.
Obviously, specifying acoustic materials that use recycled content gets big points towards LEED certification. That said, the use of recycled content for acoustical products is not necessarily unique. For example, the fiberglass substrate for our Sonora Panels are made of 52 percent pre-consumer and 5 percent post-consumer recycled content. What is truly unique is the extent that Sound Channels® utilizes the waste product of one of our most widespread habits: the use of plastic water bottles.
Sound Channels – Recycled Textiles by the Numbers:
One yard of Sound Channels® acoustic wall fabric utilizes 15 post consumer plastic bottles. Recycling one ton of plastic from bottles saves approximately 7.4 cubic yards of landfill space. This means that 36.5 million pounds of Sound Channels® fiber saves 365 million bottles from landfills, 91,250 barrels of oil and over 64,000 tons of emissions!
How does a discarded plastic bottle become wall fabric? Let’s take a look at the process…
First, bottles are picked up at recycling centers then sorted by type and color. Then labels and caps are removed; the bottles are washed, crushed and chopped into very small pieces called “flakes”. These flakes are melted down and color is added. Lastly, anti-microbial technology is added before the product is made into Sound Channels® acoustical wall fabric. Sound Channels® then can be recycled back into fiber at the end of its life cycle.
Besides the “green” benefits, there are performance advantages with Sound Channels® acoustic wall fabric. The anti-microbial technology incorporates silver and copper ions into the root fiber which naturally attack microbes. This technology works against the types of airborne bacteria that we are most concerned about, making this product ideal for hospitals and classrooms.
Recently, an improved design has increased its sound absorption by 25% (NRC of .25). The uniform coverage you get with treating the walls with Sound Channels® eliminates the flutter/slap from reflective parallel walls, while helping to control excessive reverberation and noise buildup.
Whatever your application, Sound Channels® acoustical wall fabric and Acoustics First can help you towards your “green” goals!
Comprehensive Diffuser Data Now Available!
Posted by Acoustics First in Company Information, Diffusion, Press Release, Products on February 16, 2016
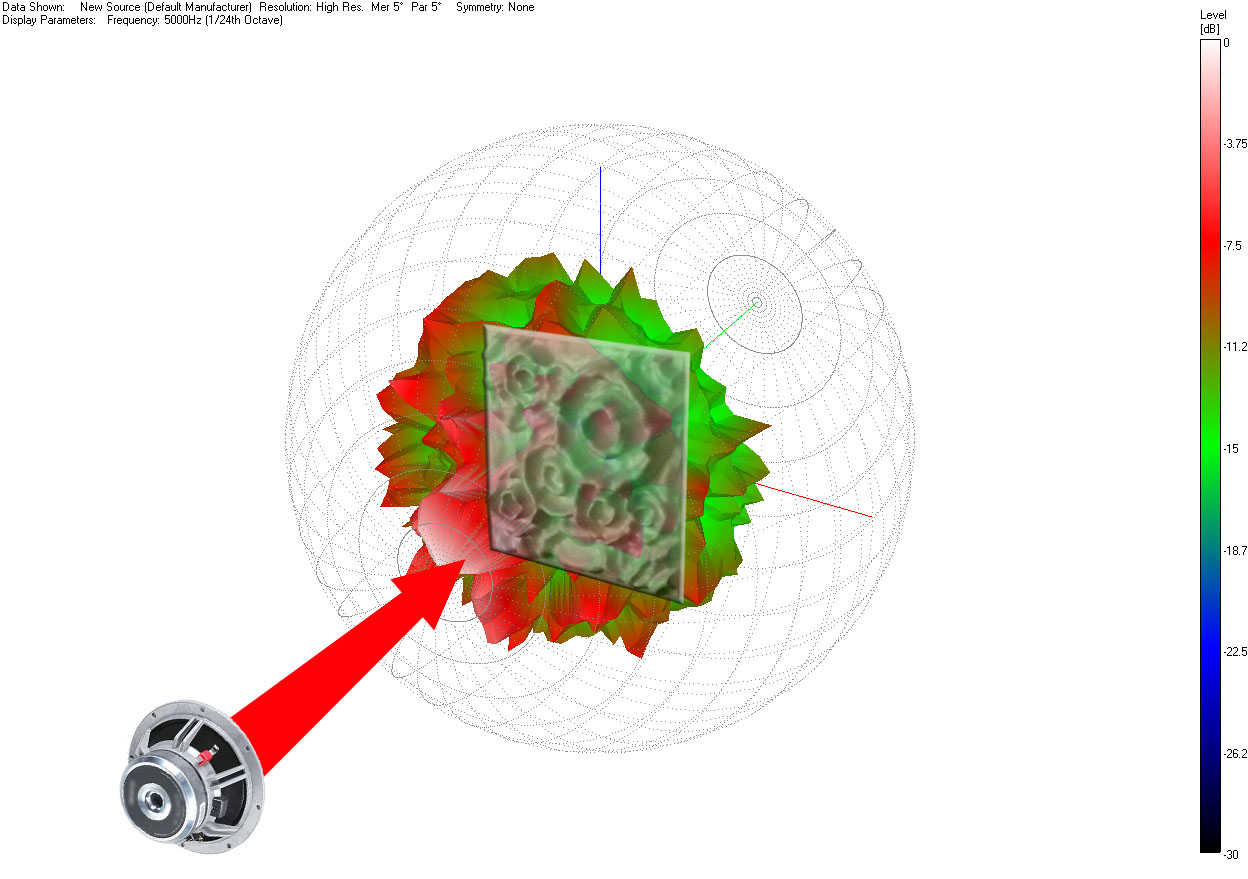
3D Polar “Balloons” are used to display a full hemispheric acoustic level response, at specific frequencies, in front of the diffusive surface. This is how a 5000Hz signal would reflect off an Art Diffusor® Model D: If we could see acoustic energy, this is what it might look like!
Acoustics First® has long been at the forefront of many exciting developments in the world of sound diffusion. In the spring of 2015, we created a method to evaluate sound diffusers using particle computer simulations. Then we utilized 3D printing technology to streamline the development of new diffuser prototypes. Recently, we received a patent for our innovative Art Diffusor® Model D design. Now we’re excited to announce the release of a new comprehensive data booklet for our entire line of sound diffusers!
In essence, this booklet represents an entirely new way to view and compare sound diffusers. “With technological advances accelerating at a staggering rate, we believed it would be advantageous to compile all of the measurable acoustic parameters of these devices, in order to develop an operating profile for each.” Since sound absorption and sound reflection can both be measured with great accuracy, we foresee a use for this data, or similar data, in virtual acoustic room modeling, along with other useful applications.

Contact us for your own print copy of the Acoustics First Diffuser Data booklet (or click here to download the PDF). The electronic data that was used to create the polar diffusion balloons is also available per request (Data compiled for Acoustics First by NWAA Labs in Elma, WA).
Currently, we are working closely with other members of the industry in an effort to develop a universally accepted standard for testing sound diffusion. In the absence of such a standard, Acoustics First is presenting this data in good faith as we believe it represents the best of what is currently available.
We look forward to sharing more advances in the field of sound diffusion!
Acoustic Treatment for your Home Theater or Listening Room
Posted by Acoustics First in Absorption, Diffusion, DIY, Home Entertainment, Home Theater, HOW TO, Media Room, Products on January 19, 2016
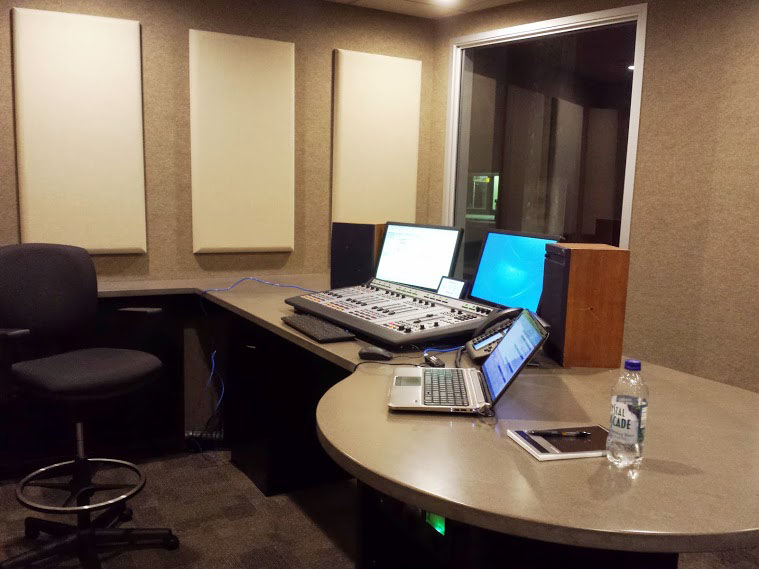
Any good theater or listening is acoustically treated to ensure the sound coming from the speakers is what arrives at the listener’s ears. Conditions common in small/medium rooms, such as flutter echo and comb filtering, degrade the clarity of music and speech. Here are some tricks to get a full and accurate sound out of your home theater or listening room. For those visually inclined individuals, the accompanying video shows how a critical listening space would ideally be treated.
Bass Traps – low-end control
Low frequency problems are common to almost any room, regardless of size. The good news is that most of the time the solution is simple. By installing bass traps in the corners of the room you can prevent the excessive bass build-up. If bass frequencies are allowed to build in the corners, it causes the bass frequencies to become muddy and undefined. The more corners you cover with a good trap, the better bass response you get from the room.
Having bass traps in all corners is best. That said, if you only have budget for two, having bass traps in the front corners of the room should be the highest priority. Fabric wrapped absorbers look as good as they sound, and Geometrix™ by Acoustics First, fit the corners like a glove.
Broadband Absorption – tame the ring.
To control the flutter echo caused by reflective parallel walls, it’s vital that the first refection points are treated with broadband absorption (wall panels). More than likely, your TV and/or sound system is in a fixed position, and your listening position will be relatively fixed as well. This should make the early reflection surfaces easy to locate. Sound travels in all directions from the speaker, including behind it, so put absorbers behind it on the wall. Don’t forget the floors, ceiling, and the wall behind you – sound will bounce off those as well.
Hang broadband absorbers over all the early reflection points – left, right, front and back so they are centered at ear height. Placement is the first key to getting this reflection free zone. The second is the right choice of absorber. To match your fabric wrapped bass traps, the simple choice is get some more panels wrapped in fabric. The Sonora® line of broadband absorbing panels coordinate with the bass traps, and come in a plethora of sizes and mounting options to work in your space.
Diffusers – put life back into your space.
Diffusion will give us something we couldn’t attain through absorption – a sense of open space. Even after treating with absorbers, there are still areas of the room where sound waves will sit, because your room is a fixed box with fixed speakers. Diffusers scatter the energy, creating ambiance with residual energy. This simple step does not remove energy from your room, but redistributes it into a soundscape that can make you forget you are in a room at all. In order of priority, the rear walls, front wall and ceiling are the most important surfaces to install diffusers.
There are many ways to diffuse the sound and coordinate with your room, from the fabric covered HiPer™ Panel and Double Duty Diffusers™, to the striking line of Art Diffusors® like the Model C, which can be painted to match your décor.

You must be logged in to post a comment.