Archive for category Diffusion
DIY – Nouveau™ Home Theater Back Wall
Posted by Acoustics First in Diffusion, DIY, Home Theater, Products, Studio Control Room, Uncategorized on August 7, 2020

It wasn’t a difficult install, but these Nouveaus made this space sing.
Adding Nouveau™ wood diffusers to a home theater is not as daunting a task as it may seem, and can be done with a little planning and a few tools. This install used an ingenious mounting method to ease the final install. Instead of mounting the z-track to the wall directly, it was mounted to sheets of plywood which were hung with Gorilla/Hercules hooks.
The first task was to pick a stain. You can use the back of a plank to get an idea of how the poplar will respond to the different options. Poplar has a very interesting and varied structure that will take stain differently than some other woods. Darker stains may be more consistent, but don’t reveal the character and variation in the wood. This install chose a Smoke Gray which grayed out soft areas and browned the harder heart wood. A semi-gloss clear coat was used to finish.
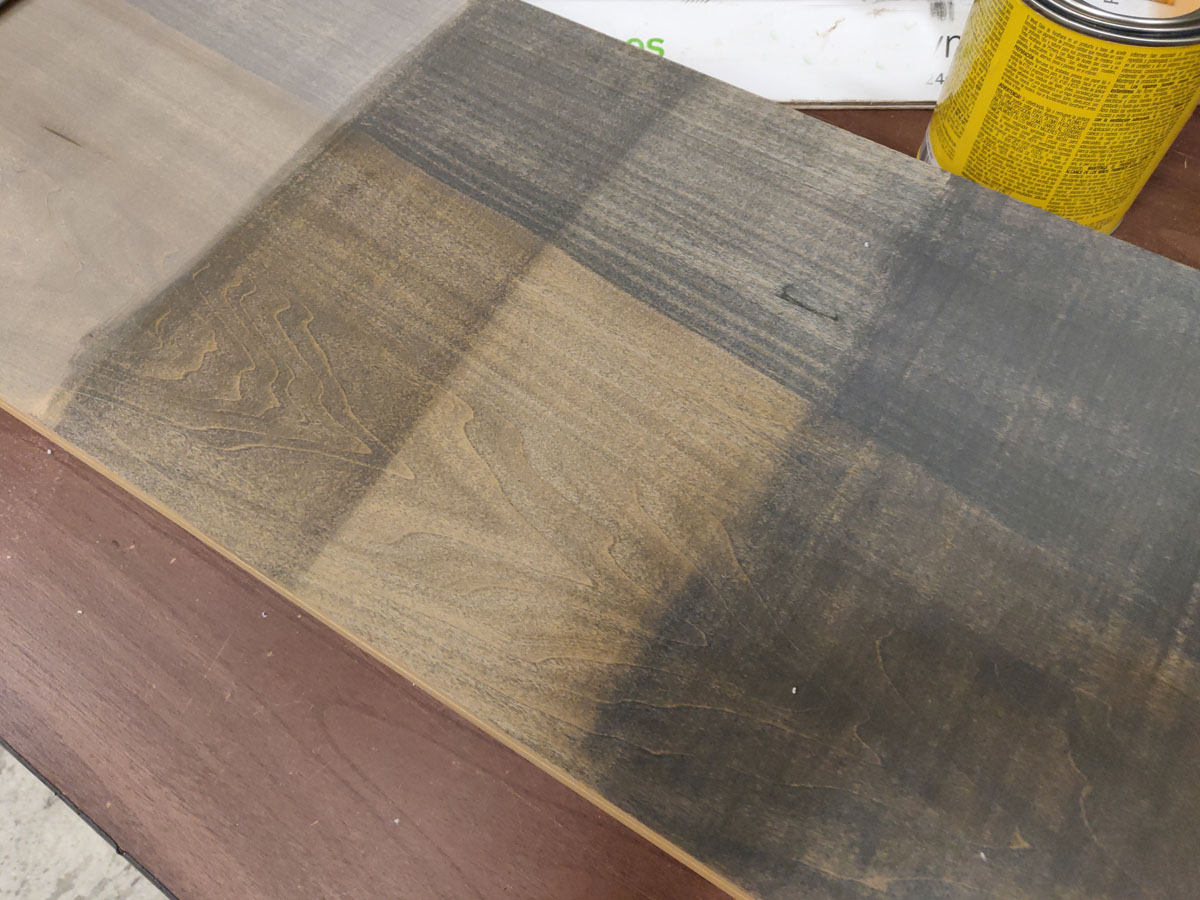
Using the back of the Nouveau™, you can see how the stains will “take.”
While the stain dried, the mounting plywood was cut down to hide behind the planks. Four hanging straps with eye-loops were then added to the top edge of each of the plywood sections, and spaced to avoid studs.
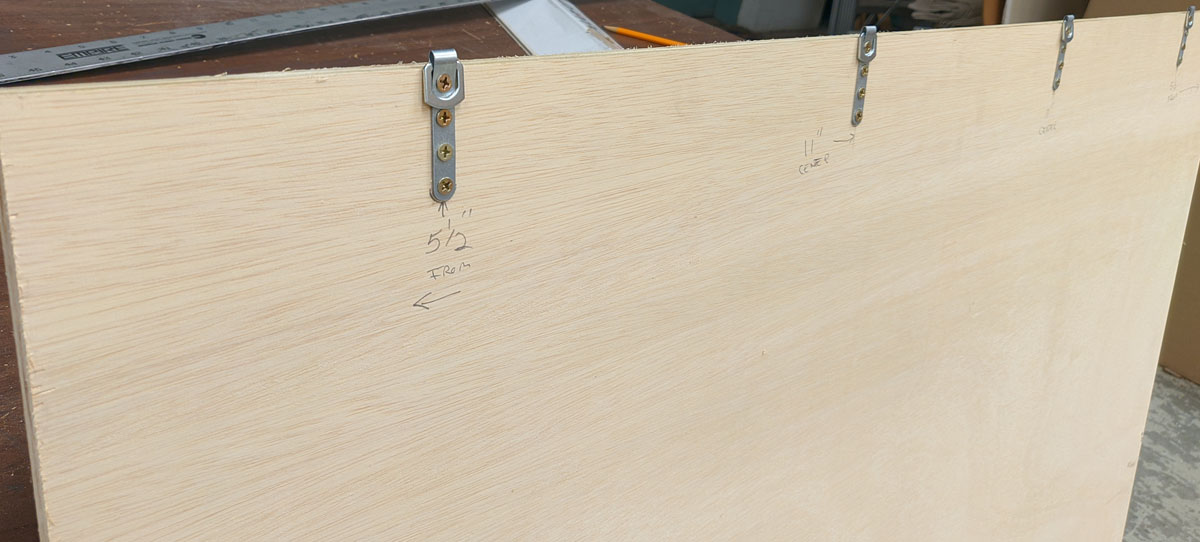
Industrial hanging eyelets were added to the top edge of the sheets to make them easy to level and hang with the Gorilla Hooks.
The Z-track that would normally be installed on the wall was installed on the opposite side of the plywood. This will make it easy to hang the Nouveaus onto the sheet after it’s on the wall.

Z-Bar track was added to the top and bottom of the plywood sheet to accept the z-bars that are going on the back of the finished Nouveau™ planks.
After the Nouveau™ planks are finished with the staining, and left to cure for a few days, they are ready to have the mating Z-bars attached to the back. They are installed with the same spacing as the Z-tracks on the plywood sheets. This will make it easy to align them after the plywood is hung on the wall.

The z-bars are measured, marked, and installed at the same spacing as the z-tracks on the plywood.
The Gorilla/Hercules Anchor hooks are rated to around 50-60 lbs each. The Nouveau™ planks are roughly 25lbs each (at 48 inches) and each section has 4 hooks supporting 4 planks plus the weight of the 3/8″ plywood. The hooks are installed so that the plywood will hang level – with the weight distributed evenly across all four hooks.

When installed properly and leveled, each of these hooks will hold up to about 50-60lbs each. In this configuration, they should only need to support about half that.
Finally, the Nouveau™ planks are installed into the Z-Tracks on the plywood, and moved into position. Because the z-bars were installed square and level, there is no shifting, and they hang true. The undersized plywood sections disappear behind the planks leaving the impression that the planks are floating slightly off the wall.

The install doesn’t look much different from a direct mount z-track installation, with a small gap against the wall.
While this mounting method may not be ideal for every scenario, this was an effective way to install 8 Nouveau™ planks with only 8 small hook holes in the wall. These can now be installed in apartments or temporary environments with minimal damage to the existing walls – and once you are done, they’re easy to take down and reinstall somewhere else. You just need a level!
Art Diffusor® Nouveau™ – Limitless possibilities.
Posted by Acoustics First in Diffusion, Product Applications, Products, Uncategorized on June 5, 2020

ArtDiffusor® Nouveau™ on a wall with a dark stain – framed.
Hey! Here’s another installation of our new ArtDiffusor® Nouveau™. For this install, these four boards were not only stained, but also framed out to enhance the design aesthetic. From different paints and stains, to mounting techniques, there are limitless possibilities for customization to create your own unique and functional sound diffusing arrays.
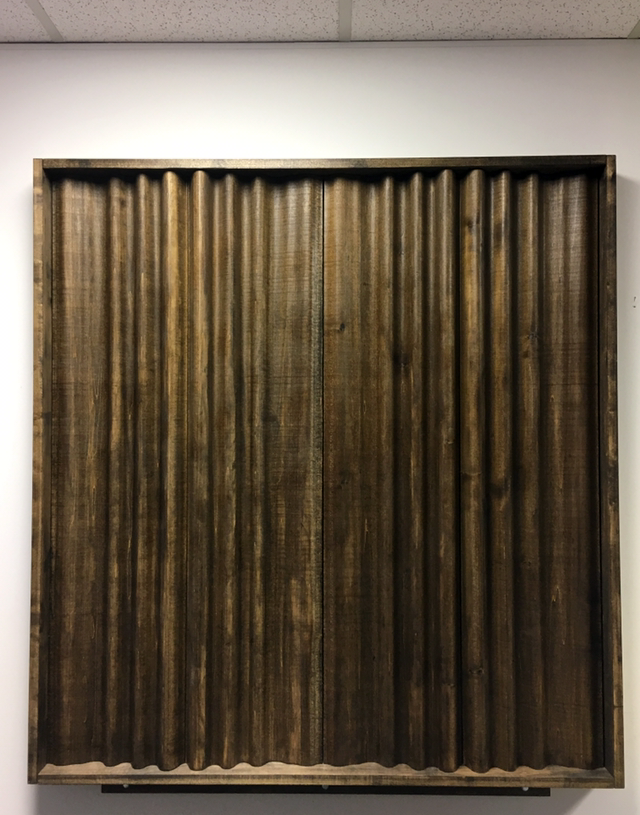
ArtDiffusor® Nouveau™ on a wall with a dark stain – framed.
Make your voice heard! – Treating your home office for conference calls.
Posted by Acoustics First in Absorption, Diffusion, Offices, Product Applications, Products, Teleconferencing, Uncategorized on May 21, 2020
The current crisis has forced a large portion of the workforce to operate out of their homes. Daily Zoom and Skype meetings have become a ubiquitous part of our lives. For many of us, this shift is only temporary. However, some companies are seeing the benefits of working at home, and are making plans to move employees to permanent remote positions.
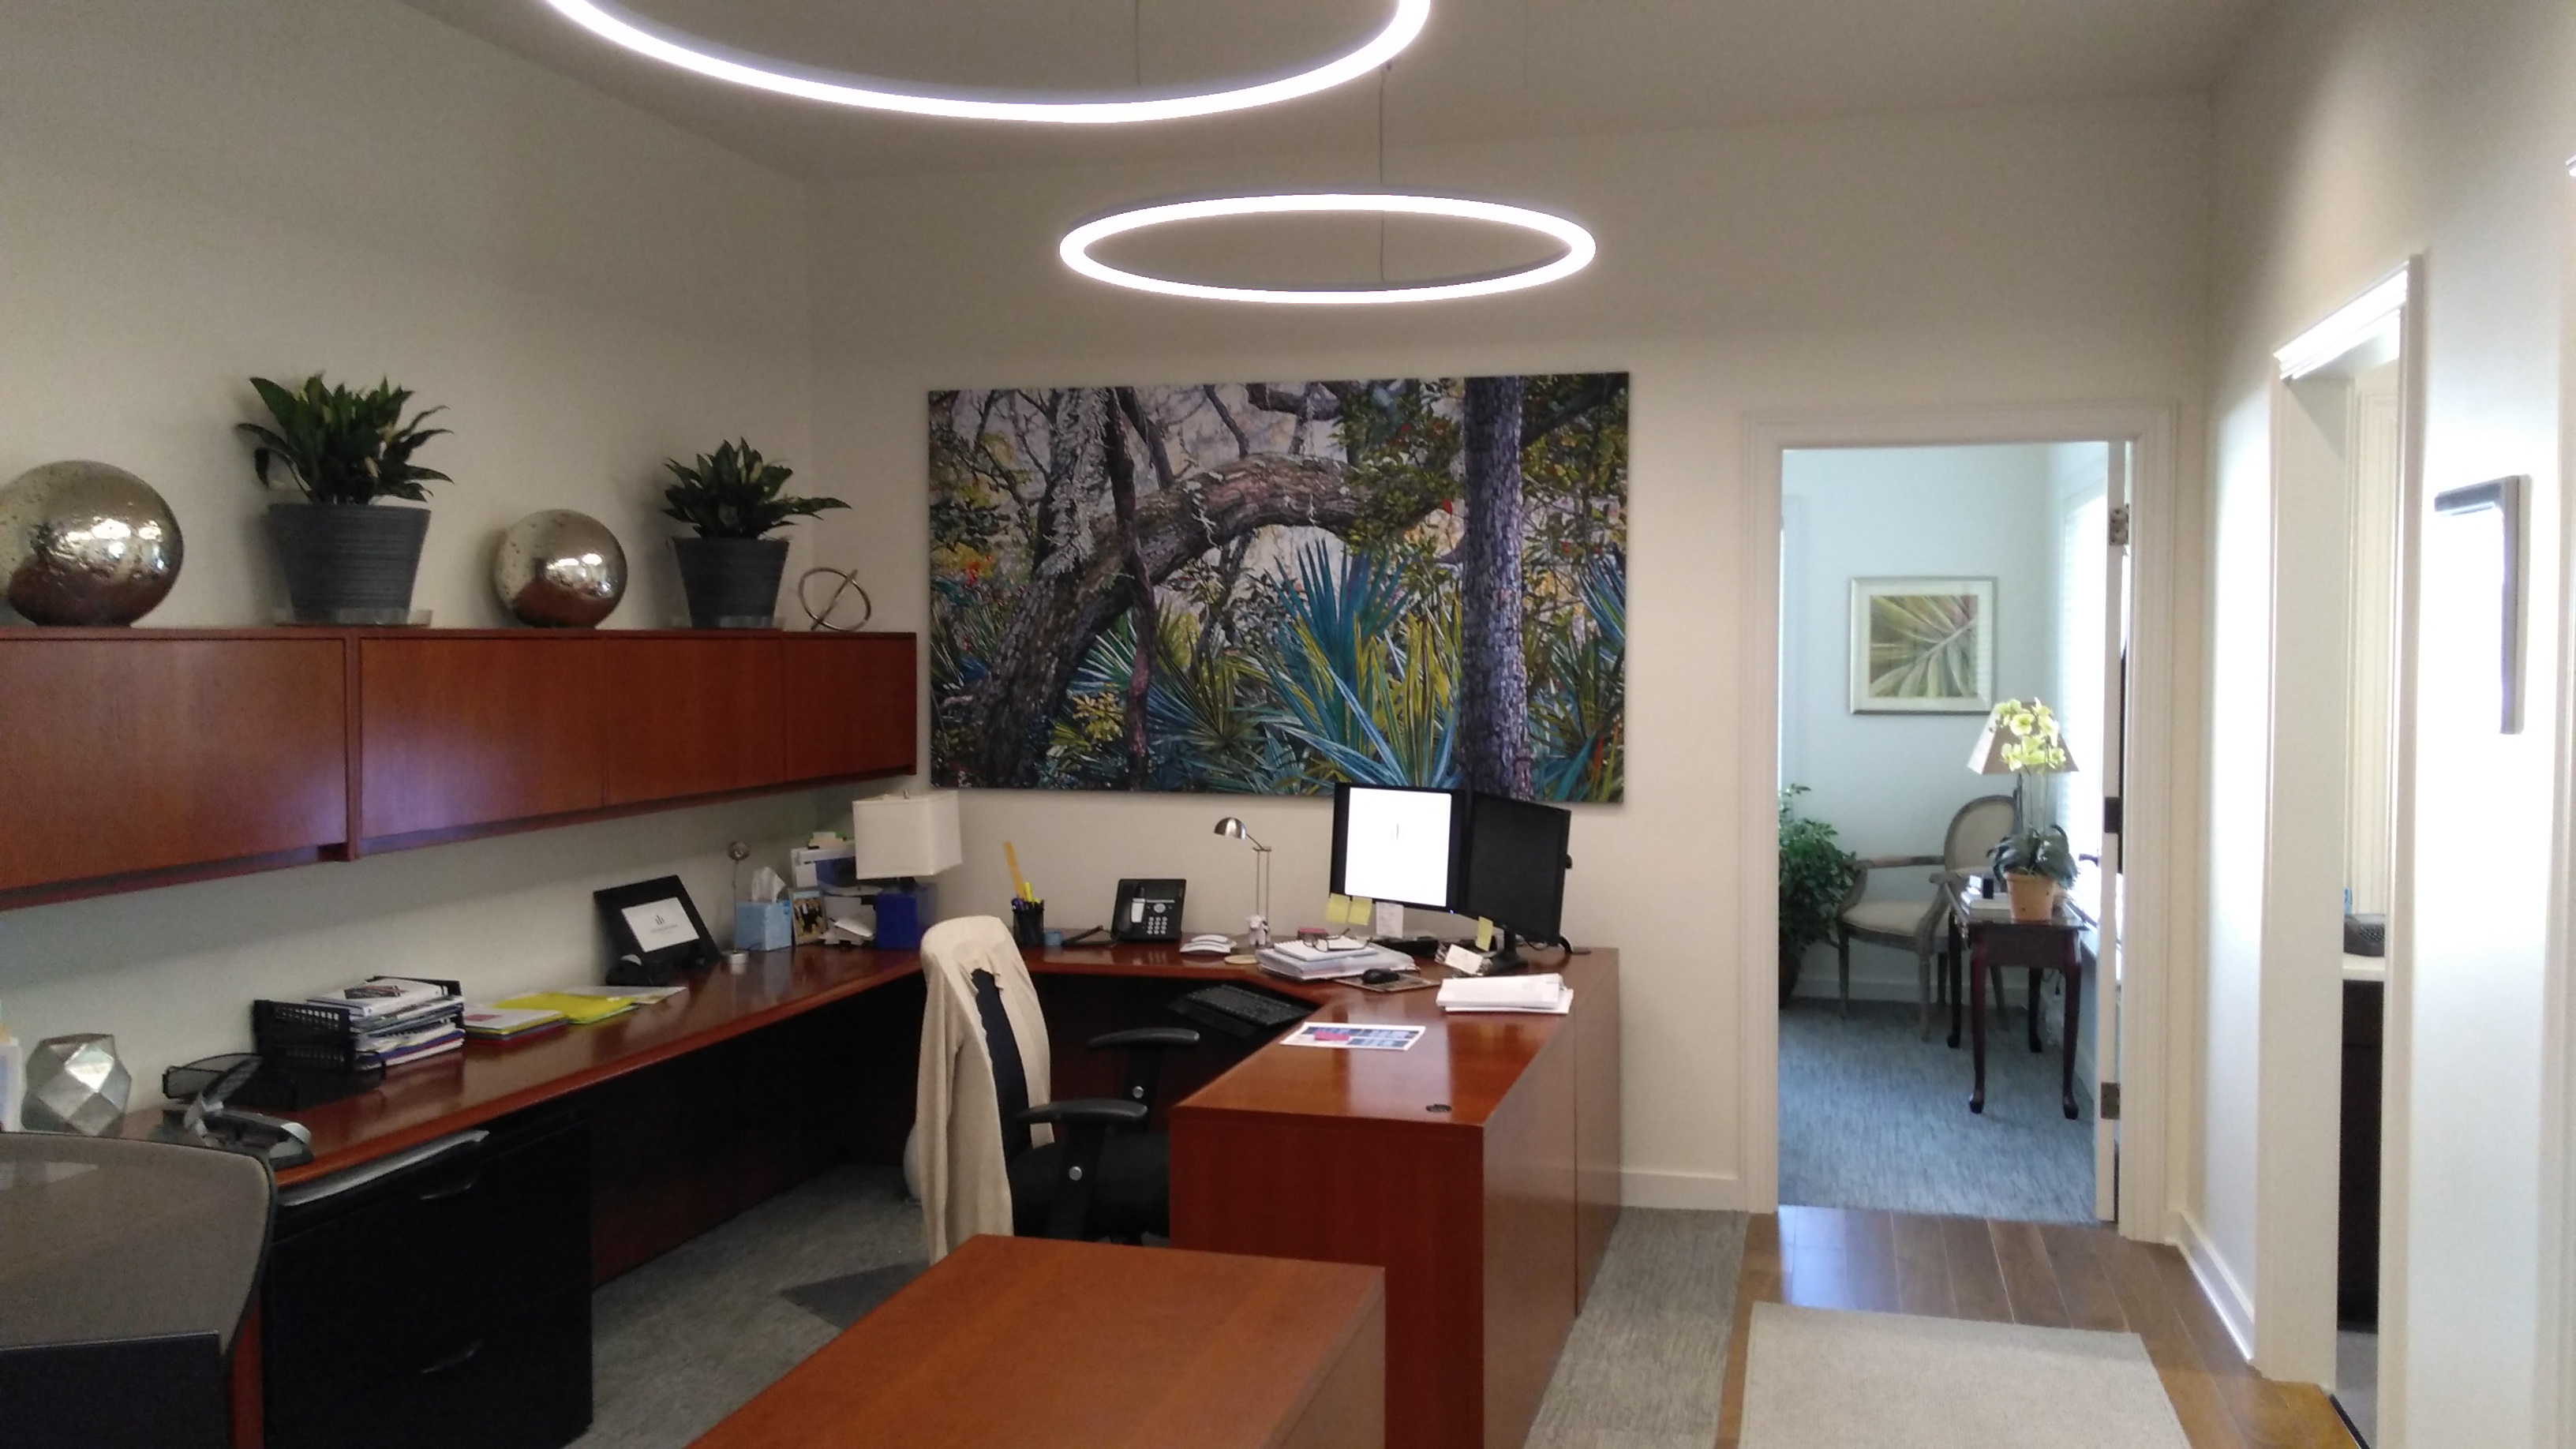
Teleworking Offices can benefit from acoustic panels like the Silent Picture® Panel, which reduces reverb and flutter echo, while appearing to be a piece of wall art.
I’m sure all of you have been on a conference call in which a team member’s audio is difficult to understand. This could be caused by a microphone or connection issue, but a large number of intelligibility problems are rooted in a room’s acoustics. Let’s take a look at some common acoustic issues in home offices and how they relate to conference call clarity.
Background Noise – Obviously, it’s difficult to understand speech when there is a lot of background noise. It is vital that you isolate yourself from extraneous sound sources as best you can. Some sources (TV, HVAC) are easier to control than others (traffic noise, pets, children etc.). Make sure your office is “closed off” from intruding noise. Remember, sound is a little like water; it will “pour in” through any openings, such as gaps around doors. If possible, install full perimeter seals and door sweeps to improve sound isolation in your office. If you have sound transmitting through a wall, ceiling or floor, you can consider adding a layer of mass loaded vinyl to the assembly in order to help block unwanted air-borne noise. You can then cover the mass loaded vinyl with SoundChannels® like in this blog.
Reverberation – In simple terms, reverberation is the sound energy that remains in a listening environment as a result of lingering reflections. The reverberation time (RT or RT60) quantifies how quickly an impulse sound decays in a space. Reverberation time is dependent upon the volume and surface materials of a given room. Large spaces with hard materials (tile, drywall etc.) have longer reverberation times, while small rooms furnished with “softer” materials (carpet, drapes etc.) sound more much more “dead”. Speaker phone conversations require a very short reverb time, for optimal clarity, somewhere in the .5s range (half of a second). You can reduce reverberation in your home office with the addition of “fluffy” or irregular furnishings, acoustic panels, rugs, curtains and plants.
Flutter Echoes – Flutter echo, which can be heard as an annoying “ringing sound”, is caused by parallel reflective surfaces. In certain critical listing environments, sound diffusers are used to alleviate flutter echo. Flutter echoes can greatly degrade conference call clarity. This phenomenon can occur between two walls or floor-to-ceiling. To control flutter echoes in your office, you should break up any parallel surfaces with furnishings and/or sound absorptive treatment.
Silent Picture®, Tone Tile® and Sonora® Panels are all great ways to attractively incorporate sound absorption into your work space!.
Reach out to Acoustics First® for a treatment recommendation for your home office!
Acoustics First talks Diffusion in Sound & Communications
Posted by Acoustics First in Articles, Diffusion, Press Release on March 24, 2020

When Sound & Communications needed some industry perspective on diffusion, they decided to go to the source. Acoustics First has been developing sound diffusers for decades, and has done some of the most comprehensive research on developing testing standards for diffusion and reflected acoustic energy with the ASTM.
Acoustics First’s chief science officer, Jim DeGrandis, covers why diffusion is so much more complex than absorption in the February 2020 edition of Sound & Communications.
Click here for the full article
Acoustics First would like to remind everyone that it’s the little things that matter…
…remember to wash your hands and stay safe.
Improving your room’s acoustic system.
Posted by Acoustics First in Absorption, Articles, Company Information, Diffusion, DIY, Mentions, Multipurpose Rooms, Uncategorized, Worship Facilities on October 25, 2019
When RPN magazine needed an article to teach readers how to improve their room acoustics, they turned to Acoustics First® to get the scoop.
Read the Article:

Download (PDF)
or
Use online reader
or
Just keep reading!

Learn About
YOUR ROOM’S ACOUSTIC SYSTEM – and How to Improve It
Ever wonder why some rooms sound better than others? What components contribute to
perception of sound in a space? What knowledge do you need to solve the sound problems that
you have?
The System
When people read the heading “The System,” there will be a great number who assume I am
talking about the “sound system” in a room – the speakers, amplifiers, signal processors, and
other electronic components that generally produce sound in a space. This is only part of the
acoustic system that creates the soundscape we hear when we are exposed to sound in a space.
Yes, sound comes out of speakers, and they are important, but the source of sound isn’t what
gives us a perception of the space we are in – it’s the space itself!
The walls, ceiling, floors, seats, sculptures, drapes, artwork, construction, and even people in the
space are all contributing to how we perceive that sound source in any given acoustic
environment. I’m not saying that the speakers aren’t important – but they are just the source of
sound.
If you have a room with a 5-second reverb time, it doesn’t matter what type of speakers you
have, any sound they make is going to continue to be heard for five seconds – as is every sound
afterward.
What does this mean? Even if you have the best speakers in the world in that room, it will sound
terrible (unless you are listening to Gregorian Chants…then it will sound awesome.)
However, if someone is speaking at a normal rate of speed, it will be unintelligible after the first 2
or 3 words – as those words will continue to bounce around with the sound of the next 15
words…like listening to 15 people all saying different things at the same time.
Your room is an acoustic system – from the sound source, to the ears of the listeners – as well as
everything in, around, and even outside of that room.
The Acoustician
Have you ever watched an acoustical consultant begin the analysis of a new space? It’s
fascinating. You will undoubtedly see them walking around the room while making noises –
clapping their hands, snapping their fingers, whistling, even talking loudly, shouting, and singing.
It’s as if they are bats using different sounds to figure out the characteristics of the room they are
in. They are, in fact, analyzing the room’s acoustic system. Where does sound reflect? Are there
echoes or flutter? What is the character of the reverb? They look at the structure, materials,
corners, architectural elements, floors, carpets, walls, windows, doors, ceilings and more.
Note: They begin this analysis WITHOUT using the speakers.
Why? If the room is bad, your speakers will not fix it.
What are they doing? They are listening. That’s it. Nothing fancy here – just listening.
I will say that many acousticians have done this so many times, in so many different spaces, that
they have an idea of what the room is going to sound like, without even making a peep – just by
looking at it. What are they looking for? What are they listening to? What can you learn from this?
Time to Listen
Everyone has a room where they dislike the acoustics. Go in there. Clap your hands. What
happened? Clap again. Snap your fingers. Make some noise – but make sure to listen. Where is
the sound coming from? Turn around, clap again. Walk to another area…clap.
As you walk around, you will hear the sound change. Turn your head. Is the sound coming from
the corner, the ceiling, both? Angle your ears in between two corners. Maybe that’s where it’s
coming from. Is there a large open balcony or a curved wall? Ask yourself these questions as you
walk around and listen.
Are any of the surfaces hard? What about the floor? Is the sound lingering over your head up in
the ceiling? Is there a defined slap off the back wall when you clap your hands? Is there a ringing
noise? Does the echo wash over you and linger?
Sharpen your listening skills. Map the room with your ears.
What Are You Doing in the Room?
This is an important question. For most uses involving speaking and understanding speech, there
are some good general targets. For example, for most rooms over 100m3 (15’ cube), a 0.8 to 1.7
second reverb time is ideal for many different functions.
However, keep in mind, some spaces may have special reverb requirements. If you’re doing
Gregorian Chants, a three to five second reverb time is still great!
Now, How Do You Fix It?
Most rooms are going to benefit from reducing the acoustic energy in the space. Absorption is
the most direct and easy to understand method – add soft stuff.
This sounds overly simple, but the initial experiments on calculating absorption were done by
moving around seat cushions – simple, but effective.
Fabric-wrapped absorber panels are today’s high-tech equivalent to the seat cushions. Curtains,
blankets, carpets, and other soft materials will also help to reduce the acoustic energy of a space.
Treatments like diffusers help to reduce focused acoustic reflections by spreading the energy
around. When sound hits a surface that is not flat, it will cover the entire surface, bending
around the corners and curves, and then bounces off in different directions.
This reduces what we refer to as ‘specular’ reflections – or direct, mirror reflections – which are
responsible for slap echoes, ringing, and flutter.
However, some hard, reflective surfaces in the front of the room can be beneficial to help
reinforce acoustic sound sources, like speaking, singing, or acoustic instruments.
Treating corners with bass traps can help to reduce bass buildup, as well as corner reflections,
which can cause other clarity issues within the listening environment.
Don’t forget…look to the ceiling for rafters and other elements that cause sound to bounce
around and put some absorption up there.

You must be logged in to post a comment.