Archive for category Product Applications
DIY – Treating a Wall – BlockAid® and SoundChannels®
Posted by Acoustics First in Absorption, Animal Shelters, Auditorium, Broadcast Facilities, Classrooms, DIY, Fitness, Government, Gymnasium, Home Entertainment, Home Theater, HOW TO, Media Room, Multipurpose Rooms, Music Rehearsal Spaces, Music Tracking Room, Product Applications, Recording Facilities, Recording Studio, School & Educational Facilities, Sound proofing, Studio Control Room, Teaching Rooms, Teleconferencing, Theater, Uncategorized, Vocal Booth, Voice Over on July 16, 2015
![]() On many occasions, we get asked about common ways to treat a wall (or walls) either for broadcast, podcast, or other voice recording scenario – where they not only want to tame the reflections within the room, but also block a certain amount of sound coming into – or leaving the room.
On many occasions, we get asked about common ways to treat a wall (or walls) either for broadcast, podcast, or other voice recording scenario – where they not only want to tame the reflections within the room, but also block a certain amount of sound coming into – or leaving the room.
Budget is frequently an issue, major construction is usually unwanted, but effective results are always required.
We’re going to show you how to handle a room upgrade – cut down on the sound transmission and cut the room reflections – all with the same skills required to hang high quality wall coverings! Let’s see how you can cover a wall with BlockAid® vinyl sound barrier to block unwanted sound, then go back and cover that with an absorptive layer of Sound Channels® wall covering to finish it off!
This treatment is not recommended for renters, as this is not an easy upgrade to undo. However, if you have an extra bedroom you are using as Podcast studio, this is a great way to treat it… Let’s get started!
Installing BlockAid®
 1. Measure the wall for the first panel length. Mark the panel width on the wall. |
 2. Measure and Mark the length of the wall on the BlockAid® |
 3. Use a straightedge and a razor to cut the BlockAid®. |
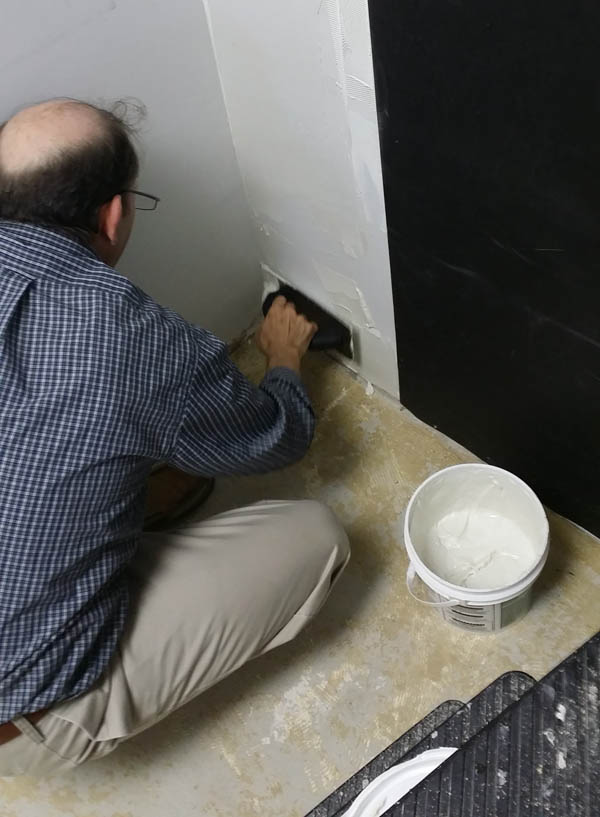
 4. Using a trowel, apply vinyl tread adhesive to the wall, covering the whole area where the first panel is going. (You marked the wall right?) |
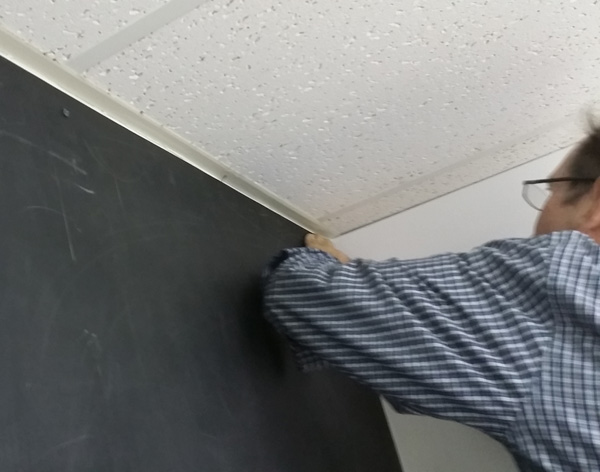 5. Hang the panel starting at the top, install a few screws to hold it in place while the adhesive sets. (You will probably need a friend to help, as BlockAid® is a pound per square foot!) |
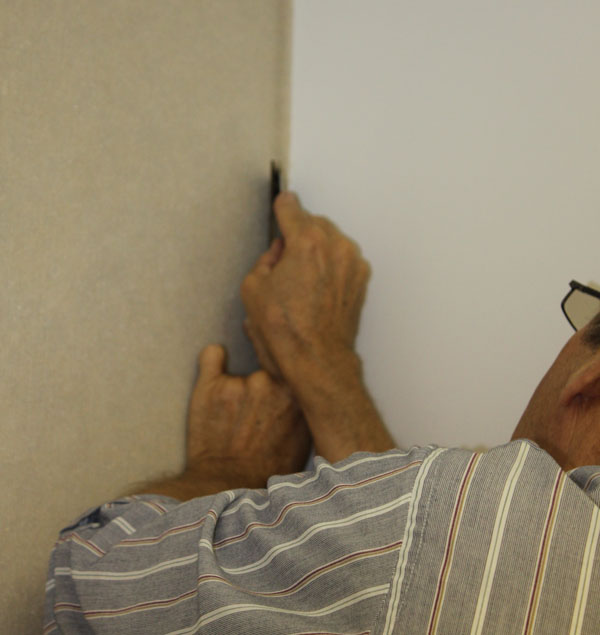
 6. Using your hands and a putty knife, smooth out all the air bubbles from behind the BlockAid® so that you get a good bond when the adhesive cures. |
 7. Repeat the steps for the next strip. Measure, Mark, Cut, Trowl, Hang… |
 8. Make sure you line up those seams! push them right up agaist each other. Smooth out the air bubbles, cut out any outles, trim any extra… Let dry! |
Good job! Now, take a breather while that dries, and notice how much less sound is passing through the walls. This is when you will notice that the sounds are now coming from under the door, and through the leaky old window. These can be taken care of in different ways…. but the easiest way is the same way you deal with keeping the cold out! Get some weather strip, a door skirt, seal the gaps around the frame of the door, and windows, maybe go out and buy some heavy curtains for the windows… if you have some leftover BlockAid®, you can always get some Industrial Velcro and temporarily stick a piece over the window!
Installing Sound Channels®
 1. Remove the Screws from the BLockAid® – if you didn’t already… then same as BlockAid®, measure the wall, mark it, measure and cut a piece of Sound Channels® and start troweling on the Chapco! |
 2. Well, when you get tired, make your friend finish troweling out the adhesive to cover where the panel is going. (You are going to overlap the seams.) |
 3. Starting at the top, hang the Sound Channels® overlapping the seam of the BlockAid® under it. Smooth out the air bubbles with your hands. Make sure it lines up well. No screws needed! |
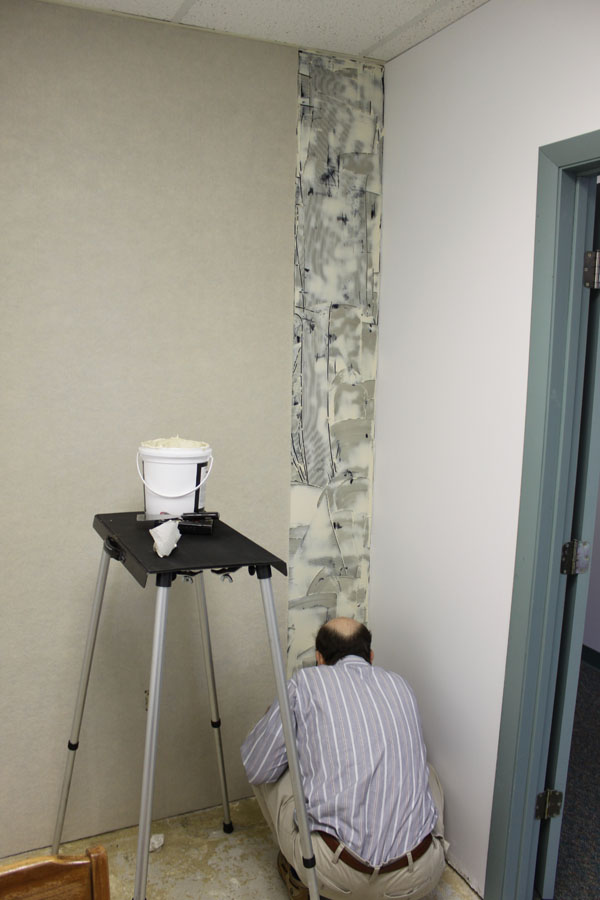 4. Measure and cut the next strip, carefully following a rib in the fabric, while your friend, (who is way better at troweling than you are anyway,) preps the next section with adhesive. |
 5. Best practice is to run the fabric in the same direction every time. Not just with the ribs, but in the same direction it comes off the roll. So find the top. |
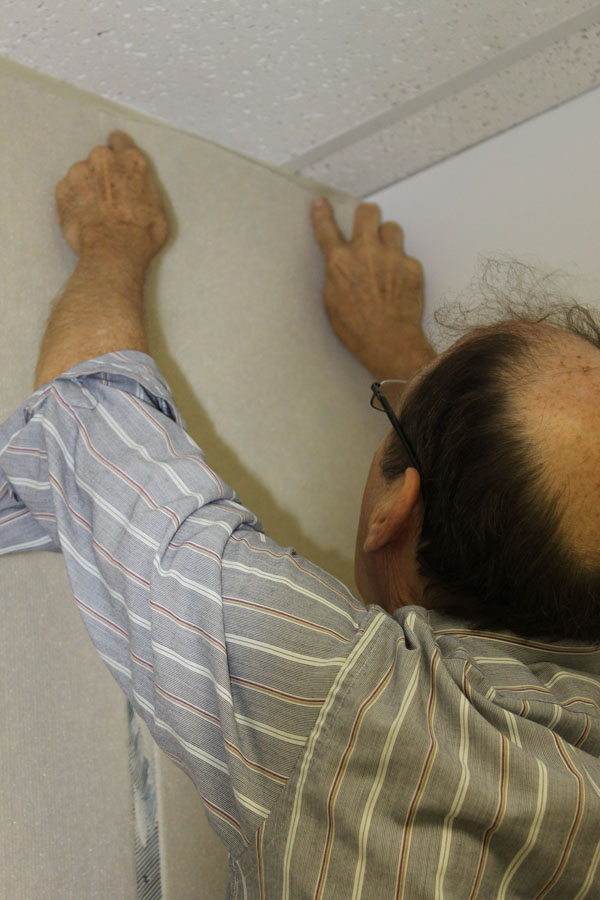 6. After you find the top, start hanging from the top, lining up the seams and smoothing out the bubbles as you go. |
 7. Keep those seams tight as you go. Keep smoothing… almost done! |
 8. Trim up the extra and repeat as many times as needed. |
That’s it!

Don’t forget to trim around those outlets!
This treatment is a common first step in treating many professional broadcast studios – it gives you extra isolation with the barrier and takes the edge of the sound reflections. Many professional environments then go back and add some additional treatments such as bass traps, diffusers, and broadband absorber panels – especially if these studios are planning on bringing in any musical guests.
This isn’t just for home studios. It works great for kids play rooms, bedrooms, home theaters, home gyms, and any place you want to block sound and tame the sound inside the room.
Customize your space as you will, but this treatment is a consistent winner for cost and performance, and is a great way to get started without breaking the bank!
DIY Microphone Shield/Gobo – 2 Minutes (with Video!)
Posted by Acoustics First in Absorption, DIY, HOW TO, Recording Studio, Video, Vocal Booth, Voice Over on May 1, 2015
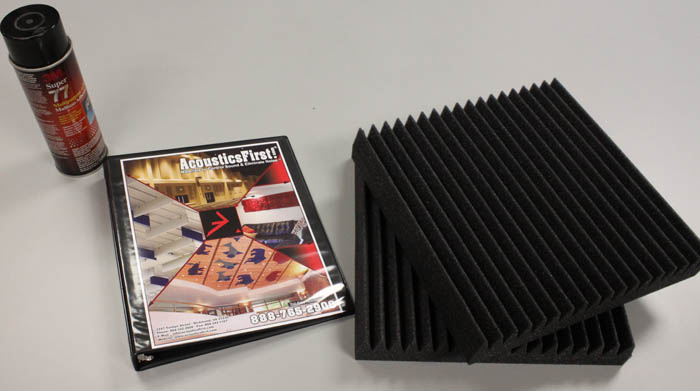
Stuff you need: Glue, Binder and Foam
Acoustics First understands that the Do-it-Yourself spirit in the audio world is alive and well, and here is another one of our contributions to that community.
The personal mic shield… all you need is…
- Foam safe Glue
- a One inch thick, three ring binder
- two 1 foot x 1 foot pieces of foam
- 2 Minutes
Got everything together?
Do you have 2 minutes?
Let’s do this!
Watch the video…
Or follow the steps…
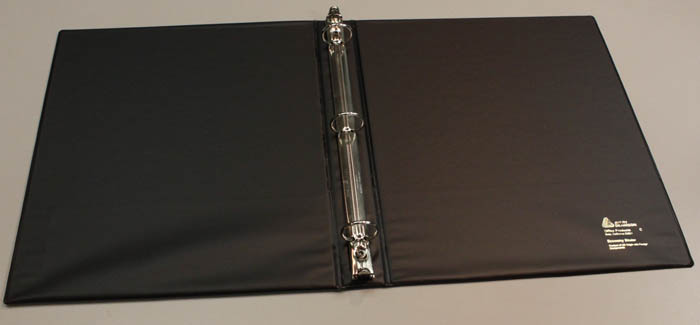
Open the Binder
Open the binder and bend the bottom tab flat.
 |
 |
Spray the Binder and the back of the foam with glue.
 |
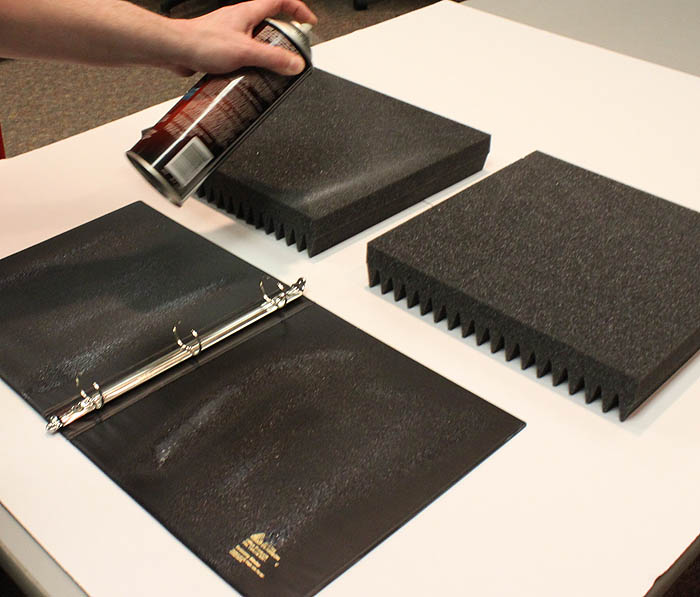 |
Wait for a few seconds for the glue to get tacky, then carefully stick the foam to the binder – be sure to apply pressure to allow for a strong bond.
 |
Give the glue some time to dry.

After the glue sets, slide the rings of the binder over a bare mic stand – the top tab will hold the shield up.

All Done! Just set up your mic and you’re ready to go!
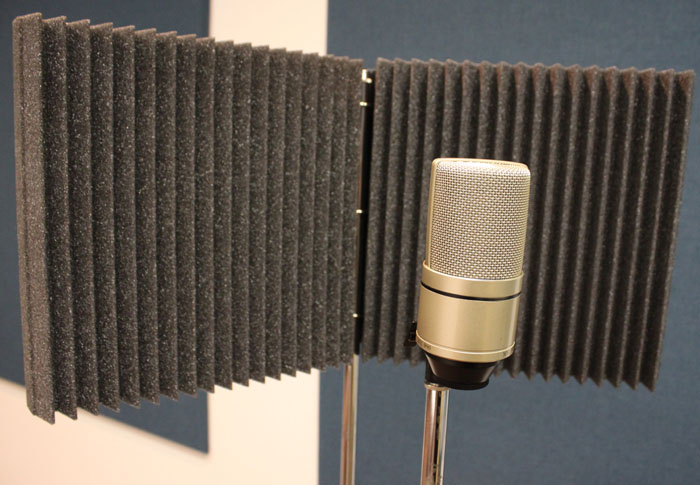
Complete Mic Shield with Microphone.
This DIY project is brought to you by Acoustics First – Be inspired and sound great doing it. Enjoy!
You don’t always hear what you see…
Posted by Acoustics First in Articles, Mentions, Product Applications, Uncategorized on April 14, 2015
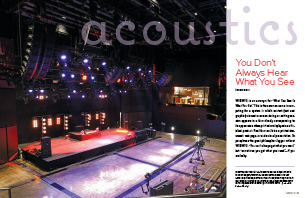 Recent Acoustics First article on PUPN!
Sometimes you enter a space that sounds amazing and wonder what treatments are being used. Many times the treatments are behind the curtain… both figuratively and in reality.
Learn about some of the ways acoustic treatments are hidden in plain sight, obscured from view, camouflaged, or just displayed proudly – Nick Colleran points out the not so obvious.
You just might find – you get what you need.
Click Here
http://www.pupnmag.com/article/detail/6404/acoustics-you-dont-always-hear-what-you-see
(Special thanks to the Great Philosopher Jagger)
– Acoustics First
Season’s Greetings from Acoustics First – 2014
Posted by Acoustics First in Absorption, DIY, Home Entertainment, Home Theater, HOW TO, Media Room, Offices, Product Applications, Products on December 9, 2014
Season’s Greetings from Acoustics First!

DIY Gift idea using Tone Tiles™ and some Creativity!
Acoustics First would like to offer this Do-It-Yourself gift idea to all of our readers this year.
If you’ve got a creative painting habit, give a customized gift that not only shows your creative talents, but also helps to improve the sound of the room!
Above is a festive holiday painting on one of our 1’x2′ Tone Tiles™.
Want to go a little bigger? We also have 2’x3′ Tone Tiles™ in Stock.

2′ x 3′ panel Photo from iPhone
A Second Idea is to get a photo printed on a Tone Tile™.
How about “posting” that photo to the “wall” of your living room, and have a great conversation piece as well as improved acoustics – at the same time !
Season’s Greetings and Happy Gift Giving!
– Acoustics First
* Don’t forget to ask your local printer if they have flatbed printing capabilities.
Tone Tiles™ – New! More Square Feet! Same Great Price!
Posted by Acoustics First in Absorption, Home Entertainment, Home Theater, Media Room, Multipurpose Rooms, Music Rehearsal Spaces, Offices, Product Applications, Products, Recording Facilities, Restaurants on October 29, 2014
That’s right! The Tone Tile™ line of products is expanding (literally.) We have added a new Size to the line of Paintable/Printable Tone Tiles™ – the New 2′ x 3′! Same Great price of $325 a box!

Look for our new ad in The Absolute Sound!
We still have the box of Ten 1’x2′ Tone Tiles™ for $325, but now you have the option to get a box of Four 2’x3′ Tone Tiles™ for the same $325! These are still paintable or printable, just bigger ~ So they have a larger impact visually and acoustically! Know an artist? Support the local artists or the artist in your own house – and create a one-of-a-kind piece of acoustic art!

3 Panels – Hand Painted by local Artist – Scott Cuervo
Got a great photo on your phone? We have seen some really great results with photos taken straight from their iPhone! Now, there is a way you can really take those photos and put them on your wall! They look great, and improve the acoustics of your room in the process.
2 foot x 3 foot panel printed from a Photo taken from an iPhone 5 (photo by Leah Grey)
If the 1’x2′ or the 2’x3′ Tone Tiles™ are not exactly what you are looking for, we also provide custom sizes up to 4’x8′! Quick shipping is not available for custom orders.
To review:
- New Tone Tile™ Box – Four Tone Tiles™ in a Box / 2’x3′ each. (24 square feet)
- Original Tone Tile™ Box – Ten Tone Tiles™ in a Box / 1’x2′ each. (20 square feet)
Either Option – Quick Ship available – Only $325.00/box
Printable/Paintable – get creative and sound great at the same time.

You must be logged in to post a comment.