Archive for category Diffusion
Bonus Room to Project Studio! Nick Lane Mastering
Posted by Acoustics First in Absorption, Customer Feedback, Diffusion, DIY, Recording Studio on February 23, 2017
Nick Lane, an independent audio engineer whose credits include Rascal Flatts and Reba McEntire, contacted Acoustics First® seeking help with his project studio. This process would convert the bonus room in his house (a second floor space above his garage) into a Project Studio.
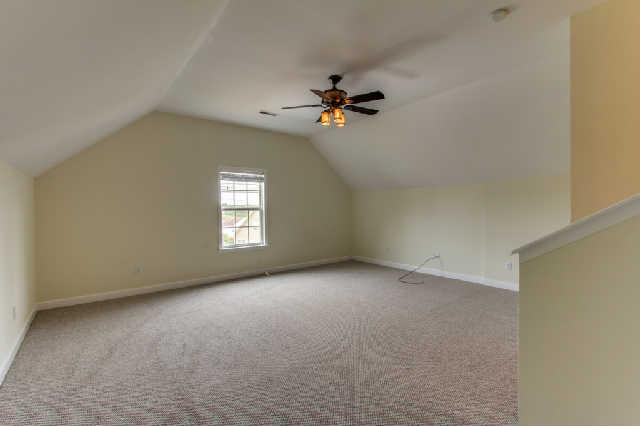
After receiving some measurements and photos, we went to work designing a layout for the space.
 |
 |
Placement of panels and ceiling clouds were optimized to reduce early reflections and trap bass, and a combination of Model D’s and C’S were used to widen the “sweet spot” of his room.

“Sounds really good!….. High end is sooo much less harsh…… walking around the room, the low-end doesn’t disappear in places anymore” – Nick Lane

Simulations! Now in stereo – and with absorption!
Posted by Acoustics First in Absorption, Diffusion, Product Applications on December 22, 2016
![]() You heard right – with both ears! (or Eyes?)
You heard right – with both ears! (or Eyes?)
The Acoustics First® simulations took a huge leap forward toward more accurately modeling real world acoustic environments in two important areas.
- Ability to simulate Two sources (Now in Stereo!)
- Modeling Absorption to strategically remove energy from a space!
These two additions to the Acoustics First® simulations allow a vast improvement to the modeling of acoustic field development – and, while still in the early development stages, has already been instrumental in advancing the development of systems and products to improve acoustics in numerous ways.
See for yourself: In this most recent simulation, we compare the development of the acoustic field in two spaces with identical stereo sources – one room is basically a concrete box, while the other is a concrete box treated with absorbers and diffusers.
Untreated vs. Full Treatment Room Sim (Two Channel – With Absorption and Diffusion!) from Acoustics First®.
Important Observations:
- Absorbers at early reflection points (Note Early reflection in First room)
- Diffusers breaking up specular reflections
- Absorbers constantly removing energy from the space – greatly reducing the overall intensity over the span of the simulation.
- This simulation is only modeling .046 of a second!
We hope you find this informative and stimulating and we will continue future developments of these simulations and try to add more functionality and realism to help all those out there to better be able to visualize the different ways you can affect the acoustics of a space.
For some of our previous Simulations – Click Here!
For our Vimeo Channel – Click Here!
Contact Acoustics First® for a high bitrate, presentation quality version of the videos – as well as permission and terms of use.
Acoustics First® makes sound Visible!
Posted by Acoustics First in Diffusion, Product Applications, Products, Uncategorized, Video on November 18, 2016
![]() As many of you know, Acoustics First® invests a great deal of energy in the development of the science of acoustics. Here are three ways that we are making advances that help people learn and actually Visualize acoustics!
As many of you know, Acoustics First® invests a great deal of energy in the development of the science of acoustics. Here are three ways that we are making advances that help people learn and actually Visualize acoustics!
Those interested in sound diffusers have certainly noticed that Acoustics First® has produced a Diffuser Data book, containing all kinds of test data about how our diffusers contribute to the sound in your space. This information is a great advancement and we have worked closely with the ASTM committee developing this test method. Some people wonder exactly how the test produces the data that we report, and we have developed a simulation to show exactly how the sound energy is sampled during this test.
If you download the Diffuser Data booklet, you can see a picture of the gigantic test arc at NWAA Labs which is used for the real world tests.
Acoustics First – Diffuser Data Test Demo from Acoustics First®.
We have also made leaps and bounds in using simulations to show the different ways that diffusion develops in a space. Depending on the type and placement of the diffusers you install, the diffuse field will develop at different speeds, at different frequencies. We can now show a couple of simulations of the development of a diffuse field to help you visualize how sound moves in room without treatment and with two different sets of diffuser treatments.
Acoustics First – Room Simulations from Acoustics First®.
Bonus video! Imagine being able to see the Untreated room and the Model D room from a different angle – To be able to move around the outside of the room and see how the sound field develops from a different perspective. Imagine no more! Here it is!
Acoustics First – Sound Field Development Simulation – 3D Panning from Acoustics First®.
If you prefer to use YouTube – you will find the videos uploaded at our YouTube channel here.
We hope these helped you to “look” at acoustics in a whole new way, and stay tuned – more advancements are coming soon!
Contact Acoustics First® for a high bitrate, presentation quality version of the videos – as well as permission and terms of use.
Bonus! Simulations! Now in stereo – and with absorption! Click Here!
DIY – Back Wall Diffuser Array/Bass Trap: Revisited
Posted by Acoustics First in Absorption, Articles, Broadcast Facilities, Customer Feedback, Diffusion, DIY, Home Entertainment, Home Theater, HOW TO, Media Room, Music Rehearsal Spaces, Music Tracking Room, Product Applications, Recording Facilities, Recording Studio, Studio Control Room, Teleconferencing, Theater, Vocal Booth, Voice Over on July 14, 2016

DIY – Diffuser Array/Bass Trap
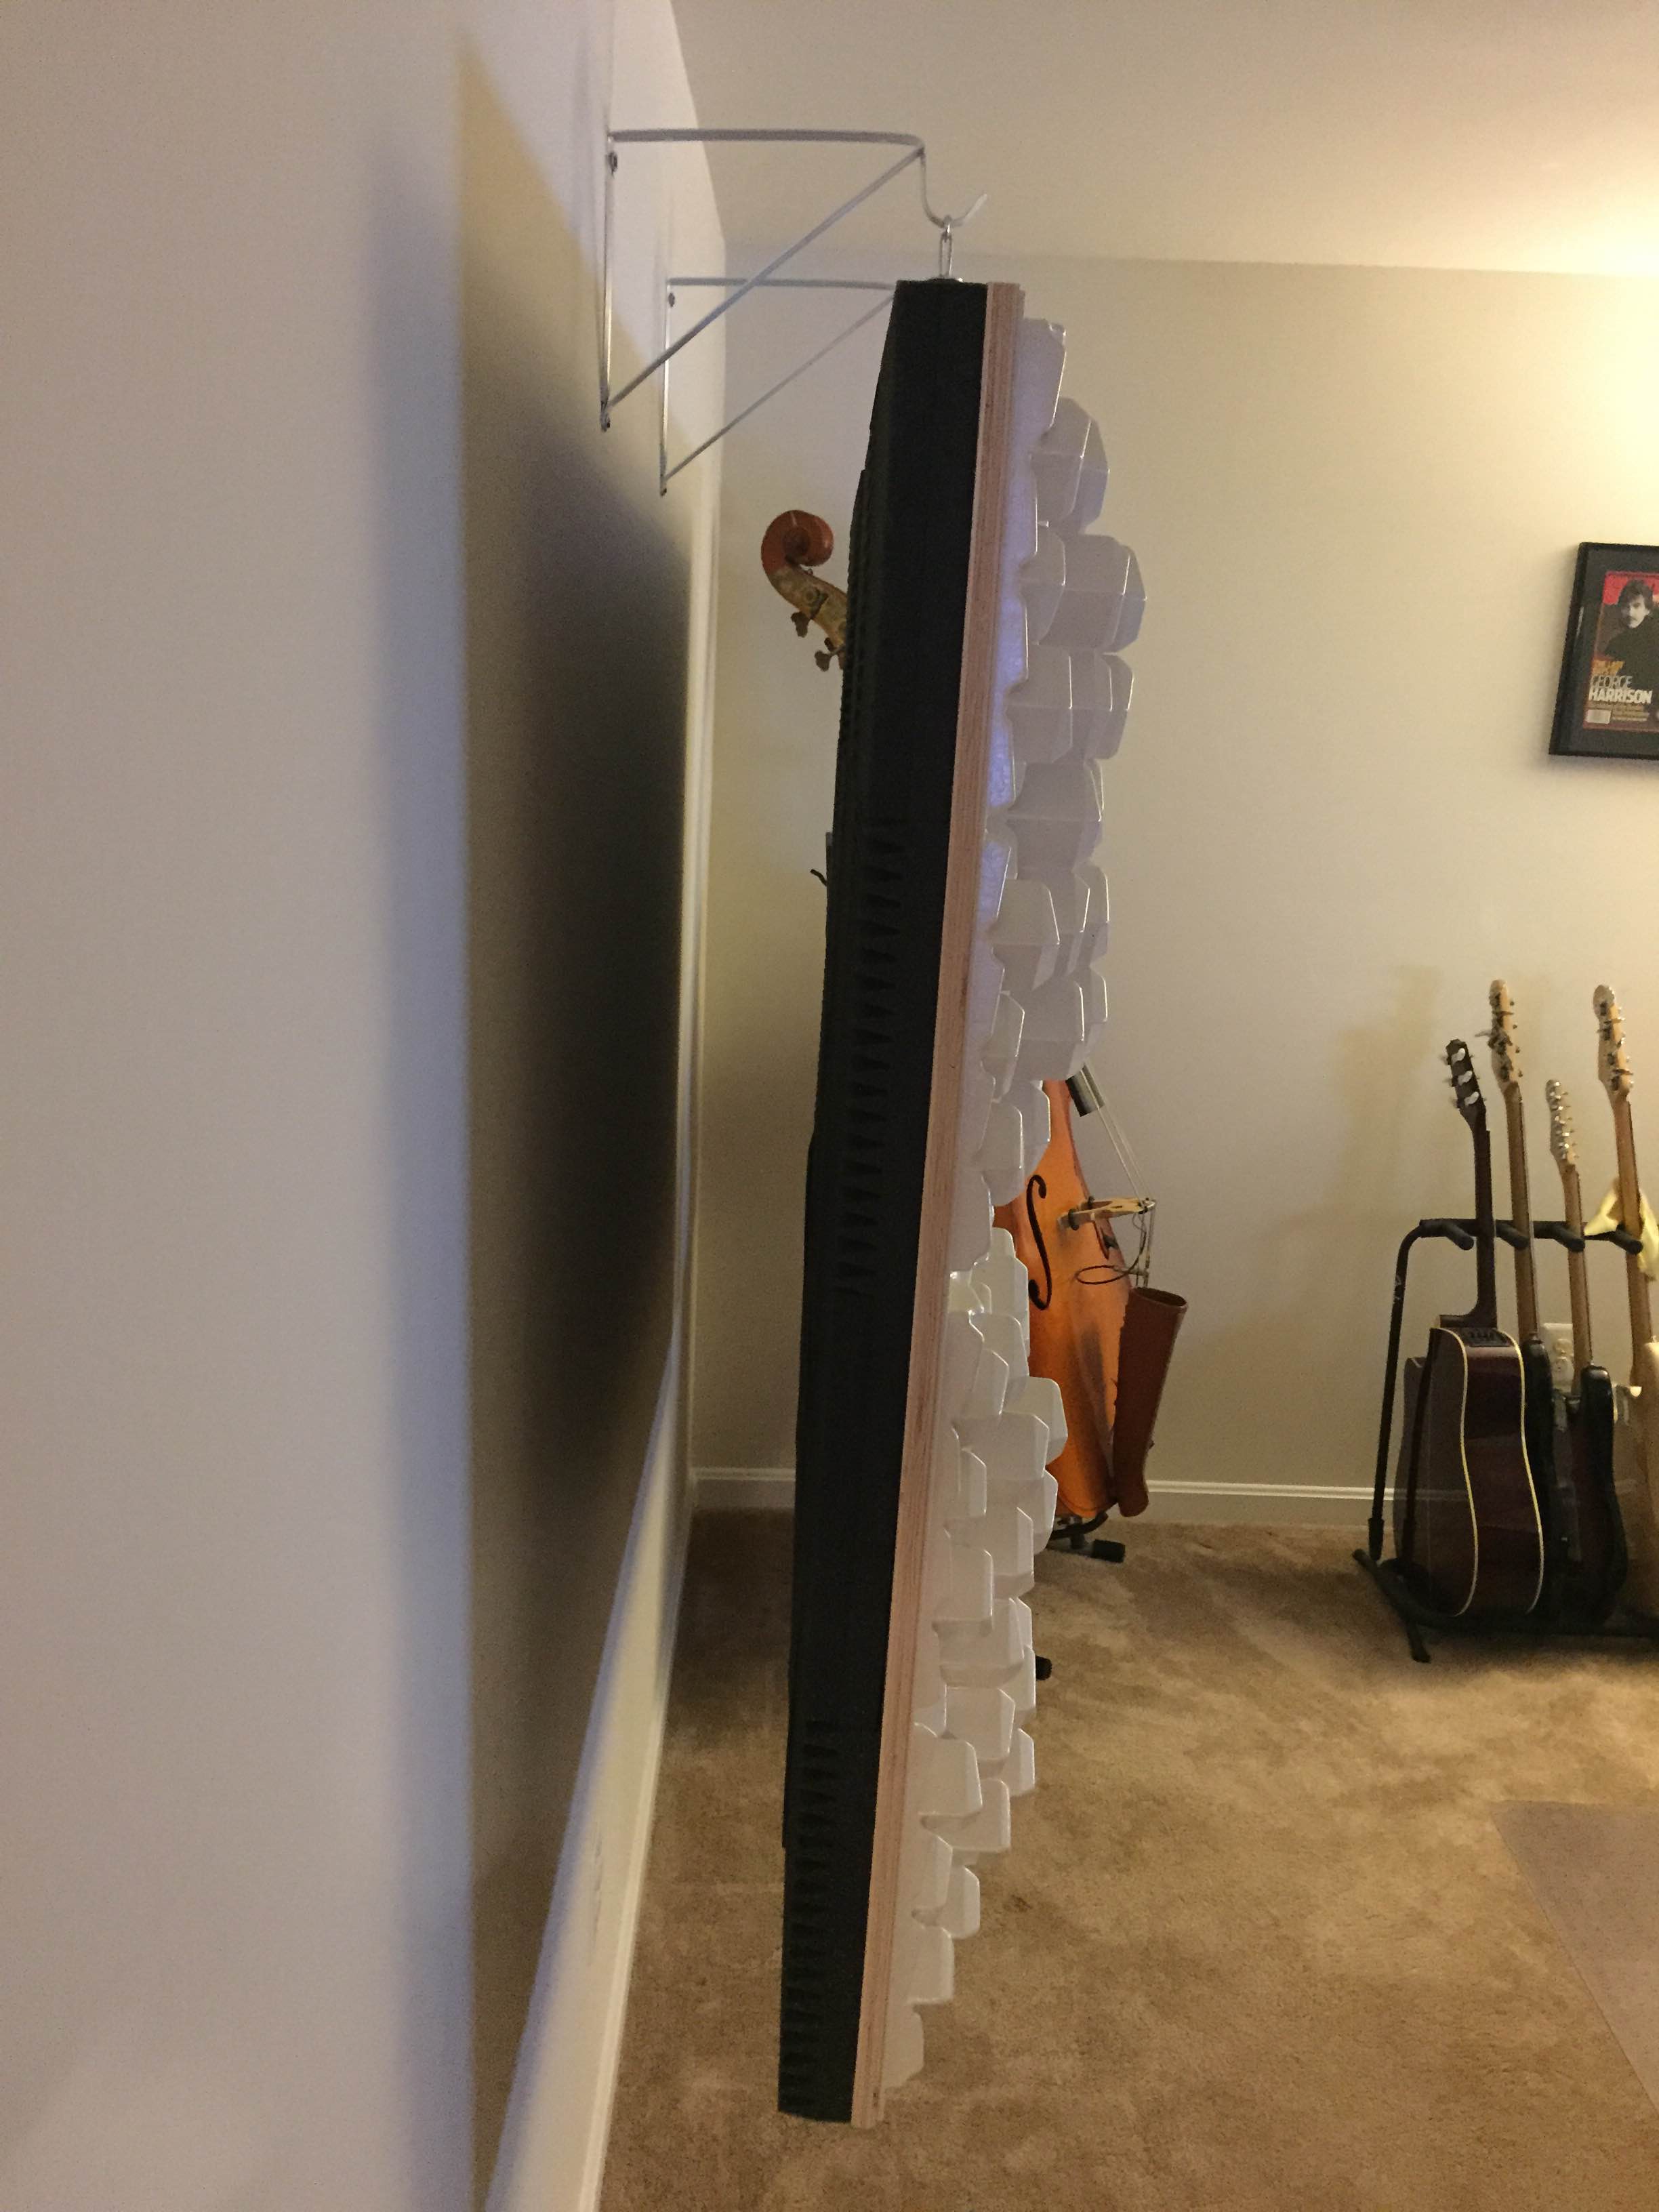
 This month we thought we’d share a few Real-Life pictures of an idea we first introduced back in summer of 2013: The “Back Wall Diffuser Array/Bass Trap”.

Isolation Hanger
This is the DIY project which incorporates our Art Diffusors®, Cutting Wedge® foam and a couple of isolation hangers into one large free-floating unit, which is acoustically decoupled from the wall.
This particular array was put together by a music producer/bass player for his home. As you can tell from the pics, the construction of this unit was executed beautifully and it’s very close to the original concept drawings.
It’s never too late to get started on your own DIY project.
 Real World – DIY |

Visit the Original DIY page to find out how to make your own.
DIY Wood Diffusion Panel – ArtDiffusor® Trim
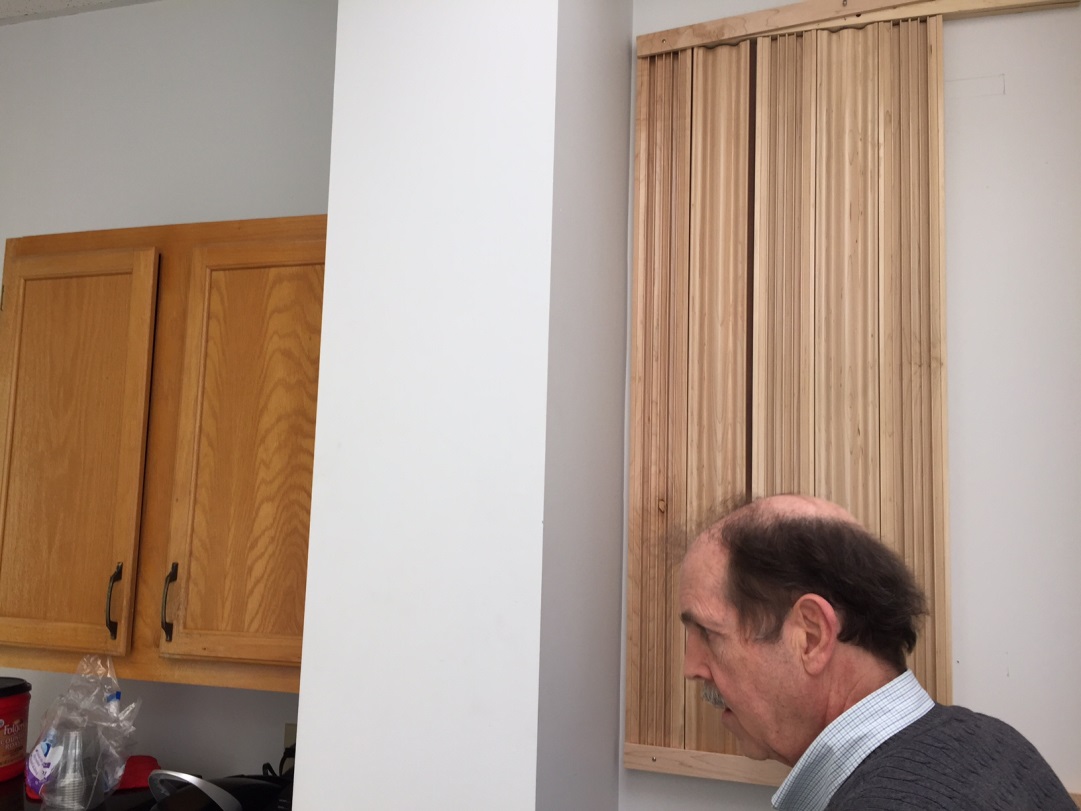
Posted by Acoustics First in Diffusion, DIY, HOW TO, Products on April 13, 2016

DIY Wood Diffuser Panel – Using ArtDiffusor Trim
Here at Acoustics First®, we are often asked about wood acoustic treatment for spaces ranging from recording studios and auditoriums to churches and home theaters. Although the acoustic properties of wood are comparable to other reflective materials like gypsum and thermoplastic, wood’s superior aesthetic makes it a desirable treatment (wood is often perceived to “sound better” simply because of its visual properties).

Two different profiles that work together!
Our newest wood acoustic treatment, ArtDiffusor® Trim, is a versatile, high frequency quadratic diffuser that can help improve the clarity of speech and music. Both Profiles (Type A & B) offer diffusion in similar ranges and allow for customizable installations. The different profiles can be used individually or together to modify the aesthetics of a room, while achieving the desired acoustic performance. In fact, in recent tests of ArtDiffusor® Trim, alternating the A and B profiles resulted in the best diffusion. Some examples of different installations include:
- Back wall Diffusion for a theater, listening or mixing studio.
- Slatted Ceiling Absorber.
- Installation over or behind stretch wall
- Chair rail, door and window molding.
ArtDiffusor® Trim can come in lengths up to 8’ and is available in Maple (other woods can be quoted). Later in this article we’ll walk you through how to build your very own diffusion panel using 4’ lengths of ArtDiffusor® Trim.
Diffusion at a Glance
Where typical fiberglass and foam panels absorb sound by transferring sonic energy into kinetic and thermal energy, diffusers act to scatter the energy, creating ambiance and a sense of open space. The function of sound diffusers is not to remove energy from your room, but to redistribute it, accurately reinforcing the sound source by controlling standing waves and flutter echoes, while retaining the room’s “liveliness”.
As is the case with any sound absorbing panels and diffusers, the treatment needs to cover enough critical surface area to make a noticeable impact. Simply installing a single piece of ArtDiffusor® Trim will not significantly improve the acoustics of a room. One way to ensure enough improvement is by using ArtDiffusor® Trim to build a series of diffusion panels and installing them as you would sound absorbing panels.
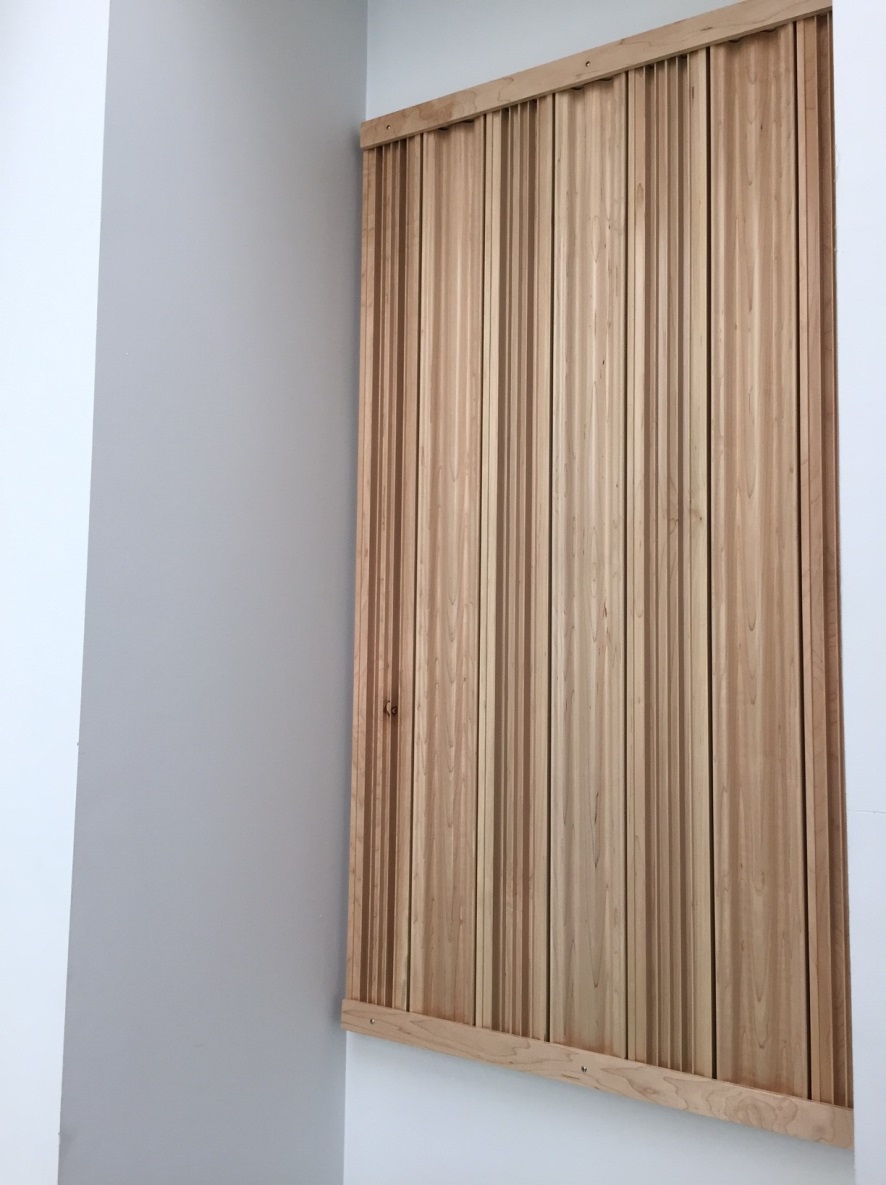
Building a Diffusion Panel – A step by step guide
- Plan out your Panel: Find out how many ArtDiffusor® Trim boards you want in your panel assembly. Our diffusion panel was to occupy an alcove that was 29” wide and each board has a width of just about 4”, so we opted for 7, 4’ boards. Remember, alternate type A and B profiles for optimal diffusion.

Plan your Layout.
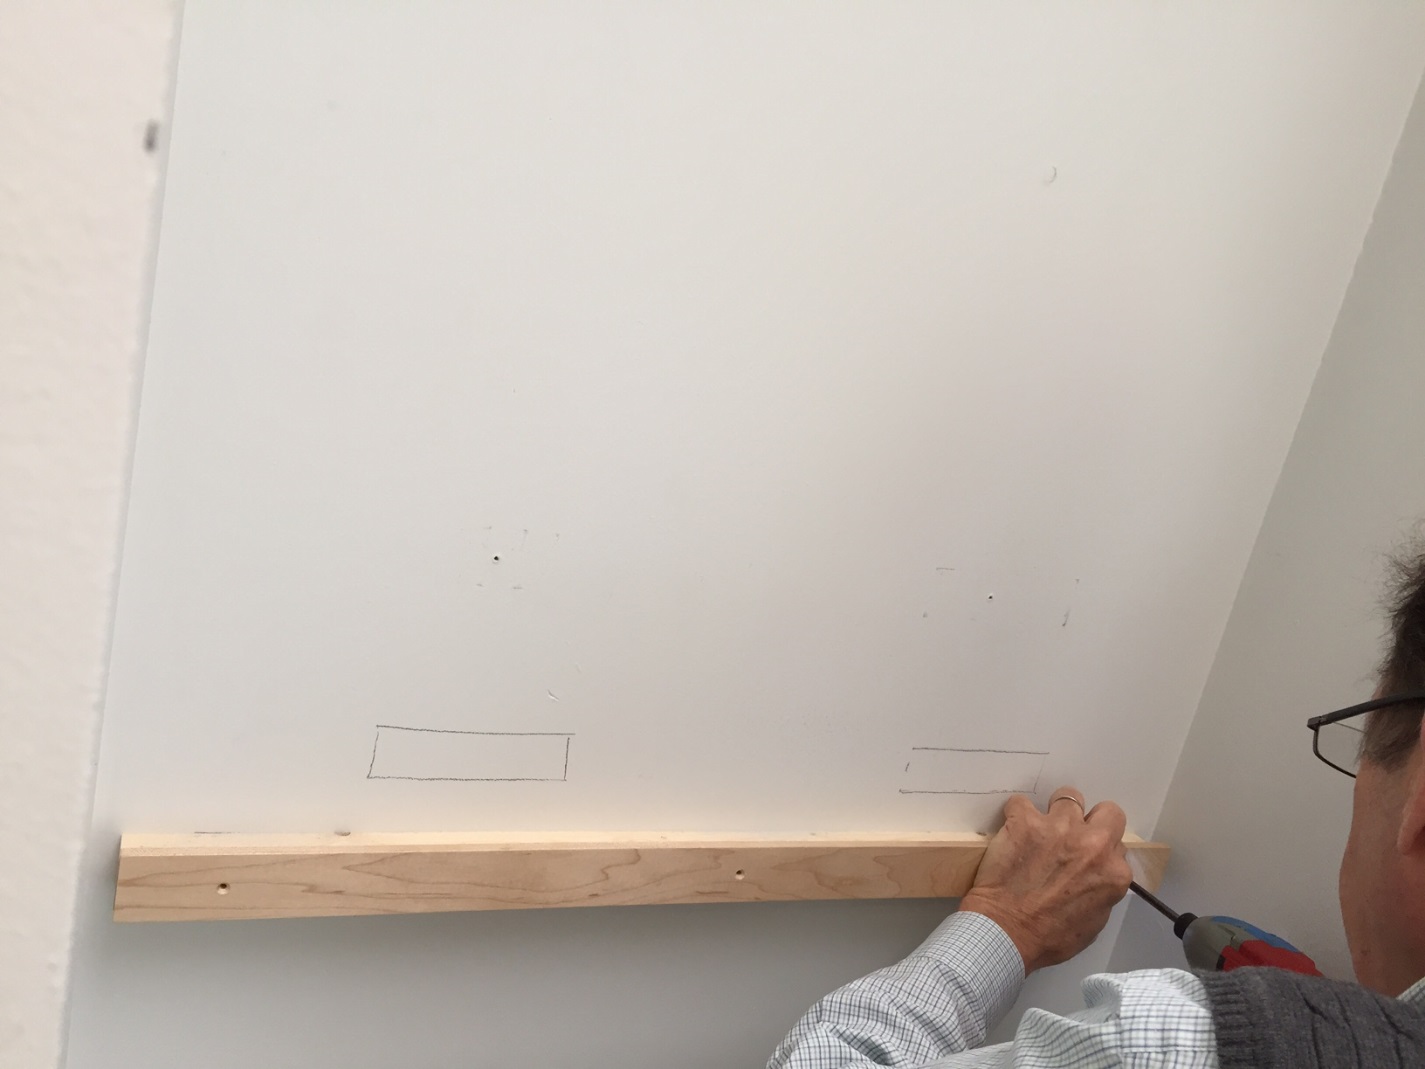
- Install the lower support board: This is what the ArtDiffusor® Trim boards will “stand” on. It is best to install acoustic treatment above chair rail height (3’-4’), to ensure that it’s effective around ear height. Measure and use a level to mark where the support board will go, install drywall anchors for a sure hold into the drywall, then drill and screw the support board into place. Be sure to countersink the holes so the facing strip has a flat surface to rest against.

Install the Lower Support.

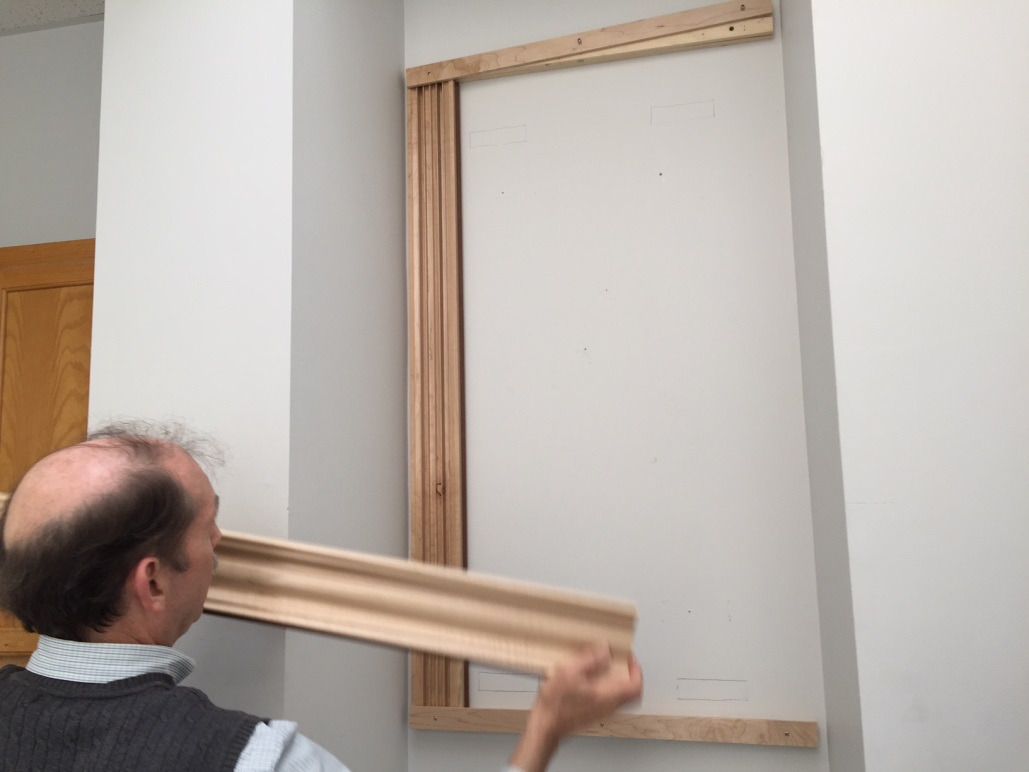
Install the upper support board: This time using the ArtDiffusor ® Trim boards as a guide, measure, level and mark the location of the upper support board. Again, using drywall anchors, mount the upper support board (don’t forget to countersink!).The picture shows both support boards installed.
———————————————————————————————–>>>- Attach lower facing strip: Use facing strip that is approximately a ½” wider than the support board. Line up the facing strip next to the support board and mark your screw locations ensuring that they won’t run into the support board screws. Drill the holes and counter sink, lining up the boards so the ½” overlaps on the top, and screw into place.

Lower facing strip installed.
- Partially attach upper facing strip: Same as the lower facing strip, but mount so the ½” overlap is on the bottom, and only screw one side in so it’s easier to slide in the ArtDiffusor ® Trim boards later.

Partially attach top facing strip.
- Slide in Art Trim: Slide in the ArtDiffusor® Trim behind the facing strip and use biscuits to fit the boards together. We decided to position the boards with an approximately 1/8” spacing.

Slide in ArtDiffusor® Trim panels.
- Finish attaching upper facing strip & admire your new DIY Diffusion Panel!

Final DIY Diffusing Wall Panel with ArtDiffusor® Trim!


You must be logged in to post a comment.